Tag: protein rich

Paleo Carrot Cake & Throwdown {$50 gift card giveaway}

carrot cake slice feature1

{giveaway has ended}

Spring has officially sprung, the signs are everywhere.  Birds are busy building their nests.  The intoxicating smell of blooming flowers is in the air.  All of this means that Easter is on it’s way!  Not only do I love this holiday for spiritual reasons, but for the candy, cakes, and sugar.

My name is Rebekah and I am/was a sugar-a-holic.  Even though I have cleaned up my diet tremendously, this is the area I still struggle.  If there is a Reese’s Peanut Butter Egg within 5 feet of me, I will seek and destroy.  It’s embarrassing to be caught shoving said egg in your mouth by your 5 year old.  The yellow wrapper and chocolate lining my lips didn’t help.  Sorry C-Bear, I owe you.

My addiction to sugar is so bad that I gave it up for Lent this year.  What is Lent?  Christians & Catholics use this time of year to give up anything that may take their focus away from God.  It symbolizes the sacrifice that Jesus made for us.  So for 40 days we try to simulate a sacrifice.  For me that means 40 days without processed sugar.

The Lent period starts Ash Wednesday and ends on Easter Sunday.  There have been serious temptations sent my way, but I have stood firm against the sugar demons.  Don’t worry, those peanut butter eggs don’t stand a chance on Easter.  Hide your eggs, hide your chocolate, I’ll be on a mission to give my self a horrible stomach ache.  Then I won’t want to touch it for at least a day, maybe day and a half.

carrot cake whole 1

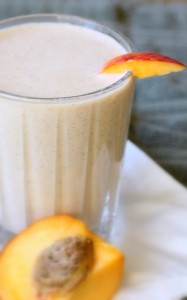
Another favorite spring time treat of mine is carrot cake.  I can’t resist the buttery, sweet, carrot filled, cream cheese topped cake.  In moderation it wouldn’t be so bad, but I don’t know anyone who is satisfied with a small sliver of the carrot-filled goodness.  I want a satiating piece.

Wanting a satiating piece of carrot cake was one of the reasons I started conjuring  up a healthy version. Giving up processed sugar was the biggest reason.  This was truly a passion project.  It took many tries to get it right, but I am truly proud of the finished project.  You will not find any ounce of processed sugar or grains in this paleoan beauty.  All you gluten-free lovers can eat this proudly.  Vegetarians, you can enjoy this freely.   Clean eats all the way.

The sweetness in the cake comes from a mixture of dates, pineapple, and carrots.  I used Bob’s Red Mill Hazelnut Flour and Coconut Flour for the base.  Then added in Bob’s Arrowroot starch to stabilize the cake. To frost this luscious grain-free goodie, I blended together coconut oil and pure maple syrup.  I know it sounds strange, but it is out of this world good.

It’s hard to tell that this is a healthy version of the naughty nosh.  This cake would be the perfect end to your Easter dinner.  Or any dinner you choose to serve this season.

If you are looking for the best decadent, playful versions of carrot cake, check out my friends Jillian, Barbara, and Angela’s recipes.

After you check them out, enter to win a $50 gift card to the store of your choice!  You can enter multiple times by following each of our social media outlets.  Click the link below to enter!

carrot_cake_cheesecake_cake
Jillian’s Bakery Style Carrot Cake Cheesecake Cake from Food Folks & Fun
carrot-cake-brownie-bars-feature
Barbara’s Carrot Cake Brownie Bars from Barbara Cooks
ang carrot cake
Angela’s Rainbow Carrot Cupcakes from Aloha: Yinz Mangia
carrot cake slice feature1
Paleo Carrot Cake from Decadently Fit

Enter giveaway by clicking rafflecopter link below!

a Rafflecopter giveaway

_______________________________________________________________________

Paleo Carrot Cake

Serves 16

Cake

12 dates, chopped

1 1/2 cups boiling water

1 teaspoon baking soda

1/2 cup chopped pineapple, packed

3 cups carrot, finely shredded

6 tablespoons Melt Buttery Spread (or other vegan butter), melted

4 eggs, room temperature

3/4 cup Bob’s Red Mill Hazelnut flour

1/2 cup Bob’s Red Mill Coconut flour

1/4 cup Bob’s Red Mill Arrowroot starch

4 teaspoons cinnamon

1 teaspoon nutmeg

1/2 teaspoon fine sea salt

1 teaspoon baking powder

1 t. baking soda

2 teaspoons vanilla

Frosting

6 tablespoons pure maple syrup

1/2 cup room temperature coconut oil (do not melt)

Cake

Pre-heat oven to 350 degrees.

Prepare a 9 inch spring form pan by greasing the sides and bottom with Melt, and cutting a parchment paper circle to fit the bottom of the pan.

Combine the dates, boiling water and teaspoon of baking soda.  Set timer for 10 minutes.

After time is up, use a fine strainer to remove dates from mixture.  Pulse dates 1 minute in food processor.  If the mixture is too thick to pulse, use 1 tablespoon of orange juice at at time to make it easier.  Do not liquify the mixture, it should still be somewhat chunky.

In another bowl, combine the flours, cinnamon, nutmeg, salt, baking powder and baking soda together.

In a large mixing bowling, whisk eggs till frothy.  Whisk in the Melt slowly.   With a wooden spoon mix in the dates, then the pineapple, carrots and vanilla.

Combine the wet mixture with the flour mixture till everything is incorporated well.

Pour batter into spring form pan and cover with foil.

Bake for 30 minutes, then remove foil cover and bake for another 30 – 40 minutes, or until cake is done.  It will be done when middle of cake springs back to gentle touch.

Frosting

With an immersion blender or high power blender combine the two ingredients till smooth.  Frost the cooled cake and enjoy.

Cake can be store at room temperature up to 3 days.


Servings: 16• Size: 1/16 Calories: 248• Fat: 15.5g • Carb: 25g • Fiber: 3.4g • Protein: 3.4g • Sugar:  18g Sodium: 222mg • Cholesterol: 53mg


7 Minute Hummus

hummus 5Being partially of middle eastern decent you would think I grew up on hummus.  Unfortunately, I did not meet hummus till I was 22 years old.  I will spend the rest of my life making up for its 22 year absence.

I’m going to assume that it was never present in my home due to the regional differences in my heritage.  Or it may have been considered hippy food.  My parents were and are far from being hippies.  How I ended up with a hippy soul I am not sure.

Anyhoo.

Fortunately, not only has it become a mainstream staple, but it is even easier to make.  Ingredients like tahini paste are no longer only sold at health food stores.  Olive oil, is present in most homes, and lemon trees seem to be gracing more properties than ever.

This healthy comfort food is also chocked full of health benefits.  Fiber, protein, and healthy fats make it a great way to snack.  I love dipping assorted vegetables in the creamy goodness.

Did you know chickpeas can help maintain your blood sugar?  They can also help prevent cholesterol from sticking to the walls of your blood vessels.

hummus 4

Apart from all of the omega 3’s and myriad of good for you reasons, hummus is super easy and fast to make.  Seven minutes may be an exaggeration in time it takes to make it.

For all of my lent practicing friends, hummus is a great alternative to meat on Fridays.  I suggest slathering some hummus inside a whole wheat pita, then stuffing it with roasted mushrooms, bell peppers, and zucchini.

Now that I am drooling, here is the recipe.

_______________________________________________________________________________

7 Minute Hummus

Serves 5

1 – 15 ounce can chickpeas (garbanzo beans)

1/4 cup fresh lemon juice

4 tablespoons tahini

1 garlic clove

2 tablespoons olive oil

1 teaspoon sea salt

2 tablespoons water

paprika, to sprinkle on top

Method

Rinse the chickpeas in a mesh strainer with cold water.  Set aside to drain.  Then pat dry.

Put all the ingredients in a food processor, minus the water and paprika.  Process till combined.

Scrape down the sides with a rubber spatula then add the water. Process again till smooth.

Serve in a bowl and sprinkle with paprika.  Traditionally olive oil is drizzled over the hummus to serve.  I do not because I do not want the added calories.

Can be refrigerated up to a week in an air tight container.

Servings: 5• Size: 1/4 Calories: 165• Fat: 9.3g • Carb: 15.4g • Fiber: 4.6g • Protein: 5.1g • Sugar:  1g Sodium: 600mg • Cholesterol: 0mg

Turkey & Pork Chili (crockpot)

turkey chili2Well it finally happened, winter has graced us Californians with her presence.   I was enjoying our overly extended fall/summer.  But, it was truly time for our state to be blanketed with precipitation and a temperature drop.

We are always in a state of drought, but this year has reached an all time high.  The perfect weather party needed to end.  The rest of the country can stop cursing at us now.  Or maybe not.  This is what our weather forecast looks like through the next week.

weather

For the next couple days, I’ll enjoy our ‘cold’ spell and enjoy the unforcasted sprinkles of rain.  I am thankful for the brief cleansing effect the rain has on our smoggy skies and the opportunity to organize my house.

What does organization have to do with the weather?  You don’t really think Californians go out in this do you?  We will hibernate our wussy weather selves at home till Storm Warning 2014 passes.

Until then I will organize everything I can.  For inspiration I will head to my friend Kristy’s amazing organizational blog, Giftie Etcetera.  Her tips and tricks will give my tornado of organization exactly the umph that it needs.

I always look forward to this short window of winter.  I love making comforting soups and warming chili.  Actually, I love making chili all year long.  It just tastes better when it the temp goes below 60 degrees.

Chili is food that has many different personalities.   Like snow flakes not one is the same.  Some people like chili with beans, some like it only ‘con carne’.  Some add ingredients that should never be in chili, like pumpkin.

I personally prefer mine con carne or with a very small amount of black beans.  Though I forgot to put in the 1/2 cup of black beans I normally add before I took the picture above.  Oops.  Pretend they are there.

Now that I have cleared that up, let’s move onto an enticing description of the dish.  This chili is simple, so simple that you brown the meat, stir in all the ingredients in the crock pot and 6 hours later you can eat.

turkey chili5

The main ingredients are lean proteins; ground turkey, and ground pork.  The blended flavor of the meat, onion, garlic and spices, combine to create a perfect balance of healthy comfort.

There is even a secret ingredient.  Readers from the mid-west won’t be surprised to see that there is dark chocolate in this crimson meat melody.  The chocolate melts into the dish intensifying the flavor of the chili.  The small amount of sugar in the chocolate helps to reduce the acid in the tomatoes.  You won’t be able to tell it’s there, but I insist on you adding it.  It adds a layer of yum you will regret leaving out.

If being efficient while cooking is an area you need help on, you need to head over to Giftie Etcetera for step by step instructions on how to maintain organization in the kitchen.

The chili is perfect ladled into a bowl, or over an egg white omelet.  The options are endless.  Whether you make this chili to eat in -14 weather or in 72 degree and sunny, make lots.  It freezes well.  Enjoy!

I would like to welcome visitors from Giftie Etcetera.  If you like what you see please subscribe so you can receive new recipes as I post them.  Thanks for stopping by!

_________________________________________________________

Turkey & Pork Chili

Serves 8

1 lb. lean ground turkey

1 lb. lean ground pork

1 T. olive oil

1 medium brown onion, diced

1 green bell pepper, diced

2 garlic cloves, minced

1 teaspoon sea salt

1/2 teaspoon black pepper

4 tablespoon chili powder

1 teaspoon dried oregano

1/2 teaspoon cayenne

1/2 teaspoon cumin powder

1 28 oz. can diced tomatoes (I love Muir Glen)

2 tablespoons tomato paste

2 cups water

1 oz. dark chocolate, chopped (70% works well)

1 cup black beans, rinsed

Crock Pot Instructions

Heat olive oil in a large dutch oven.  Brown the meat, then add the onions, garlic, salt and black pepper.  Transfer the meat to a large crock pot.  Stir in the remainder of the ingredients, except chocolate.

Cook on low for 5 – 6 hours.  During the last 30 minutes, stir in chocolate and beans until melted.

Stove Top Instructions

In a large dutch oven heat the olive oil.  Brown the meat, then stir in the onions, garlic, salt and pepper.  Cook till onions are soft and translucent, stirring occasionally.

Add in the water and scrape any bits off the bottom of the pan.  Add in the rest of the ingredients, except beans, stir to combine.

Bring to a boil, then lower to a simmer.  Simmer on low with lid on for 30 minutes.  Stir occasionally to prevent burning.

Add in beans, stir and simmer for another 10 minutes.  Remove from heat.

Serve with your favorite toppings.  ex:  diced onions, reduced fat cheese, or greek yogurt.

Servings: 8• Size: 1 cup Calories: 226• Fat: 5.6g • Carb: 19g • Fiber: 4.2g • Protein: 28.8g • Sugar:  7.8g Sodium: 464mg • Cholesterol: 37mg

Strawberry Hot Wings (baked)

strawberry hot wingsIn four days Americans will gather to watch the Seahawks and Broncos battle for the coveted Lombardi Trophy and declare themselves World Champions.

For us non-NFL lovers, thankfully Superbowl parties are not just about watching the game.  It’s an excuse to hang out with friends and of course eat.  Next to Thanksgiving, Super Bowl Sunday is the second highest eating day.  On average, 1,200 calories and 50 grams of fat are consumed by fans of pig skin chasing.

Domino’s Pizza has reported they deliver 11 million pizzas on game day.

11 million pounds of chips are consumed, 4 million pounds of pretzels, and 51.7 million cases of beer will be purchased for the day.

Among the more popular, traditional foods are hot wings.  More than 1.23 billion wings and drumettes will devoured by cheering fans this Sunday.  A successful Superbowl party must have these among the smorgasbord.

As much as I love a spicy, sauced covered wing, I cringe at the nutritional facts.  In only five Hooter’s wings, there is 866 calories, 63g of fat, and 25g of carbs.  Lord help us.  You would have to run 95 minutes, maintaining a 10 minute mile pace the entire time to burn those calories.  Not even in moderation would these be beneficial to your waist line.

In my super skinny version of the North American favorite, there is only 172 calories, 7.8g of fat, and 6.1g of carbs for the same serving.  A huge savings in your calorie bank.

How did I reduce the calories that dramatically?  I removed the fatty skin and I baked them.  There is zero butter in the sauce.  Instead I replaced it with Melt rich and creamy spread.  Melt contains only good fats, like virgin coconut oil, and ghee.

This spicy, sweet, hip friendly version of wings would be a great addition to any Superbowl party.  Even if your team loses at least you will have won bragging rights to the best tasting, healthiest dish of the day.  You also won’t have remorse for what you ate.

What ever team you are rooting for I hope you have a fun, safe, calorie friendly day!  Go Trojans!

_________________________________

Strawberry Hot Wings

Serves 6 – 3 wings each

30 chicken wings/drumettes, skin removed (half of each)

salt, pepper & chili powder to season

2 garlic cloves, minced

2 flats of strawberries, you need 1 1/2 cups of pureed strawberries

1/2 teaspoon white pepper

1/2 teaspoon worcestershire sauce

4 tablespoons Melt buttery spread

1/2 teaspoon garlic powder

1/4 teaspoon onion powder

1/2 teaspoon mustard

1/2 teaspoon apple cider vinegar

1 tablespoon honey

1/2 tablespoon tabasco (more or less to your desired heat level)

Organic Canola oil in a Misto sprayer (preferred) or store bought non-stick version

green onions, diced (optional for garnish)

Preheat oven to 425 degrees.

Rinse and dry the chicken completely.  Sprinkle each side of the wing with a small amount of salt, pepper and chili powder.  Set chicken on a wire rack that is resting on a cookie sheet, lined with parchment paper.  Spray each piece of chicken lightly on both sides with canola.  Bake for 35 – 45 minutes or until the chicken is cooked through and crispy.

When chicken is done remove from oven and baste both sides with sauce.  Return back to oven for 1 minute.  Remove from oven and baste one more time.  Serve hot.  Garnish with green onions.

Sauce

Melt the buttery spread in a medium sauce pan over medium low heat.  Add in the strawberry puree, garlic powder, garlic, pepper, worcestershire, onion powder, honey, tabasco, mustard, and vinegar.  Bring to a simmer.  Reduce by half.  Remove from heat.

Servings: 6• Size: 5 pieces Calories: 172• Fat: 7.8g • Carb: 6.1g • Fiber: 1g • Protein: 21.3g • Sugar:  4.9g Sodium: 239mg • Cholesterol: 0mg

The Best Cauliflower Pizza

cauliflower pizza 5I am sure if you have a Pinterest account you have at least heard of the cauliflower pizza.  You may have even attempted to make one.  The consensus seems to be that most fall apart, and are just o.k.

Just o.k. doesn’t cut it on Decadently Fit.  Just o.k. won’t have you telling your friends about it.  Just o.k. keeps healthy food in the “I’ll eat it, but I don’t really like it”, realm.  So not o.k.

After researching the good, bad, and hideous recipes, I came up with this bad boy.

I figured out that one of the most important factors in making the crust is removing as much liquid as you can.  When you think you have removed it all, use your brute strength and remove more.  Leftover moisture will be the down fall of an otherwise successful *fake-out meal.

*fake-out meal – a mother/father’s attempt at making their family think what they are eating is not a healthy, sub par version of their favorite food.

One more tip, make the cauliflower ‘dough’ as smooth as possible when processing.  I left mine the consistency of cauliflower rice, and my 7-year-old gourmand asked if there was rice in the crust.  Albeit, he devoured his piece in record time.

cauliflower pizza

Have fun with this recipe.  As you can tell by the horrible picture taken on my iPhone (above), I made one half for the adults and one half for the kids.  You can add any combination of toppings that fit the tastes of your home.

I would love to see your combinations.  Feel free to post a picture of your version on our Facebook wall.

______________________________________________

Cauliflower Pizza

Serves 4

Ingredients

1 head of cauliflower, stem removed

1 garlic clove minced

1 teaspoon dried basil

1/2 teaspoon dried oregano

1/2 teaspoon salt

1/4 teaspoon white pepper

4 oz. goat cheese

1/4 cup grated parmesan

1 egg, beaten

1 teaspoon baking powder

1 jar organic pizza sauce

12 oz. bag Trader Joe’s Lite Mozzarella (I used maybe 2/3 of the bag for the entire pizza)

In two batches pulse the cauliflower pieces till as smooth as possible, adding a little bit of water if needed.

In a microwave safe dish combine the cauliflower puree, garlic, basil, oregano and salt.  Microwave for 5 minutes on high.  Let sit with the lid on for 20 minutes.  Remove the lid and let cool.

When cool enough to touch place mixture in a kitchen towel and ring out as much liquid as possible.

Pre-heat oven to 450 degrees.

Combine cauliflower mixture with remainder of ingredients.  Form into a ball.

Coat a large pizza stone with a thin layer of coconut oil or ghee.  Place the cauliflower ball in the middle of pizza stone.  Work the dough out to the edges forming a circle, making sure the dough is not too thin.  Thicker is better.

Bake the dough without toppings for 10 -15 minutes, or until the edges start turning golden brown.  This is a very important step.  Do not under-bake.

Remove from oven.  Add your favorite pizza sauce, and toppings of your choice.  Cover in Trader Joe’s Lite Shredded Mozzarella Cheese.  Bake another **5 – 10 minutes.  Remove when the cheese is golden and bubbly.

**(all ovens bake at different times, please watch your pizza to keep from burning)

Nutrition facts only reflect the dough

Servings: 4• Size: 1/4 of pizza Calories: 176• Fat: 9.3g • Carb: 13g • Fiber: 5.3g • Protein: 13.2g • Sugar:  5.3g Sodium: 591mg • Cholesterol: 73mg

Gluten-free Chicken & Waffles w/ Mustard Maple Syrup

chickenwaffles 4 frameIt’s that time of year again.  The time where everyone will start pinning healthy recipes to their Pinterest boards.  Gym memberships will be bought.  New Year’s resolutions will be made in the hopes that 2014 will be the year they hold their weight. No pun intended.

Most likely you are reading this blog because you came upon it on Pinterest, Facebook, Instagram, Google, or Twitter.  You may have pinned this as part of your master plan to keep that weight loss/health resolution.  Let me tell you, you scored on this find.  Especially if you are a foodie who struggles with typical bland diet/health food.

This recipe is what I would like to call the light amongst the dark.  We are spoiled with the ability to access great recipes with a simple Google or Pinterest search.  Unfortunately, a lot of the so-called replacement recipes make me want to go eat card board instead.

waffle batterThis Paleo/gluten-free waffle is an adaptation of the Amazing Paleo version.  I was a little nervous when I initially saw the list of ingredients.  The ratio of eggs to coconut flour scared me.  It sounded like it would be the consistency of a crepe, not waffle.  Due to the addition of baking soda twafflehe eggy batter transforms into a fluffy, savory waffle.

If you stop at the waffle you will most definitely be satisfied.  But, in the words of Emeril Lagasse, I think you should “crank it up another notch”.

chicken split 2The chicken is really easy to make.  Start off by splitting each lean chicken breast with a knife.

Next each of the slimmed down breasts marinate in tenderizing

buttermilk for 30 minutes.

crackers 3While they marinate, the gluten-free cracker crust is pulverized into a fine powder. and the eggs are whisked into a sunny yellow binding liquid.

After marination is complete, each breast is dunked into the egg mixture and then covered with the cracker coating.

After each breast has been coated, they are baked for 40 minutes at 400 degrees.  chicken cooked

I topped 2 -3 waffles with a piece of chicken, and dressed them with a cloud of spicy arugula that was tossed in a mustard maple syrup.  Then of course I had to drizzle a little more of the syrup on top of the crunchy goodness.

prelim waffle

If you did stumble upon this post on via the many different vehicles the internet provides, I hope you subscribe.  I would love to help you keep your resolution.

  Whatever your resolution(s) are for 2014, if they involve your health or not, aspire to keep them.  Remember, you made them for a reason.

Happy New Year!

Recipe

Chicken

3 boneless chicken breasts, halved lengthwise (see picture above)

1 cup low-fat buttermilk

1 box Van’s gluten-free Multi-grain crackers

2 eggs, whisked till slightly frothy (small bubbles)

1/2 teaspoon garlic powder

salt & white pepper to season

paprika

Waffles

4 eggs, whisked

2 tablespoons coconut flour (or brown rice flour)

2 tablespoons coconut oil, melted and cooled

3 tablespoons full fat canned coconut milk

½ teaspoon garlic powder

½ teaspoon onion powder

¼ teaspoon paprika

1 tablespoon fresh chives, minced

¼ teaspoon sea salt

¼ teaspoon freshly ground black pepper

¼ teaspoon baking soda

Syrup

2 tablespoons prepared mustard

2 tablespoons maple syrup

1 tablespoon apple cider vinegar

1/4 teaspoon white pepper

2 cups arugula

Pre-heat oven to 400 degrees.

Marinate the chicken breasts with the buttermilk in an air tight Ziploc bag for 30 minutes.

While chicken marinates, combine all ingredients for the waffles and let rest.

Whisk together all the ingredients for the syrup and refrigerate.

In shallow bowl whisk together the eggs, season with salt and pepper.

In a food processor pulse entire box of crackers until a powder forms.  Transfer powder to another shallow bowl. Mix in the garlic powder, then season with salt and pepper.

Remove the chicken from the Ziploc one piece at a time.  Coat all sides with egg mixture, then the cracker mixture.  Set each piece on a cookie sheet covered with foil.  Each chicken piece will sit on a cooling rack coated with olive oil or coconut oil cooking spray.  Repeat the process till all 6 pieces are coated.  Sprinkle each piece of chicken with paprika.  Bake for 40 minutes.

When there is 10 minutes left in the chicken’s cooking time, start cooking the waffles in waffle iron.  Use the highest setting possible.  Cook till iron indicates they are done.  Check waffle, leave in till waffle is the color you prefer.  I like mine to have a nice light brown crust.

Toss the arugula with 1 tablespoon of the syrup.

Assemble each plate with 2 – 3 waffles, 1 piece of chicken and a handful of arugula.  Drizzle each plate of goodness with more syrup.  Serve immediately.

Servings: 6• Size Calories: 356 • Fat: 16.1g • Carb: 26g • Fiber: 3g• Protein: 23.3g • Sugar: 9g Sodium: 345mg • Cholesterol: 224mg

(A regular plate of chicken and waffles has 941 calories and 30g of fat!)

Enchilada Casserole (gluten free)

enchilada casserole no wordsThis past week I started a gluten-free experiment. All of the pasta, bread, tortillas and cereal I consumed lacked gluten.  Not because I have Celiac Disease or an intolerance, but because I know I have a lot of readers that do.  I wanted to know how hard it was to eat gluten-free.  I wanted to know if it took more time to prepare meals.

Part of me felt bad for the gluten-free community.  Being excluded from eating any type of food is sad to me.  I get to enjoy most foods without side effects (except milk).  To be told no more pasta or bread would be pure torture for me.  Or so I thought.

Honestly after doing my little experiment I no longer feel sorry for them.  I actually feel sorry for anyone who hasn’t tried the gluten-free products.  I made a brown rice pasta rigatoni with pesto, and my entire family devoured it.  CT (my little guy), even asked to take it to school for lunch.  The cutie next to him went home and told her mom she wanted that for lunch too.  Needless to say it was a huge hit.  No one missed the gluten.

The brown rice pasta has a smooth texture that rivals it’s gluten filled counter part.  The taste is slightly nutty, and pairs great with any sauce.

Even though brown rice contains a modest amount of protein, the high quality lysine does it’s job perfectly.  The protein repairs and build muscles.

The fiber in brown rice is hard to digest, so all of the bad stuff is dragged out of the body with it.  Think of fiber as as the nightclub bouncer, toxins as the unruly club goers.  When the bouncer realizes the toxins are doing harm to your body, they grab hold and don’t let go till they, um, well, exit your body.  (Women should be consuming 25 grams of fiber per day.  Men should be consuming 38 grams daily). 

My next experience with a gluten-free product, was brown rice tortillas.  I didn’t even know they existed till a recent Trader Joe’s trip.  I was in the tortilla aisle searching for a healthier option.  I grabbed the last package and read it’s stats.  At 24 grams of carbs for one, I wasn’t sold.  I put them back and made another lap around the store.  When I came back around to the tortilla section there was a ruckus.  Customers were extremely upset that the brown rice tortillas were gone.  They wouldn’t be back till the next day.  I’m a middle child and hate to be left out of the fun, so the next day I went back and got some.

I really didn’t think I was going to like them.  When I pulled them out of the package there was a rubbery type feel to them.  Scared me a little bit.  But, then a bright figurative light bulb went on.  I had just made a home made enchilada sauce,  I would make enchiladas with the rubbery discs.  Yeah, I know how that sounds, but keep reading.

When I rolled the first enchilada, the light bulb started to flicker and dim.  The rubbery little suckers completely fell apart!  I started feeling bad for the gluten-free community again.  How could they live in a world where enchiladas were an impossibility.  It just wasn’t fair.  So I did what I normally do when a recipe doesn’t go as planned, I stared blankly at everything.

Whilst staring at the broken tortilla, with all it’s insides spilling all over the cutting board, the solution hit me. The light shone brightly again, and my feelings of sadness left as fast as they came.  I rebuilt that enchilada into a casserole, tearing up the tortilla, and layering the ingredients.

What I ended up with was a gluten-free, protein filled masterpiece.  After baking it, the tortillas were no longer rubbery.  They were delicious!  When I tallied the nutrition facts I was excited to see that the meat and beans gave the dish a whopping 21 grams of protein.  The tortillas added a nice 4 grams of fiber.

The entire casserole was gone by lunch time the next day.  Yes, all 8 servings, split between my husband and I for 3 consecutive meals.  It will most definitely become a regular on the dinner rotation.

And seriously, never buy a can of enchilada sauce again.  It only takes 10 minutes to make your own, and you can’t beat the taste of a fresh sauce.

So hurry, run to Trader Joe’s and grab brown rice tortillas.  I hear they move off the shelf rather quickly.

Recipe

1 lb. organic ground beef

1 garlic clove, minced

1/2 red onion, diced

1/2 teaspoon sea salt

1/4 teaspoon black pepper

1/2 teaspoon ground cumin

1 can of organic black beans, preferably low-sodium

1/2 cup part skim cotija cheese, crumbled

1/4 cup shredded sharp cheddar cheese

4 – 6 brown rice tortillas

2 green onions, chopped (optional)

1 large tomato, diced (optional)

Enchilada sauce

1/4 cup grapeseed oil

2 tablespoons gluten-free flour (I like Bob’s Red Mill)

1/4 cup Hatch chili powder (or regular chili powder)

1 (8 oz.) can tomato sauce

1 1/2 cups water

1/4 teaspoon ground cumin

1/4 teaspoon garlic powder

salt to taste

Heat oil in a skillet over medium-high heat. Stir in flour and chili powder, reduce heat to medium, and cook until lightly brown, stirring constantly to prevent burning flour.

Gradually stir in tomato sauce, water, cumin, and garlic powder into the flour and chili powder until smooth, and continue cooking over medium heat approximately 10 minutes, or until thickened slightly. Season to taste with salt.

Enchilada Casserole

Pre-heat oven to 375 degrees.

In a large skillet over medium-high heat brown the beef, and drain the fat.  Return back to skillet.  Lower heat to medium-low, and add onions, garlic, salt, pepper, and cumin.  Stirring frequently cook till onions are translucent.

Stir in the black beans into the meat mixture.

Put 1/4 cup of the enchilada sauce on the bottom of a 9 x 9 pan.

Tear up the tortilla into large pieces, and cover the enchilada sauce.

Sprinkle half of the meat mixture on top of the tortillas.

Layer half of the cotija onto the meat.

Layer half of the remaining sauce onto the cotija.

Repeat the tortilla, meat, cheese, sauce layering again.

Sprinkle with the cheddar, then the olives.

Bake for 20 minutes.  Cool for 10 minutes before serving.

Garnish each slice with tomatoes and green onions.

Servings: 8• Size: 1/8 of casserole Calories: 383• Fat: 22g • Carb: 31g • Fiber: 4g • Protein: 21g • Sugar:  2g Sodium: 548mg • Cholesterol: 62mg

Zucchini Lasagna – Low Carb

zucchini lasagna 2Every year I plant a summer garden in my backyard.  I use a 4 X 8 raised planter bed and fence out the animals (bunnies & squirrels) with chicken wire.

I spend a good amount of time planting each plant carefully.  Making sure each has a symbiotic plant to fight off disease and pests.  When everything is planted, I watch those babies like a hawk.  I go out everyday and make sure they have enough water, sun, and aren’t being invaded by insects.  In a nutshell, I love gardening.

Unfortunately, this year, I have not been able to plant one.  We tore up our back yard last December.  Now, very slowly it is being put back together.  Slow, like dripping molasses.

I miss the tomatoes right off the vine.  I miss the wafting smell of the basil as I approach the planter bed.  Most of all, I miss being able to harvest the vegetables of my labor.

I really shouldn’t complain though, I have an ever better substitute for my garden.  My neighbors L & L have the best home garden I have ever seen.  No exaggeration.  Rows of high tomato plants, zucchini, cucumber, apples, avocado, grapefruit, oranges, lemons and peaches.

L is very good at what he does.  He had special soil, called sandy loam, trucked in just for his garden.  Whether it be the soil or his green thumb, the quality and the quantity he produces far exceed what my little 4 X 8 bed could.

larry food
L & L zucchini & eggs

That being said, I have been able to survive the summer with the fruits of his labor.  Once a week I receive a surprise delivery on my door step.  Sometimes that even includes eggs.  We are very spoiled by them.

Recently Mrs. L had surgery that limited her mobility.  Mr. L was going to have to take care of the Mrs. and her live in mother on a daily basis.  Upon hearing this, I immediately offered to make them dinners.  It was least I could do for all they have done for us.  Not only have they been generous with their crops, but also a myriad of other things.  We are blessed to live next door to them.

It just so happened that the day before I was to begin working on their meals, L dropped off one of his infamous bags of produce.  It had all the usual suspects, including a few gorgeous zucchinis.

There are so many ways to prepare zucchini, but one of my absolute favorites is a zucchini lasagna.  A zucchini lasagna replaces the pasta sheets with zucchini.  Lowering the carb count and increasing the nutrients.

In my recipe, I make two sauces, a marinara and bechamel.  Marinara is a fancy name for tomato sauce.  Bechamel is a fancy name for cheese sauce.  I make my bechamel lower in fat and carbs by using chicken broth instead of milk, Melt, instead of butter.  The two sauces intertwine in each bite, creating a tomato cream sauce.

The sauces are layered between the zucchini ‘noodles’.  It is up to the chef whether to add ground turkey, pork, or sausage.  The sauces are bold enough to stand with the zucchini alone, for a vegetarian version.

This lasagna can be baked and served immediately or it can be covered tightly with plastic wrap and foil, then frozen for up to 3 months.  Either way, it’s worth the work.  You won’t be disappointed I promise.

It’s a dish that feels indulgent, yet is much healthier than eating a traditional lasagna.  According to L & L it was a great use of their zucchini, and helped Mrs. L get on the road to recovery.

Recipe

3 – 4 large zucchini, sliced on a mandoline ( <— click for the same one I use)

sea salt

16 oz. mozzarella low moisture, part skim or any cheese blend (I used a pizza blend)

1 lb. ground turkey, pork or turkey sausage, cooked and any fat drained

Marinara

2 tablespoons olive oil

1 28 oz can organic diced tomatoes

1/2 brown onion, diced

2 garlic cloves, minced

1 small carrot, diced

2 teaspoons dried basil

sea salt and pepper to taste

Place zucchini slices on a paper towel and sprinkle lightly with sea salt.  Let sit for an hour.  Blot dry, turn over and repeat step on other side. This will pull excess moisture out of the zucchini, so your lasagna won’t be soupy.

Heat the olive oil in a large pot.  Add the carrots and basil, saute for 2 – 3 minutes.  Add in the onions and saute till translucent.  Add in the garlic and saute for 1 minute, constantly stirring so it doesn’t burn.  Stir in the tomatoes, and de-glaze the pan (scrape the brown bits off the bottom of the pan).  Simmer for 20 minutes on low, stirring every 3 minutes or so to avoid burning the sauce.  Using a stick blender, blend the sauce partially.  I like mine to still have some chunks.  Season with salt and pepper.  Set aside.  (Whatever you have left after making the lasagne can be frozen).

Bechamel (not traditional)

4 tablespoons Melt butter (smart balance or ghee)

4 tablespoons whole wheat flour

2 1/2 cups low sodium organic chicken broth

1/2 cup shaved Parmesan

1/2 teaspoon white pepper

Melt the ‘butter’ over medium heat.  Whisk in the flour, stirring constantly for 3 – 5 minutes or until the mixture smells like popcorn.  Constantly whisking, slowly stir in the chicken broth.  Continue to whisk till the mixture is fully incorporated.  Lower the heat to low.  Stir in cheese and pepper.  Take off heat.

To Assemble Lasagna

1.  Ladle a thin layer of marinara on the bottom of a 9X13 pan.

2.  Layer zucchini noodles on top of the marinara, overlapping slightly.

3.  Ladle 1/2 of the bechamel on top of the zucchini.

4.  If you have a meat layer, add it on top of the bechamel.

5.  Layer 1/3 of the cheese on top of the meat.

6.  Ladle the remaining 1/2 of the marinara on top of the cheese.

7.  Repeat steps 2 – 6 one more time.

8.  The last layer should be the remaining cheese.

9.  Bake for 20 – 30 minutes or until bubbling and golden brown.

10.  Let stand for 10 minutes before serving.

*Servings: 8• Size: 1/8 of the lasagna Calories: 205 • Fat: 13g • Carb: 13g• Fiber: 3g • Protein: 12g • Sugar:  6g Sodium: 677mg • Cholesterol: 20mg

*(nutrition facts are shown without meat)

Almond Muffin (made in the microwave)

almond muffin wordsMy boys will be starting school in exactly 17 days.  Who’s counting?  During the school year I am notorious for not eating breakfast.  Why?  Well, raise your hand if you are guilty of not eating a healthy breakfast because it takes more time, and you would rather not eat junk.  (raises hand).

I like sleeping in.  So I will push the limits as far as I can sometimes.  When I finally do drag myself out of bed I stumble half awake to the Keurig.  Pop in the k-cup, stare at the dripping, addicting substance till it fills my cup completely.  Pour in my creamer and stevia, then sit on the couch watching the Food Network while gulping down my dark liquid friend.  Sometimes I will jump on the computer and start a blog or respond to emails.

On a normal day I look at the clock at some point and become frantic.  Realizing that I have just enough time to wake the boys up, make them breakfast, make sure they are dressed, teeth and hair are brushed and all the right accompaniments are in their back packs.  Then frantic part two sets in when I realize I forgot to pack their lunch.  I scramble to the kitchen, throw together a sandwich and throw in some healthy sides and a drink.  Throw the lunch box in their back pack and run out the door to get them to school on time.  Phew!

Sound familiar?  Not one part of that chaotic routine includes me eating breakfast.  As much as I would love to get up earlier to incorporate a well-balanced meal, it most likely won’t happen.  BUT, if I can spend 5 minutes between the chaos making  and eating something healthy, I will.

My clean eating, health conscious friend, Alicia, posted a great busy morning mom recipe on her facebook last week.  A clean, protein filled muffin that you can make in the microwave.  The clean up is minimal because you mix and microwave the muffin in a coffee cup.  So brilliant.

I tweaked her recipe a little to meet my dietary needs, so I am going to post her recipe and mine.  You can decide which meets you needs or swap between them.

I know this will become one of my staple breakfasts during the school year.  Because as we all know, if you don’t fire up your metabolism in the morning, you are doing body a disservice.  I no longer have an excuse not to eat a clean, health breakfast.  Thanks, Alicia!

Alicia’s Flaxseed Muffin Recipe

1/4 cup Bob’s Red Mill Organic Flaxseed Meal

1tsp baking powder

2tsp cinnamon powder

1tsp coconut oil

1 egg

2tsp honey

Mix all ingredients in a coffee mug. Pop in the microwave for 50 seconds then dump on plate and enjoy!

Servings: 1• Size: 1 muffin Calories: 248 • Fat: 16g • Carb: 24g • Fiber: 2g • Protein: 9g • Sugar:  21g Sodium: 386mg • Cholesterol: 185mg

My Almond Muffin Recipe

1/4 cup Bob’s Red Mill Flour Almond Meal

3/4 teaspoon baking powder

1 teaspoon cinnamon

pinch of sea salt

1 tablespoon maple syrup

1 egg

1 teaspoon real vanilla extract

Servings: 1• Size: 1 muffin Calories: 345 • Fat: 18g • Carb: 40g • Fiber: 7g • Protein: 12g • Sugar:  24g Sodium: 388mg • Cholesterol: 195mg

Peach Pie Protein Smoothie

peach pie protein shake 2Eating breakfast is essential.  It turns on your body’s fat burning oven and gives you the energy you need to start your day.  Skipping this meal can lead to overeating throughout the day.  When you skip a meal, your body signals your brain to play catch up.  Bad choices are made when our bodies go into starvation mode. Your best plan of attack is to drink a full glass of water right when you wake up.  This cleanses your body of impurities and hydrates.  Plan on eating within the first hour of waking up to fully kick-start your metabolism. Eating within the first hour can sometimes be a challenge for me.  Especially since we are on our 4th week of summer break here.  I love simple breakfasts that don’t require tons of prep and clean up.  Shakes fit this mold, and fill my tank.  This peach protein shake is quick, satiates, and tastes like dessert.  Serious bonus. On that note, you can end your day with this shake.  Just add 1/2 a cup of your favorite frozen yogurt, and tada!  You can pull the wool over your kid’s/husband’s eyes and make them think they are drinking a non-nutritious shake. Onto the fabulous reasons to drink this peachy goodness.  The protein in the powder and almond milk will keep you full till your mid-morning snack and build muscle. Who can resist the taste of a fresh peach?  I know I can’t.  Knowing they are full of vitamin A, C, & B, contain iron and fluoride, and protect from free radicals, make them even more appealing. Cinnamon, well there are so many benefits to ingesting a daily 1/2 teaspoon dose of this spice, I needed a list:

  1. 1/2 teaspoon of cinnamon per day can lower your bad cholesterol (or LDL).
  2. Cinnamon may help treat Type 2 Diabetes by lowering blood sugar levels and increasing the amount of insulin production in the body.
  3. Cinnamon has anti-fungal properties, and it’s been said that candida cannot live in a cinnamon environment.
  4. Cinnamon can reduce the proliferation of leukemia and lymphoma cancer cells.
  5. Cinnamon has an anti-clotting effect on the blood.
  6. Honey and Cinnamon combined have been found to relieve arthritis pain.
  7. When added to food, cinnamon inhibits bacterial growth and food spoilage, making it a natural food preservative.
  8. Just smelling cinnamon boosts cognitive function and memory.
  9. Cinnamon fights the E. coli bacteria in unpasteurized juices.
  10. Cinnamon has been found to be an effective natural remedy for eliminating headaches and migraine relief.
  11. Cinnamon can also help stabilize blood sugar (which is great for weight loss). A couple of dashes in your morning tea or cereal is all it takes.

(facts from http://organicauthority.com)

So, when you see the peaches at your local market, make sure you grab a few to make this delicious breakfast treat. You are missing out if you don’t!

Peach Pie Protein Smoothie
 
Author: 
Nutrition Information
  • Serving size: 9 oz.
  • Fat: 4.6
  • Carbohydrates: 28
  • Sugar: 23
  • Sodium: 285
  • Fiber: 4
  • Protein: 27
  • Cholesterol: 20
Recipe type: Smoothie, Breakfast
Ingredients
  • 8 ounces vanilla almond milk
  • ½ of a peach (skin removed) or ½ cup frozen peaches, sliced
  • 1 scoop vanilla protein powder
  • ½ teaspoon ground cinnamon
  • optional additions: (1 tablespoon)
  • FiProFlax
  • chia seeds
  • flax seeds
  • hemp hearts
  • wheat germ
Instructions
  1. Put all ingredients in a high powered blender and blend till smooth. I like the milkshake option.