Category: Quick Meal

Quick Meals on Decadently Fit

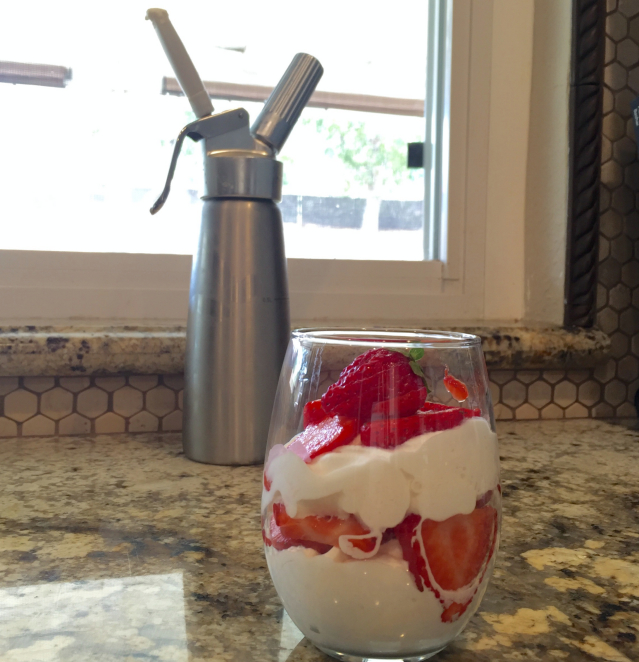
Low Carb Whipped Cream

whipped cream

I’m a sweet junkie.  I’ll never be able to give up sweets no matter what.  I’ve tried and it’s never worked.  So, in order for me to maintain a carb/sugar level that doesn’t make my Fitness Pal scream I have to come up with alternatives.

When I was pregnant with my second son I had gestational diabetes.  It was awful considering I was also on bed rest due to pre-term labor and blood clots.  Every night before bed I had to eat a snack to maintain my blood sugar levels through the night.  Every night my husband/nurse would bring me strawberries and sugar-free Cool Whip.  We figured out it was the perfect carb/sweet amount I needed to maintain my blood sugar and give me the sugar fix my pregnant body was craving.

If you have ever read the ingredient list on a tub of Cool Whip you know that most of the words are extremely hard to pronounce, a.k.a a chemical storm of ‘ingredients’.  Although I was able to keep my sugar levels down with the sugar substitutes I was trading one evil for another.

Fast forward to now.  I have zero time to put together low-fat/low sugar desserts that will quench my insatiable sweet tooth.  Then it dawned on me, if I cut up a ton of strawberries on Sunday and come up with a low sugar, whole ingredient alternative for the whip cream I used to enjoy I would be set.  Then another light bulb precariously teetered above my chemistry and anatomy swollen brain, I have an Isi whip cream dispenser.  That would aid in the instant gratification need.  So, long story short this super simple quick recipe was born.  Yes, you do need a whip cream dispenser, but trust me it’s worth every penny.

Click the whip cream canister image to be directly taken to amazon to purchase!

5.0 from 1 reviews
Low Carb Whipped Cream
 
Author: 
Nutrition Information
  • Serves: 10 servings
  • Serving size: ¼ cup
  • Calories: 76
  • Fat: 7.2
  • Saturated fat: 4.8
  • Carbohydrates: 2.5
  • Sugar: 2.5
  • Sodium: 8
  • Protein: 0
  • Cholesterol: 32
Recipe type: Dessert
Prep time: 
Total time: 
Low Carb Whipped Cream
Ingredients
  • 1 tablespoon honey
  • 14 oz. whipping cream
  • 2 teaspoons vanilla
Instructions
  1. Melt the honey in a microwave safe dish on your melt function or on 10% power for 1 minute or until melted.
  2. Stir in the cream until combined with the honey, add in the vanilla.
  3. Transfer mixture to an Isi whip cream dispense, only filling till max fill line. Screw the lid on tightly then add nitrous canister, screw in tightly.
  4. Refrigerate for 4 hours or until cold.
  5. Shake before dispensing whip cream.


Click the whip cream canister image to be directly taken to amazon to purchase!

Crockpot Roast Chicken

FullSizeRender

Hellooooooo!  Yes, it’s been a long time since my last post and I hope you can forgive me.   Priorities changed and I had to shift focus for a little while.  Actually, my focus has shifted profusely!  I went back to school in March.  I will be a bachelor degree toting nurse by 2020, God willing.  Why the shift in my passion?  It hasn’t really.  I’ve always had a desire to help people, that is why this blog was started in the first place.  Being a nurse I will be able to help people on an entirely different level.  God gives us all desires and passions, and I believe the desire to become a nurse came directly from him.  So with the strength instilled in me by him I have maintained straight A’s so far and my family hasn’t taken too big of a hit.

I actually LOVE school.  I am a much better student at this point in my life than I ever was.  I am getting much more out of it this time, even the classes I am not so into, like Philosophy.  Ugh, that class was interesting to say the least.

As of today I start my chemistry and Anatomy classes.  I am not a math person so chemistry is going to challenge me, but I’ve taken Anatomy before and am so looking forward to dissecting everything!  I promise not to post pics on the blog of dissections, although I can’t say the same about my instagram.  You have been warned!

So, needless to say life is busy in our household.  But, eating and being healthy is still a priority to all of us.  I do NOT want to put on the freshmen 15, and want to continue to feed my brood in a healthy manner, no excuses.  So instead of the recipes you are used to on Decadently Fit, the recipes will now be super easy and quick, lots of crock pot ideas.

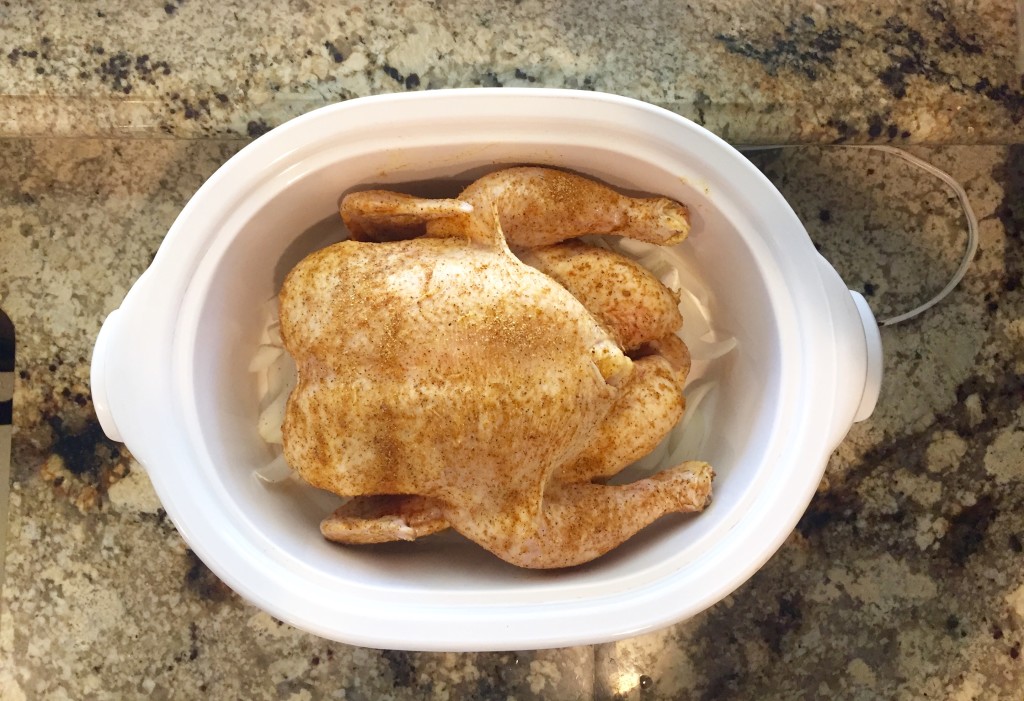
The recipe below is tonight’s dinner, crock pot roast chicken. It took me a matter of 10 minutes to prepare this dish.  For those with limited culinary knowledge you don’t have to be afraid of this dish, it’s beginner friendly.  I will be serving it will frozen organic broccoli and frozen organic brown rice.  Quick, easy, healthy, minimal clean up.

Cheers to new adventures, creating new goals and maintaining a healthy family!

5.0 from 3 reviews
Crockpot Roast Chicken
 
Author: 
Recipe type: Crockpot Recipe
Cuisine: American
Prep time: 
Cook time: 
Total time: 
Easy weeknight crockpot meal.
Ingredients
  • 1 5 lb. roasting whole chicken
  • 2 tsp. coarse sea salt
  • 2 teaspoons adobo seasoning
  • ½ teaspoon smoked paprika
  • 1 large onion, chopped
Instructions
  1. Combine the spices in a small bowl
  2. Remove the giblets from the chicken, rinse and pat dry with paper towels.
  3. Place chopped onion in the bottom of a 6 qt. crockpot
  4. Rub the chicken with the spices and set on top of the onion.
  5. Place the lid on the crockpot and cook on low for 4 - 8 hours or until a thermometer shows 165 degrees in the thigh.
  6. If you would like the skin crispier remove the chicken from the crockpot place on foil covered cookie sheet and broil the chicken for 2 to 5 minutes.
  7. Let rest for 10 minutes, then carve and serve.


Hatch Chili Quinoa Stuffed Zucchini – Plus a Giveaway!

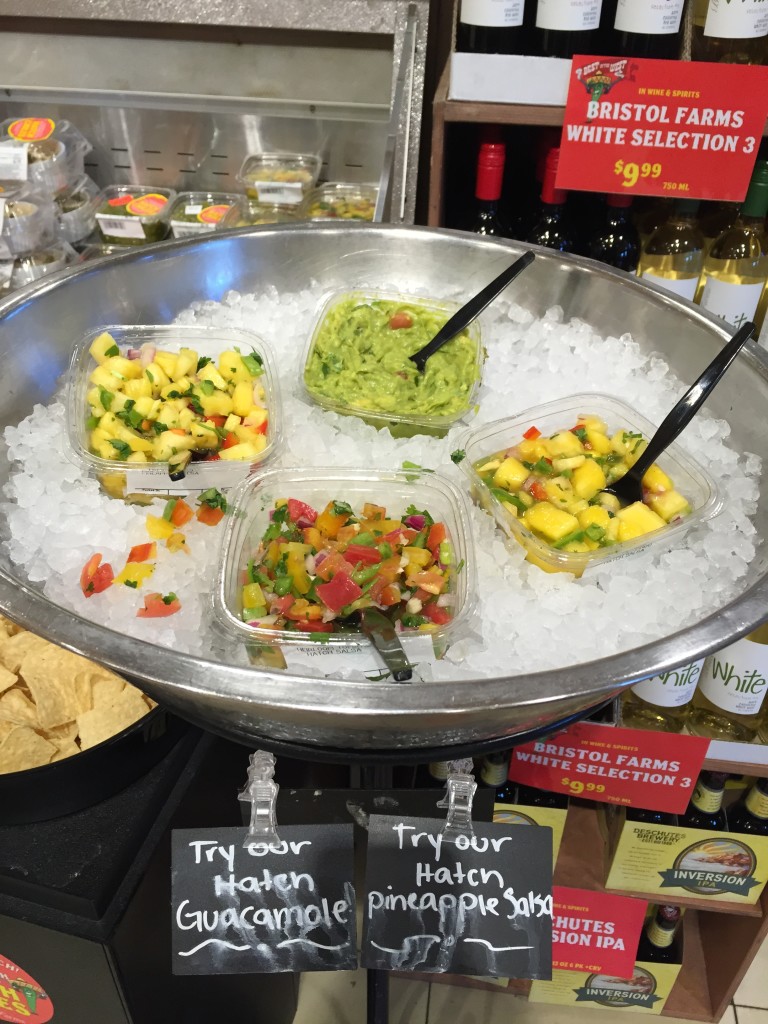
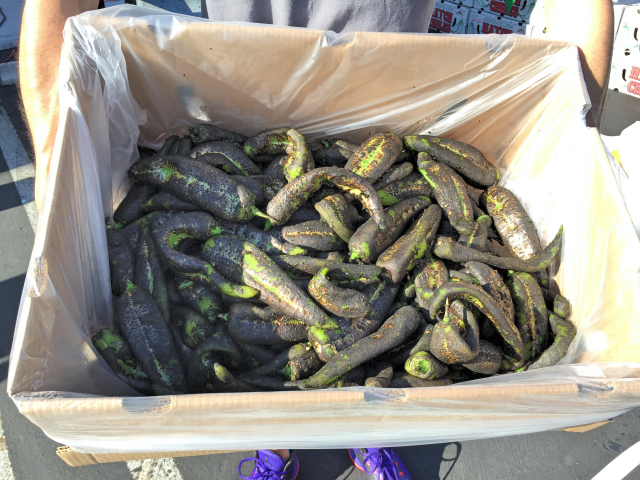
Fresh Hatch Chiles_Fotor If you have been a reader of my blog for at least a year you know about the Hatch Chili.  If not, here is a quick history/biography of the only chili that can be purchased in three different heat scales, mild, medium and hot. a Rafflecopter giveaway

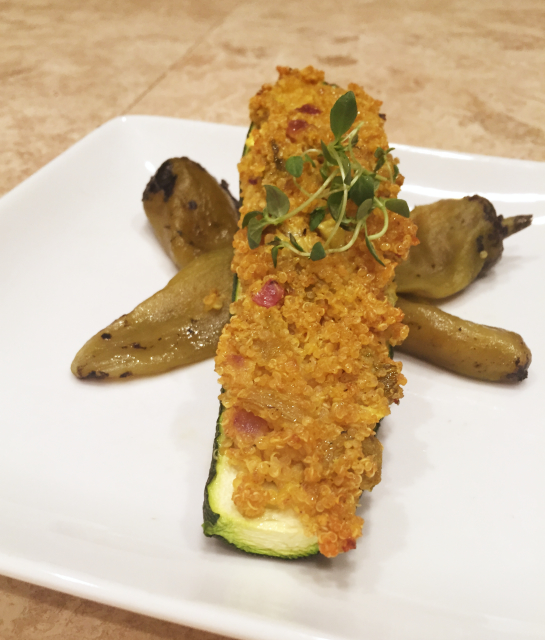
The Hatch Chili has a very short season, which starts in August and ends in September.  They are only grown in Hatch, New Mexico, where the climate is perfect for this species of chili.  The chilies resemble a poblano, but have a deeper flavor.  Whether used roasted, fresh or in powder form the chili goes well with so many flavor profiles. Hatch Chili Roasting IEFB_Fotor The smell of the roasted chills is pretty incredible though.  I should know that scent incredibly well after recently going to a Hatch Chili Roasting event at the Bristol Farms located in Palm Desert.  I was lucky enough to attend with my fellow IEFB friends, Sara from My Imperfect Kitchen and Natalie from The Devil Wears Parsley.  Sue from It’s Okay to Eat the Cupcake was there in spirit with us! Hatch Chili Salsas I tried Hatch Chili everything that day!  From savory dishes like, pizza, sushi, grilled cheese, salsa, macaroni and cheese, guacamole, and chorizo.  My sweet tooth was invited to the party with the juices, smoothies and cupcakes spiked withe versatile chili. Hatch Chilis Roasted_Fotor   I had never been to a Hatch Chili Roasting or a Bristol Farms before.  Both were worth the drive to the desert!  The smell of the hatch chilis wafted through the parking lot when we pulled up and filled the car on our drive home.  We bought a case and split it amongst the four of us.  I would highly recommend doing this.  Since the season is so short it’s one of the only ways to have access to them in the off season.  If you would like to find a roasting near you click here. IMG_3727_Fotor After you have purchased your chills make sure you peel and freeze them within 24 hours of the roasting.  I separated my 1/4 case into smaller freezer bags, flattened them, and stacked them in the freezer.  I left a portion fresh and have been eating them in eggs, soups, meat loaf and then came up with the recipe below with items I already had on hand. Hatch Zucchi_Fotor Hatch Chili Quinoa Stuffed Zucchini is a quick protein filled meal that satisfies.  The mild bite from the mixture of hatch chills and curry powder gives the zucchini a flavorful punch.  Low carb, vegetarian, gluten free, diabetic friendly and tastes amazing.  (recipe below) Want your own Hatch Chili Cook Book from the produce experts at Melissa’s Produce?  Enter to win your own copy here!  You may even win one of the signed copies from the author!

a Rafflecopter giveaway

Here are even more great hatch chili recipes from my friends:

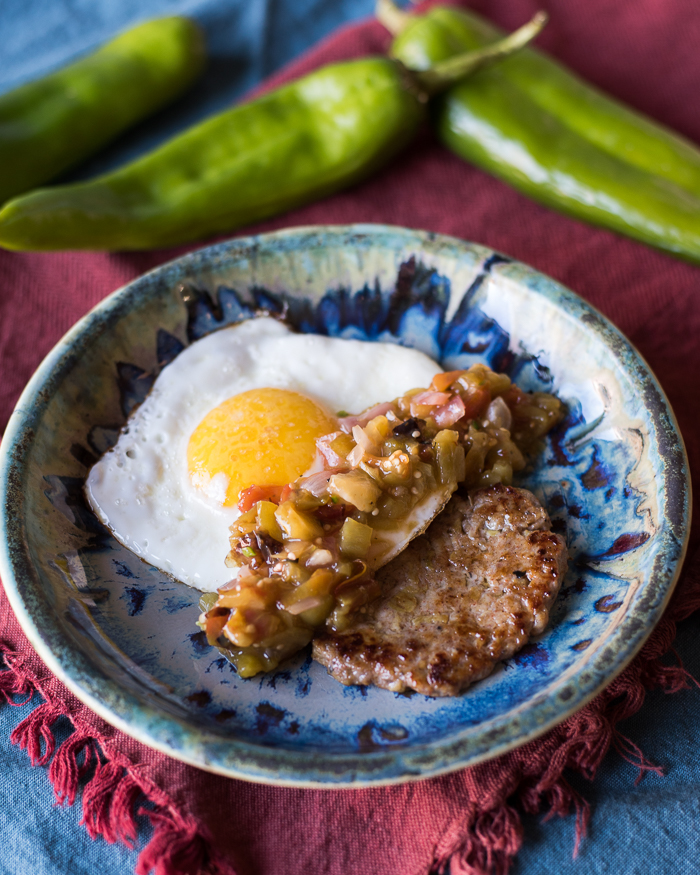
Hatch Chili Breakfast Sausage from Natalie at The Devil Wears Parsley

HatchChileChickenSausage-Natalie

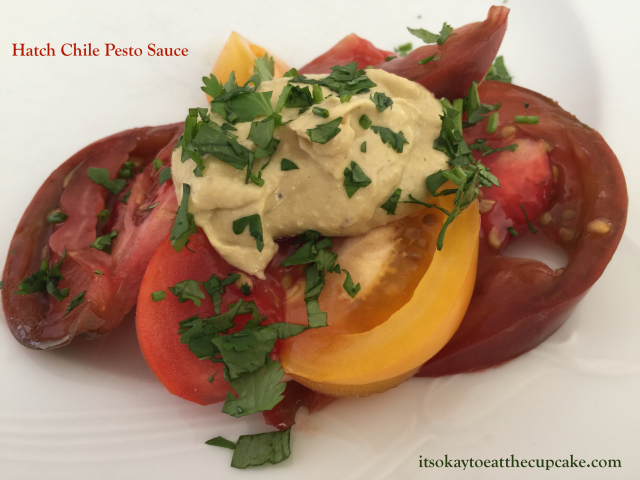
Hatch Chili Pesto from Sue at It’s Okay to Eat the Cupcake

Hatch Chile Pesto Sauce_Fotor

Hatch Chili & Chicken Pockets from Sara at My Imperfect Kitchen

HatchChile&ChickenPuffPastryPockets

4.8 from 4 reviews
Hatch Chili Quinoa Stuffed Zucchini - Plus a Giveaway!
 
Author: 
Recipe type: Main Dish
Ingredients
  • 4 zucchini, split in half
  • 2 cups cooked quinoa
  • 1 teaspoon curry powder
  • ½ cup greek yogurt
  • ½ teaspoon sea salt
  • ½ cup red onion, diced
  • 3 roasted hatch chilis, peeled, and diced
  • 8 tablespoons cheddar cheese (optional)
Instructions
  1. Preheat oven to 350 degrees.
  2. Remove the insides of the zucchini, leaving an edge all the way around the zucchini to hold in the filling. Roughly chop the insides and set aside in a medium size mixing bowl
  3. Saute the red onion in 1 tablespoon olive oil over medium heat for 5 minutes or until translucent.
  4. Add the red onion to the mixing bowl, along with the quinoa, curry, yogurt, salt, and chills. Mix to combine.
  5. Place the zucchini on a cookie sheet, then scoop the quinoa filling into each zucchini boat.
  6. Bake for 30 minutes, then top with cheese if desired. Bake another 5 minutes to melt cheese.
  7. Serve immediately.

 Disclosures:  All opinions in this post are my own.  Bristol Farms did not sponsor this post.  Melissa’s Produce has generously supplied the cookbooks in the giveaway, and hatch chili ingredients.  

Thai Zucchini Noodle Salad

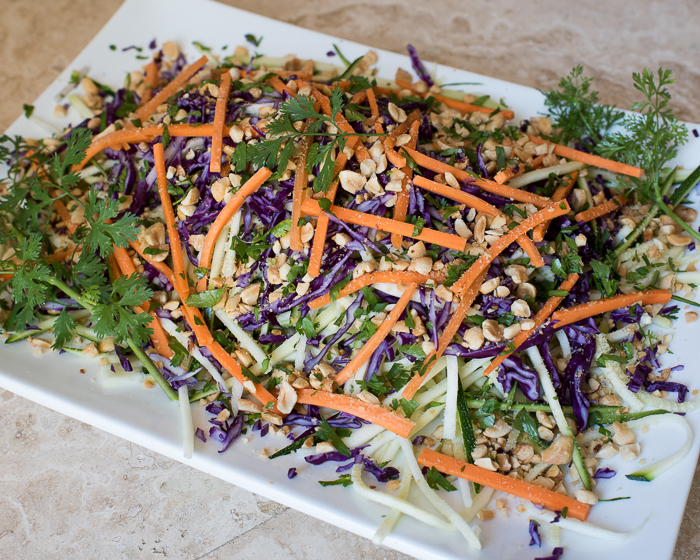
RebekahSpicyAsianZucchiniNoodleSalad-2
photo credit: Natalie Wiser-Orozco

Sometimes it’s the simplest things in life that make your day.  A smile from someone, a cat purring loudly in your face or even food.  I hate to admit it but food makes my day quit often.  Lately I have been on a tirade with Thai food.

I can not get enough Thai food.  Curry, coconut milk, tamarind, spicy everything.  If I was stranded on a desert island I could eat Thai food the rest of my life.  Oh wait, isn’t Thailand a ton of islands?  I want to be deserted on any one of them.  Now.

In the meantime, I will have to live with making my own at home.

Since the weather has gone from quadrapolar (yes I made that up),  can’t decide what season to be, to I live in an oven hot, cold food is a must.  Cold Thai inspired food equals perfection right now.

Recently my Inland Empire Food Blogger posse came over to share their newest salad creations with me.  I am incredibly lucky to have such talented friends that make to die for food.  I brought this Asian beauty to the table, literally.

My addition was quick, refreshing, spicy, salty and slightly sweet.  You can add grilled chicken to the salad to make it a complete meal.  Whatever you do to this salad just make it.  The dressing is to die for and will quench any Thai cravings you have.  Since it’s low in carbs you can have as much as you want!  Dive in fork first!

Here are the links to the other great salads my friends brought:

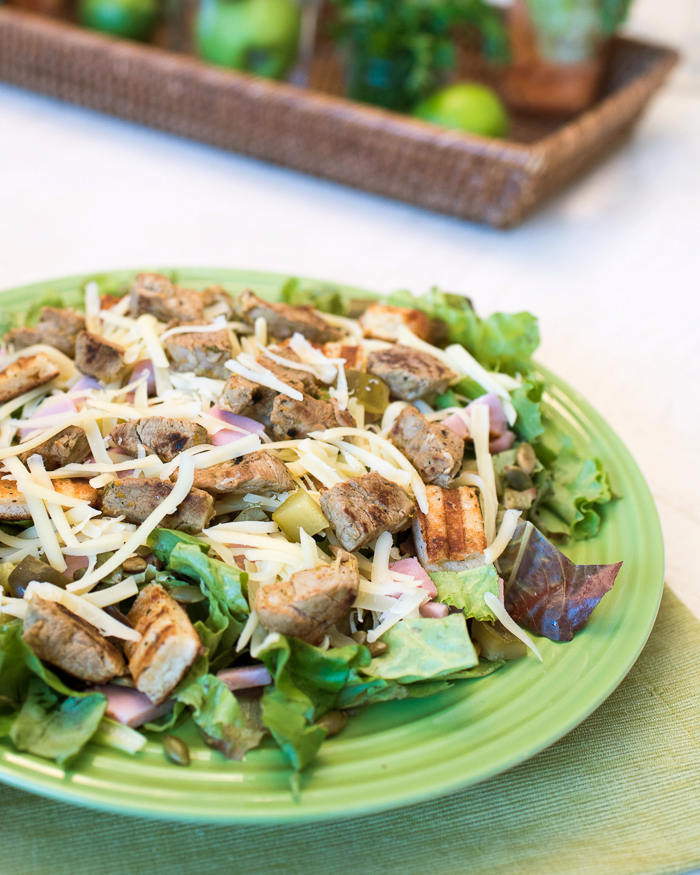
Natalie from The Devil Wears Parsley made a Cuban Sandwich inspired salad.

EnsaladaCubano-14

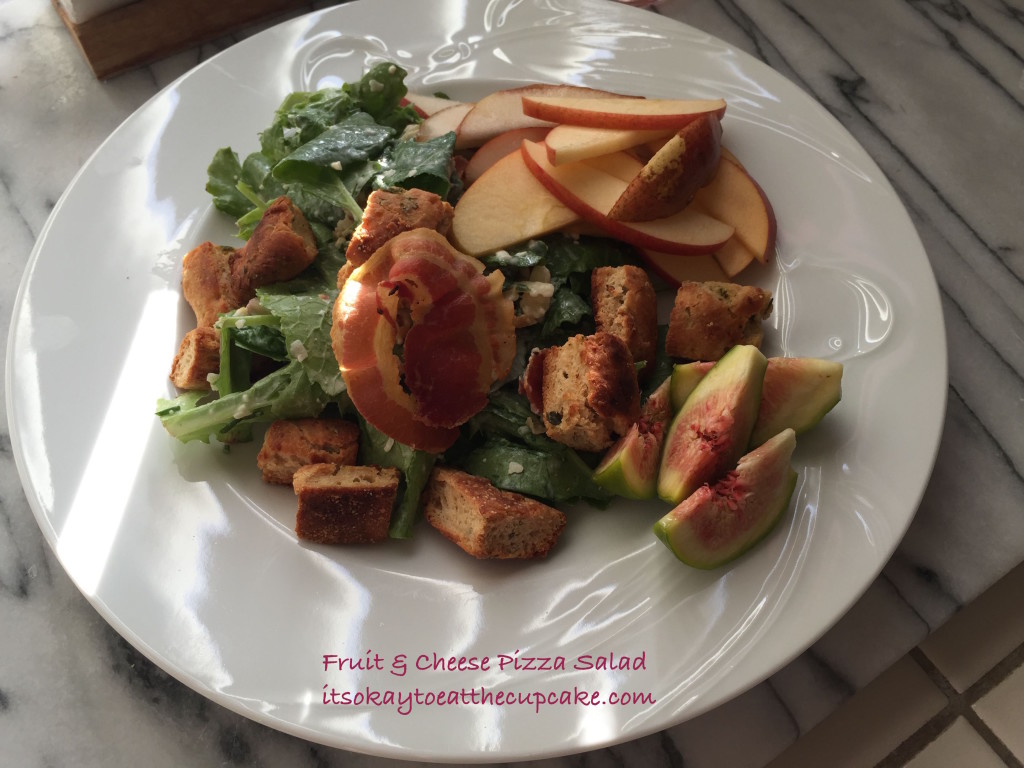
Sue’s Italian inspired Salad from It’s Okay to Eat the Cupcake has home made pizza croutons!

Salad Overhead

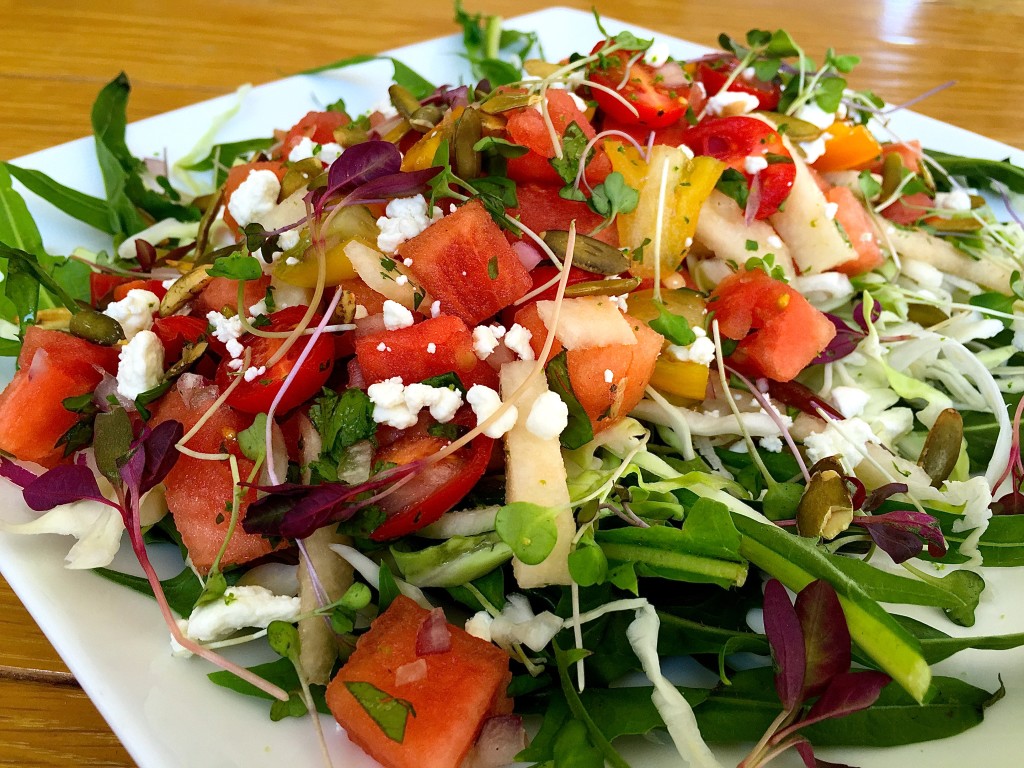
Sara’s baja inspired Spicy Watermelon Salad made my mouth so happy, her recipe is posted on her blog My Imperfect Kitchen:

Sara Salad


Thai Zucchini Noodle Salad
 
Author: 
Nutrition Information
  • Serving size: 
  • Calories: 85
  • Fat: 3.5
  • Saturated fat: .6
  • Carbohydrates: 10
  • Sugar: 6.4
  • Sodium: 414
  • Fiber: 3.1
  • Protein: 3.9
  • Cholesterol: 0
Recipe type: Salad
Cuisine: Thai
Ingredients
  • 3 zucchini, spiralized or julienned into long spaghetti like strips ( I used a mandolin)
  • ¼ head of red cabbage, shredded
  • 1 large carrot, julienned
  • 2 tablespoons chopped cilantro
  • ¼ cup crushed roasted unsalted peanuts
  • grilled chicken (optional)
  • For the dressing:
  • 2 teaspoons fish sauce
  • 2 tablespoons tamari or low sodium soy sauce
  • 1 tablespoon honey
  • 2 cloves garlic, minced
  • ½ teaspoon red pepper flakes
  • 3 tablespoons rice wine vinegar
  • ½ teaspoon ground coriander
  • 1 tablespoon sesame oil
Instructions
  1. Whisk all dressing ingredients together and refrigerate for an hour.
  2. To assemble Salad:
  3. Layer the noodles on the bottom, then the cabbage, the carrots, the cilantro, and then the peanuts. Right before serving drizzle the dressing over the salad. For best results, mix dressing into the salad to coat evenly.


My Ultimate Sandwich Creation- Organic Oroweat Bread Giveaway

sandwich orowheat 1_Fotor

If you follow my blog posts on a regular basis you know that I am super picky about what I put in my body.  I like to eat organic whenever possible, especially when it comes to products/ingredients that are notoriously GMO (genetically modified) or filled with preservatives.

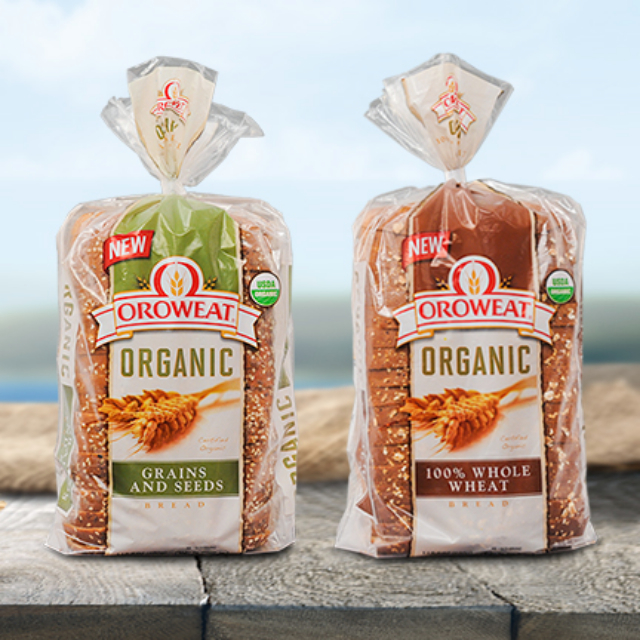
Oroweat recently asked me to review their line of organic breads and come up with an ultimate sandwich.  Even though they sent me coupons to try the bread and a gift card to buy ingredients for an ultimate sandwich, it was a no brainer to review the bread.  Not only is this bread already a staple in our household, it has been approved by my pickiest eaters, and more importantly by me.

oroweat_organic_breads_bkg_Fotor

The bread comes in two varieties, Grains & Seeds and Whole Wheat.  Both are fantastic, and made with all USDA certified organic ingredients.  *There are only 17g of carbs in each slice (, making it friendly to my carb counters.  *No high fructose corn syrup, and 3g of fiber.  The slices have a wonderful texture and hearty in size.  Best of all I buy it at my nearby Target.  No need to go to a specialty store to buy a healthy, delicious bread option.  Click here to find a store near you!

I was challenged to create an ultimate sandwich using the organic line of breads.  I love my sandwiches.  Since lunch is when I eat the highest amount of carbs, sandwiches are usually what I gravitate to.  They fill me up and keep me happy till snack time around 3 p.m.

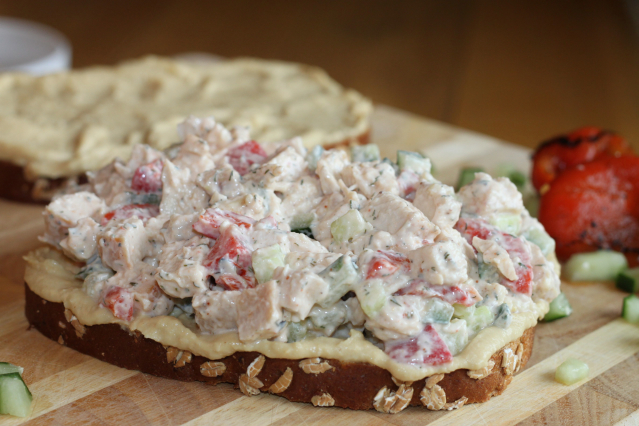
sandwich open face_Fotor

I personally am super sick of turkey sandwiches at this point.  I know the barrage of turkey is happening again in a couple of weeks, so I decided to take another route.  After much thought, I decided to go with a Greek Chicken Salad Sandwich.

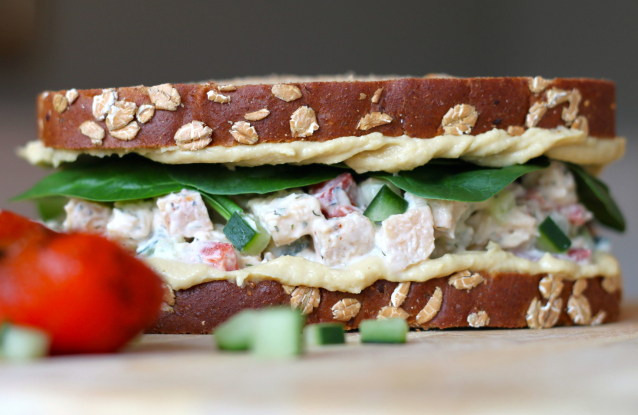
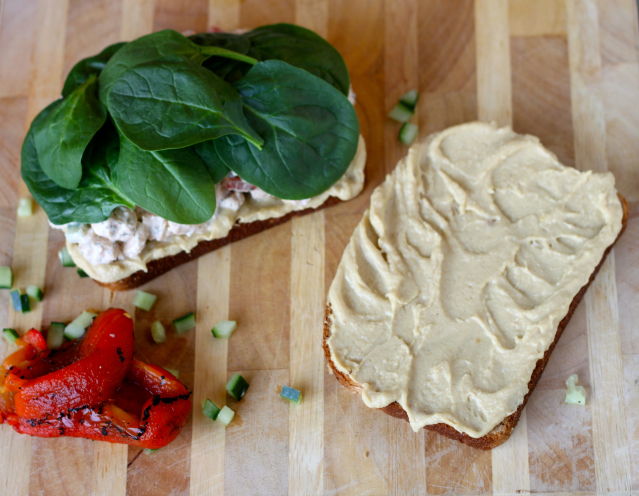
I’m so glad I went with a Mediterranean inspired sandwich.  It was easy to make and woke up my taste buds. This sandwich is a protein powerhouse with chicken, hummus and greek yogurt based tzatziki sauce.  The addition of cucumbers, roasted red bell peppers and spinach make the sandwich crunchy and nutrient dense.

sandwich with spinach_Fotor

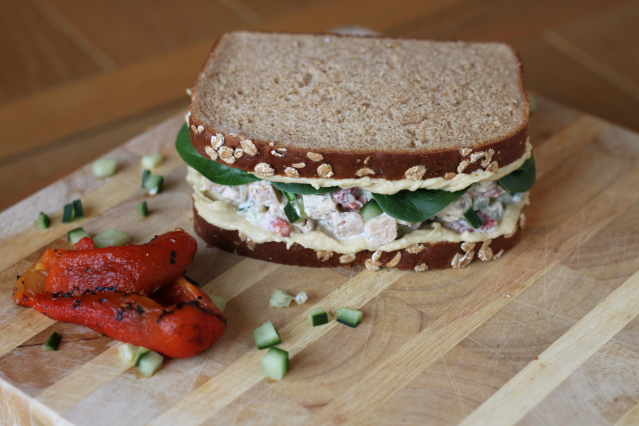
In case you are wondering, this sandwich is an awesome addition to any lunch box.  I made one, stuck it in my sandwich container and left it in the fridge.  Four hours later when I went to eat it, it was exactly the same as the one I made fresh.  That is huge to me, I strongly dislike soggy sandwiches.

sandwich orowheat 3_Fotor

Want to recreate my mediterranean masterpiece?  Follow the recipe below.  Want to win your own coupons and gift card from Oroweat?  Of course you do!  To follow Oroweat on Facebook click here.

a Rafflecopter giveaway

______________________________

Recipe

6 slices of Oroweat Organic Whole Wheat Bread

Greek Chicken Salad on Organic Oroweat Bread

2 roasted chicken breasts, cubed (great use for leftovers!)

1/3 cup roasted red bell pepper, diced

1/2 cup cucumber, diced

1/2 cup tzatziki sauce, (see recipe below or used organic store-bought)

6 tablespoon hummus

baby spinach

Tzatziki Sauce

1 cup 0% organic greek yogurt

1 tablespoon dried dill weed

1 tablespoon organic lemon juice

1 tablespoon organic olive oil

3 garlic organic garlic cloves, minced

sea salt and pepper to taste

Method

1.  Make the tzatziki sauce by mixing all the ingredients together and chilling for at least 4     hours.

2.  Mix together 1/2 cup of the tzatziki sauce with the chicken, bell peppers, and cucumber.

3.  To assemble sandwich place 1 tablespoon of hummus on one side of bread.  Place about 1/4 cup of the chicken salad on one slice of bread, top with a handful of spinach, and top with the another slice of bread.  Serve immediately or save for lunch time.

Disclosure:  I was given 3 coupons for 1 loaf of Oroweat Organic bread and a $25 gift card to purchase ingredients related to my sandwich creation.  All opinions are my own.  All facts regarding the bread are directly from Oroweat.

*Nutrition information given was taken directly from the Whole Wheat bread package.


Potato Leek Soup with Bacon – DYP Book Review – PLUS Giveaway!

potato leek 2_FotorPotatoes notoriously get a bad rap.  Dieters exclude them from their menu plans, grouping them with the bad carbs such as the ones in bread.  Casting them aside afraid they will add more unwanted pounds.

The round, eye filled root vegetable has been type cast as the evil villain due to its role as the greasy french fry and calorie dense chip.  I’m here to tell you that the poor potato has been misunderstood.  His good qualities need to be highlighted and celebrated by the health seeker. Potatoes are high in fiber, vitamin c,  B-complex, and magnesium.  They can lower blood pressure, cholesterol, improve brain function, prevent kidney stone formation, protect against cancer, and boost antioxidants.

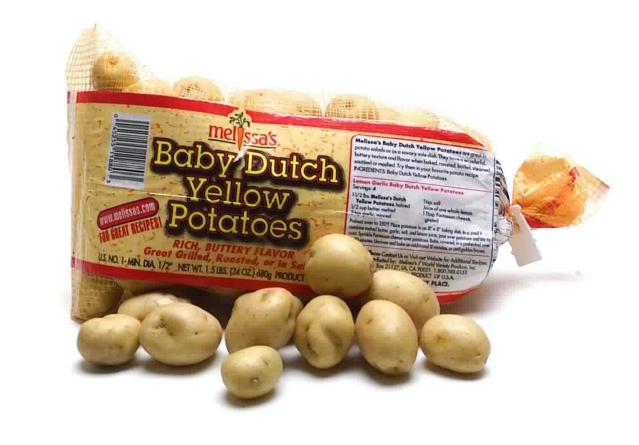
With that being said, there are so many different types, how is one to know which to use in a potato salad versus a stew.  Well, let me make it really easy for you.  Bake a russet and use Dutch Yellow Potatoes (DYPs) in everything else.  It’s really that simple. 1Baby Dutch Yellow 24 oz_Fotor Dutch Yellow Potatoes are so versatile they work for just about everything, even dessert.  On November 18th, I was at the book launch at Melissa’s Produce for their latest cookbook DYPs The Perfect Everyday Cookbook.  Since the DYP is exclusive to Melissa’s Produce it was only natural for them to compile a book full of the best recipes for the golden tuber.

I learned some interesting facts about potatoes at the event.  For instance, did you know that if a potato has a green hue to it you should not eat it.  The green hue is a warning sign that the potatoes have gone bad.  Amazingly, the DYP will not ever get the green hue, due to their extraordinarily long shelf life.  That fact is important considering the normal harvest time is August to October.  The potatoes are stored in giant temperature climate-controlled storage rooms for the rest of the year where they are harvested in Idaho.

DYPs are the most versatile potato because of their waxy texture and edible skin.  They cook quickly, about 6 – 10 minutes and won’t fall apart and get mushy.  It’s hard to over cook these adorable little guys.  I added them to my Pork Chili verde, simmered them for an hour, and they were perfectly cooked.  I used the Pee Wee size DYP for the chili, so there was zero prep before adding them into the green saucy goodness.  Look for the recipe in an upcoming post!

pb cookies_Fotor

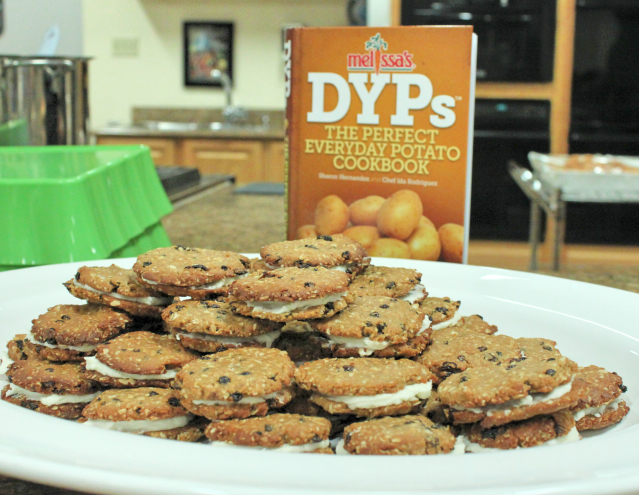
I have to encourage you to try a potato based dessert.  Especially the Gluten-Free Peanut Butter Cookie Sandwiches (pg. 261).  It’s no secret that I love peanut butter. These cookies were to die for!  I would have never thought to use potatoes as a gluten-free option in a dessert.  Well played Melissa’s!  I may have snuck a lot of them out the door that day.  I only shared one.

Whether you mash, roast, use them in a salad or dessert, you should keep always keep DYPs around.  I see them in my local Von’s year round.  Chances are they are in your local grocery store as well.

Yes, potatoes have carbs, but they are good carbs.  Carbs that if you are working out, you need as fuel.  They are a clean fuel that your body knows how to process.  Yes, you should eat them in moderation.  But, they are what I call happy carbs.  They are satiating so you actually have to eat fewer of them to feel full.

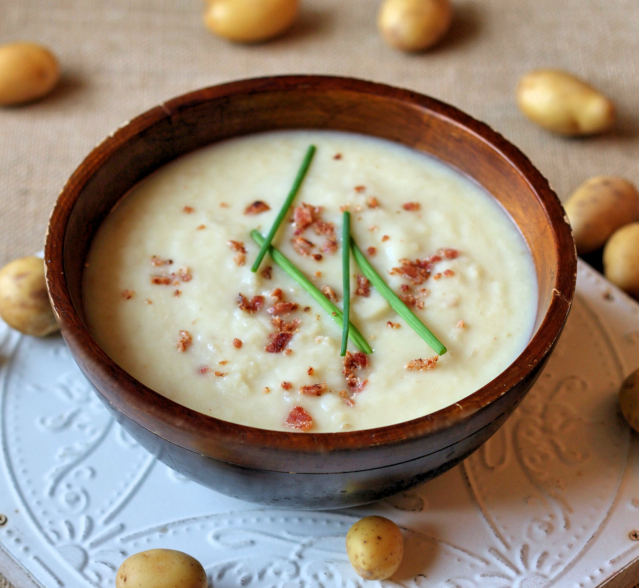
To give you a taste, pun intended, here is one of my favorite recipes from the DYP cookbook, DYP and Leek Soup.  Not only is it the simplest soup recipe I have ever come across, it’s so luscious and comforting.  Not to mention it’s also topped with crispy bacon.  To die for.

If you are interested in learning more about the perfect potato and how to use them in every season, click here to purchase this incredible DYP cookbook.  OR enter my giveaway to receive the book and a bag of potatoes!  You can enter in the box below (or if the box does not come up click on the rafflecopter link)!

a Rafflecopter giveaway

5.0 from 1 reviews
Potato Leek Soup with Bacon - DYP Book Review - PLUS Giveaway!
 
Author: 
Recipe type: Soup
Prep time: 
Cook time: 
Total time: 
Ingredients
  • 1½ cups DYPs, diced small
  • 1 package Melissa's Belgian Style Leeks, sliced lengthwise, then cut crosswise into 1 inch pieces (about 2 leeks)
  • 2 tablespoons butter
  • 2 cups water
  • 2 cups vegetable or chicken broth, plus more for thinning
  • ¾ teaspoon sea salt
  • white pepper to taste
  • 3 slices thick cut bacon, cooked and crumbled
Instructions
  1. Place the DYPs in a bowl and cover with water to prevent discoloration.
  2. Set a large stock pot over low heat and add butter. Add the leeks and cook, stirring occasionally, until softened. Drain the DYPs and add them to the leeks, along with water and the broth, sea salt, and white pepper.
  3. Increase heat to high and bring to a boil. Cover and reduce the heat to a simmer. Cook for 30 minutes, or until the DYPs are very soft.
  4. Pour the soup mixture into a blender, in batches if needed, and puree until smooth. (Be careful with hot liquids in blenders). Return the pureed soup to the pan and add broth to reach the desired consistency. Continue to cook over low heat till heated throughly.
  5. Serve in bowls topped with bacon.

Disclaimer:  I was not paid to promote or sponsor this post.  I was given a bag of DYPs and the DYP Cookbook from Melissa’s Produce.  All opinions are my own.   Please see disclaimer in the giveaway for details regarding to the prize and details of the contest.

The Big Book Of Sides – Cookbook Review – Whole Roasted Cauliflower

cauliflower_Fotor

This is the time of year I spend hours scouring the internet looking for the most impressive side to impress our relatives with at holiday gatherings.  Half the time I get distracted on Pinterest looking at other things besides a mouth-watering side.  Hours later I have nothing to show for it.

A couple of weeks ago I attended a cookbook release event at the Melissa’s Produce test kitchen in Vernon, CA.  The Big Book of Sides by Rick Rodgers was presented to an entire room of hungry bloggers.  We were treated to several recipes from the book, prepared by Melissa’s amazing chefs.  Life as a food blogger does not suck.

bekah rick_Fotor

Rick is an Award winning cookbook author of more than 40 cookbooks.  This isn’t his first rodeo. His past experience has helped create an impressive collection. This compilation of inventive and traditional sides is the only place I will need to look when trying to impress the relatives.

There is something for everyone from stuffing and gravy to homemade green bean casserole and macaroni and cheese.  There are healthy sides and decadent comfort foods.   Even homemade dressings and step by step instructions to the perfect risotto.  If you have any occasion you need to bring a side dish for this book covers it all.

Among the dishes we were served was:

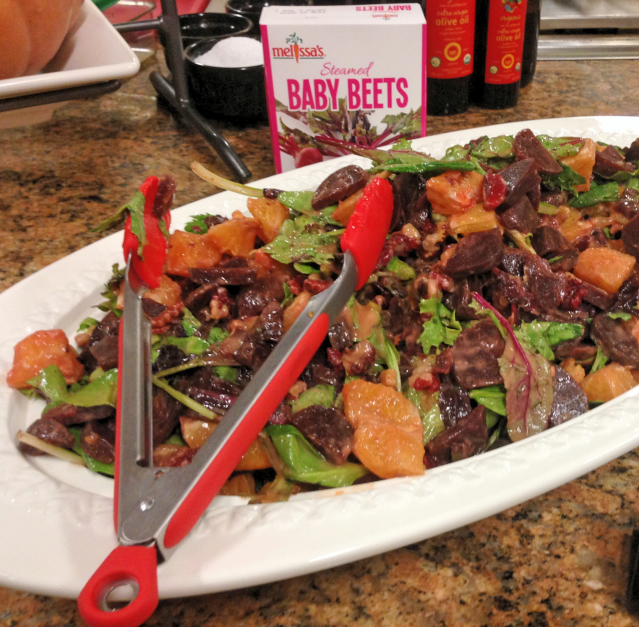
Roasted Beet and Orange Salad

beets_Fotor

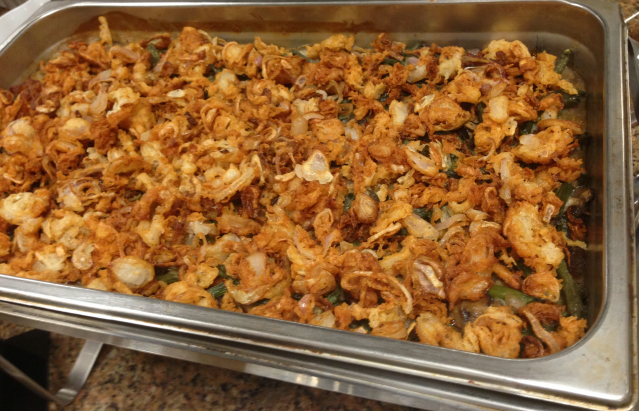
Homemade Green Bean and Mushroom Casserole with Crispy Shallots

green beans_Fotor

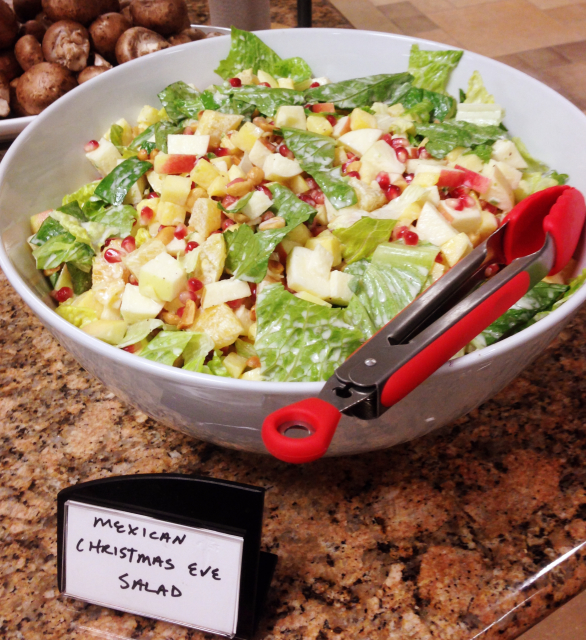
Mexican Christmas Eve Salad

christmas salad

Also on the menu was Roasted Brussel Sprouts with Bacon and Maple Syrup, Butternut Squash and Potato Gratin, and Ricks perfect Gravy.  When I say perfect, I mean perfect.

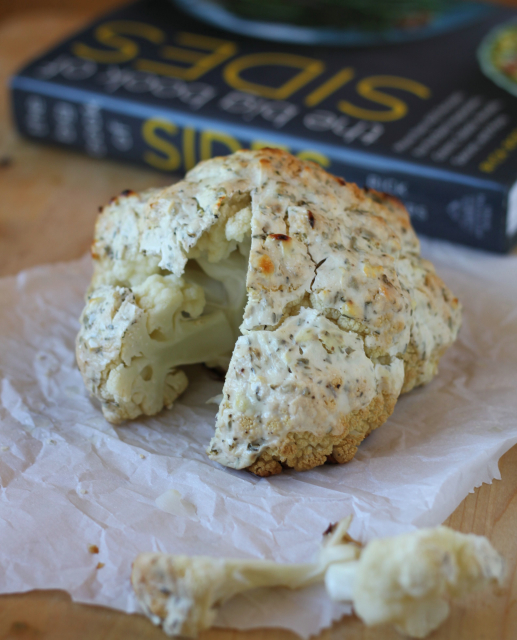
One of the recipes that jumped off the page and into my kitchen this week was the Whole Roasted Cauliflower with Za’tar Crust (page 67).  Not only would this make a great holiday side, but it is a fast, easy, tasty middle of the week side.  Middle eastern spices mixed with greek yogurt create an almost parmesan like crust over the entire cauliflower head.  If you haven’t decided what to bring to Thanksgiving dinner bring this.  As the description in the book says, “It’s a show stopper!”.  Below you will find the recipe card for this show stopping side dish.

To add this wonderful book to your collection you can click here or on the image below.  The book would make a great Christmas present for anyone who loves to cook or is learning to cook.


Disclosure:  I was not compensated for any portion of this post.  The book was given to my courtesy of Rick Rodgers cookbook launch event.  All opinions are my own.  My opinion is that you should click the link above and get this book into your hot little hands now.  :)

Whole Roasted Cauliflower with Za'tar Crust
 
Author: 
Nutrition Information
  • Serving size: ⅛ of the head
Recipe type: Vegetable, Side dish
Cuisine: Middle Eastern
This is a show stopper- an entire head of cauliflower roasted with a yogurt topping to a golden brown turn. For such a simple dish, it gets points for its dramatic appearance and complex flavors.
Ingredients
  • ¾ cup low-fat plain yogurt (I used greek)
  • 1 teaspoon dried oregano
  • 1 teaspoon dried thyme
  • 1 teaspoon sesame seeds
  • 1 teaspoon ground sumac
  • 2 garlic cloves, crushed through a press
  • 1 teaspoon kosher salt
  • ½ teaspoon freshly ground pepper
  • 1 head (about 2 lbs) cauliflower, green leaves trimmed
Instructions
  1. Position a rack in the center of the oven and preheat the oven to 400 degrees. Line a rimmed baking sheet with parchment paper or foil.
  2. In a medium bowl, whisk the yogurt, oregano, thyme, sesame seeds, sumac, garlic, salt and the pepper until smooth. Stand the cauliflower on the baking sheet and spread the yogurt mixture all over the top and sides.
  3. Roast until the topping is deep and golden brown and the cauliflower is tender when pierced with a long, thin knife, 50 minutes to 1 hour. Cut the cauliflower into wedges and serve.

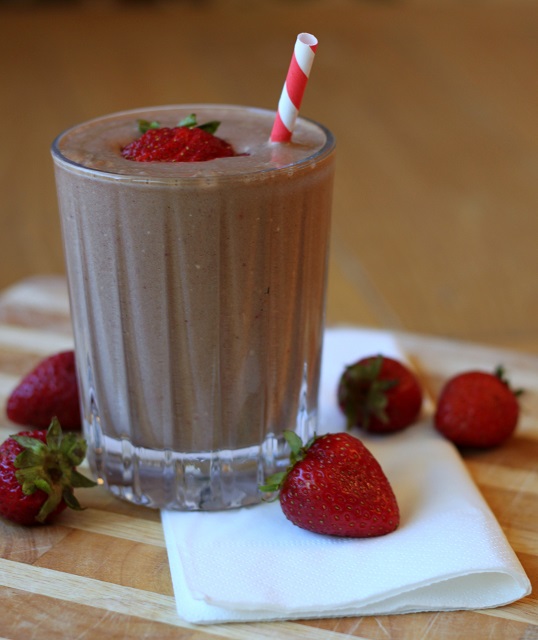
Chocolate Strawberry Protein Smoothie

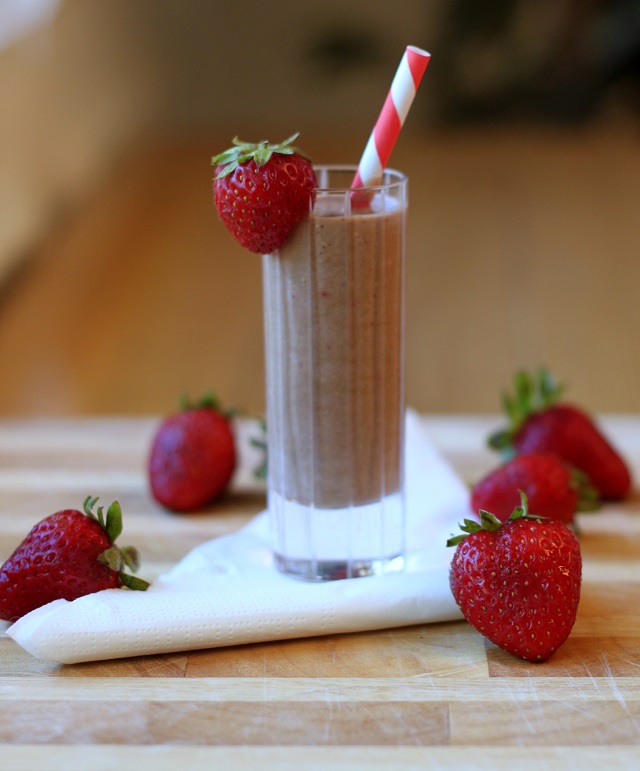
choc straw smoothie2 resized

It’s that time of year again moms and dads.  School is back in session.  No more night swimming or sleeping in.  The mom only overnight wine tasting tours are on hold.  The leisurely weekday breakfasts have come to a sudden halt.  There is a gloom in the hot molten air that can only be described as buzz kill.

I’m sure some of you are scratching your heads as to why we are already back in school.  Ask California’s Governor Jerry Brown to answer that one for you.  Apparently it had something to do with California Standard testing which has been dissolved.  Hey Jerry!  Can we have a September start date again?

Back to reality.  Literally.  6:10 a.m. wake up times are again my new reality for the next 10 months.  Back to being super organized in the morning, even more so since I have two in school.  Two completely different lunches to pack, two kids that lose shoes on a daily basis, two kids to keep from killing each other while they brush their teeth.  The most handsome third grader and first grader are now in my midst.

boys 1st day resize


With the organized chaos that ensues every morning sometimes I forget to make food for myself.  For instance, this morning I made 3 breakfast sandwiches with a side of strawberries.  As my husband and two boys were eating their sandwiches I looked down at the plate I set out for myself.  Empty.  With only 10 minutes before departure time my stomach growled loudly, reminiscent of the mountain lions that keep coming out of our foothills.  My only option was to make a smoothie, another sandwich wasn’t in my time constraint.

I’ve made this smoothie once before and inhaled it, creating massive brain freeze.  This time I used self control as to not repeat such idiocy.  In a moment of clarity I remembered that I had promised to post the recipe about a month ago on my Instagram.

So as promised here is the healthiest well balanced version of a chocolate covered strawberry you will ever ingest.  This smoothie has a whopping 26.5 grams of green organic whey free protein.  I started using the Orgain protein powder because it took care of my aversion to whey in my protein shakes.   This powder is a legit source of clean protein made from Organic Brown Rice Protein, Organic Sprouted Chia Seed, Organic Hemp Protein, and Organic Pea Protein.  The sugar comes from monk fruit and organic stevia.

We need to talk about the raw green chocolate powder in this smoothie.  If you haven’t started using raw green powder start today.  These powders are nutrient dense and cost less than buying the 1 pound of greens it takes to make 1 ounce.  Because the powder is raw the enzymes are still in tact when they are turned into powder form.  Raw greens will give you increased energy and repair cellular damage.  I know the next question, “what does it taste like?”.  My honest answer is I have no clue.  I always put it in a smoothie and I can’t taste it.

This surprisingly vegan, gluten-free smoothie will easily make it’s way into your rotation. It’s incredibly filling, nutrient dense, and above all it tastes like dessert.  I hope you enjoy it amongst the controlled chaos in your life.  Cheers!

choco straw smoothie5 resized


Now for some exciting news!   As of August 4, 2014 I became a full time food blogger!  Woohoo!  So what exactly does that mean?  More posts with more healthy, decadent recipes.  More giveaways, more awesomeness that you will notice in each post.  So stay tuned!  If you haven’t already, now would be the perfect time to subscribe to the blog so you don’t miss anything.  A lovely email with the newest post comes straight to your inbox.  No checking social media to make sure you didn’t miss anything.

You can subscribe by typing in your email on the right hand side of the homepage.

Questions?  Comments?  Feel free to leave a love note at the bottom of this post.

Feeling social?  We are on Pinterest, Instagram, Facebook and Twitter.


Best 100 Juices for Kids Review + Giveaway

(giveaway has ended)
My children love their morning glass of juice.  It has become a morning ritual that they look forward to.  I am not a huge fan of unnecessary sugar deposited into my kids.  Especially right before they are going to sit in a classroom all day.  But, their pediatrician actually recommended they enjoy one glass in the morning to alleviate morning time hypoglycemia.  So it was easy for this health loving mama to give them their one glass without guilt.  To keep the juice healthy I buy organic apple juice for them, and sometimes I get wild and crazy and pull out orange juice.

A few weeks ago I received a fabulous fellow blogger’s new cook book in the mail, Best 100 Juices  for Kids (The Harvard Common Press).  The fabulous author, Jessica Fisher, writes the popular blogs, Life as Mom, and Good Cheap Eats. Both blogs have been an inspiration for my own blog.  She is witty, brilliant, and gracious.

I was lucky enough to sit next to her at Camp Blogaway last year.  Immediately I liked her.  Shortly after we met, she took me under her wing.  As a new blogger I needed help to make my blog into what it is today.  She gave me the tools to improve my blog without batting an eye.   So when she asked who would like to review her new book, I eagerly shot up my hand.  It was the least I could do after all the help she has given me.

From the moment I cracked open 100 Juices, I was in love.  FishMama openly shares her journey through their family’s eating habit reform.   She talks about her days as a former soda junkie, something I can most definitely relate to.  About how that addiction led to unwanted dental visits for the family.

Best100JuicesForKids-1024x1024

There was one line that really grabbed me hook line and sinker in her intro.  She mentions that even though feeding her six children (FishKids) can be expensive, she wanted to make “every bite count”.  I internalized that statement.  Pondered what it meant for the G family, and my two kids.  I got the concept of the book in its entirety, as applied to our life.

After some quick research I found the organic apple juice I was buying from the store contained 15g more sugar than a freshly juiced apples.  Even though I thought I was making a healthy choice for my kids, I was not making every bite count.  Switching to freshly juiced apples would meet that goal.  The 15 g of hidden sugars wouldn’t exist and I would spend less money by making my own.

Even though this was the best choice, would my kids follow suit and drink the fresh concoctions?

I had the boys become official Best 100 Juice taste testers.  To my surprise and joy, they loved it.  Not only did they approve of the recipes, they loved the process of making them.  They are still enjoying the same morning ritual, but it has been improved.  Less sugar, more nutrition.  Just the way I like it.

I like that beyond writing 100 recipes Jessica also added in advice on how to juice on a budget, types of juicers, how to get the most juice out of them, and how to clean them.  Oh, and wonderful tips on making the experience fun for kids.

Among the juices are smoothies, popsicle, sports drinks, fizzy drinks or sparklies, fruit/veg drinks, and slushies too!   Such a fun array of recipes for parents that want their kids to learn healthy eating habits.

I am looking forward to making a new recipe every day of summer break with the boys.  Only 15 more days till that glorious day!  But, who’s counting?

__________________________________________________________________________________________

Recipes from 100 Best Juices for Kids

This is a great recipe for my two boys that are always on the go.  I personally despise the store-bought sports drinks.  Typical ‘ade’ drinks contain two kinds of artificial sugar, artificial flavoring and preservatives. These are not items I want my child rehydrating with. For FishMama’s clean version, I had all the easy pronounce ingredients on-hand.  This is a sports drink I will say YES! to.

Lemon-Lime Sports Ade

Lemon-Lime Sports Drink fishmama

3 1/2 cups water

6 tablespoons Honey Syrup (1 cup honey to 1 cup water, boiled)

2 tablespoons freshly squeezed lemon juice

2 tablespoons freshly squeezed lime juice

1/4 teaspoon fine sea salt

1.  In a pitcher, whisk together the water, honey syrup, lemon and lime juices, and salt.

2.  Store in a covered jar or container in the refrigerator.  Serve chilled.

___________________________________________________________________________________________________

I want to share one more of her brilliant recipes.  Not only could this be a fun breakfast for the kids, but also for mom and dad.  This fiber and protein filled smoothie will please everyone.  It has three of my favorite ingredients, banana, chocolate and peanut butter.  Yum!

Chocolate & Banana Nut Butter Blast

Chocolate Banana Nut Butter Blast fishmama

Serves 1

1 cup crushed ice

1 small banana, broken into chunks

1/2 cup milk

1 tablespoon natural unsweetened cocoa powder

1 tablespoon peanut butter or other nut or seed butter of your choice

1.  Place the ice, banana, milk, cocoa powder, and nut or seed butter in the blender cup or pitcher.

2.  Blend until very smooth.

 ____________________________________________

GIVEAWAY!

best juices book

Do you love these kid approved healthy recipes as much as I do?  I thought you would!  Well you are in luck my friend.  Harvard Common Press is giving away a copy of this incredible book.  To enter follow the rafflecopter link below.

Click here to enter Best 100 Juices for Kids Giveaway!


Disclosure:  I did not receive any compensation to write this post.  All opinions are my own. 

Photo Credit:  Harvard Common Press

7 Minute Hummus

hummus 5Being partially of middle eastern decent you would think I grew up on hummus.  Unfortunately, I did not meet hummus till I was 22 years old.  I will spend the rest of my life making up for its 22 year absence.

I’m going to assume that it was never present in my home due to the regional differences in my heritage.  Or it may have been considered hippy food.  My parents were and are far from being hippies.  How I ended up with a hippy soul I am not sure.

Anyhoo.

Fortunately, not only has it become a mainstream staple, but it is even easier to make.  Ingredients like tahini paste are no longer only sold at health food stores.  Olive oil, is present in most homes, and lemon trees seem to be gracing more properties than ever.

This healthy comfort food is also chocked full of health benefits.  Fiber, protein, and healthy fats make it a great way to snack.  I love dipping assorted vegetables in the creamy goodness.

Did you know chickpeas can help maintain your blood sugar?  They can also help prevent cholesterol from sticking to the walls of your blood vessels.

hummus 4

Apart from all of the omega 3’s and myriad of good for you reasons, hummus is super easy and fast to make.  Seven minutes may be an exaggeration in time it takes to make it.

For all of my lent practicing friends, hummus is a great alternative to meat on Fridays.  I suggest slathering some hummus inside a whole wheat pita, then stuffing it with roasted mushrooms, bell peppers, and zucchini.

Now that I am drooling, here is the recipe.

_______________________________________________________________________________

7 Minute Hummus

Serves 5

1 – 15 ounce can chickpeas (garbanzo beans)

1/4 cup fresh lemon juice

4 tablespoons tahini

1 garlic clove

2 tablespoons olive oil

1 teaspoon sea salt

2 tablespoons water

paprika, to sprinkle on top

Method

Rinse the chickpeas in a mesh strainer with cold water.  Set aside to drain.  Then pat dry.

Put all the ingredients in a food processor, minus the water and paprika.  Process till combined.

Scrape down the sides with a rubber spatula then add the water. Process again till smooth.

Serve in a bowl and sprinkle with paprika.  Traditionally olive oil is drizzled over the hummus to serve.  I do not because I do not want the added calories.

Can be refrigerated up to a week in an air tight container.

Servings: 5• Size: 1/4 Calories: 165• Fat: 9.3g • Carb: 15.4g • Fiber: 4.6g • Protein: 5.1g • Sugar:  1g Sodium: 600mg • Cholesterol: 0mg