Pure Barre Review – The Best Gym Alternatives Series

purebarre_Fotor

It’s that time of year where the resolutions have been broken and you might be contemplating never making one again.  Chances are, working out or eating healthy was one of those resolutions.  Before you give up, you should figure out the reason you are giving up.  For instance, maybe getting up at 4:15 a.m. isn’t for you.  Or a gym membership is too expensive.  Even better, you don’t want to be a part of the meat market atmosphere in a standard gym.

I stopped my gym membership last year.  Not only did I hate the meat market atmosphere, but also waiting for a treadmill, and fighting for a spin bike.  I’ve been working out at home since then. Trying to figure out what I wanted to trade the gym out for.

In December I had a brilliant idea, a metaphorical lightbulb went off.  Why not try all of the different options out there?  From there I can decide what works best for me, my schedule and my body.

I know I am not the only one trying to figure out what works for me.  I’m sure everyone reading this has the same issue.  The guilt from a stagnant gym membership is probably killing you.  Your unkept resolution still haunting you.  I’m sure you would love to find your ‘thing’.  So why not share my experiences with all of you, making your decision easier as well.

In this series of posts I will write about my experience at each of the non-gym establishments I visited.  I will give you an idea of what to expect, the price point and my take on it.  I have and will be attending a full variety of establishments from barre classes to personal trainers to free options.

equip

The first non-gym facility I checked out was the new Pure Barre located in Rancho Cucamonga.  Lets just say I was ecstatic when owner Ashley Sinkeldam enthusiastically agreed to be a part of this series.  Ever since I heard there was a Pure Barre opening five minutes from my house I’ve been dying to try it out.

Ashley recently opened the Rancho location in October of 2014.  Even though the gorgeous studio is still in it’s infancy, she and her instructors are well seasoned vets to the Pure Barre way of life.  They are a cohesive unit of *ledge sculptors that take their job seriously.

pure barre group
The Pure Barre Rancho Team – top: Courtney, Ashley (owner), Michelle R. , bottom: Jamie, Michelle G.

I’ll be honest, I had pre-conceived notions about what to expect.  Almost all of them were completely wrong.  I thought the fact that there was ballet barre in the room meant that there was some ballet involved.  Technically, no.  I thought that it would not be as hard as it was.  It was harder than I could have ever expected, and I LOVED that.

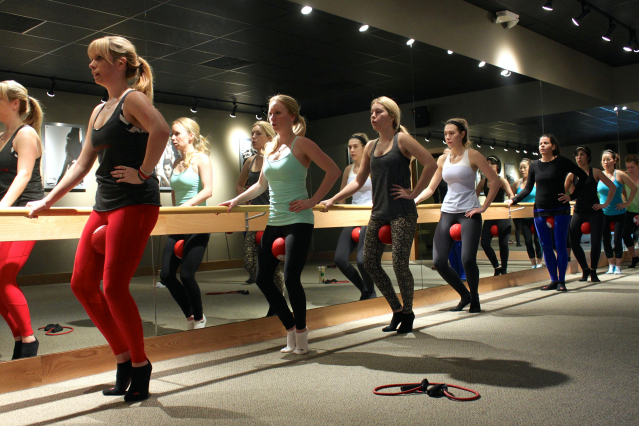
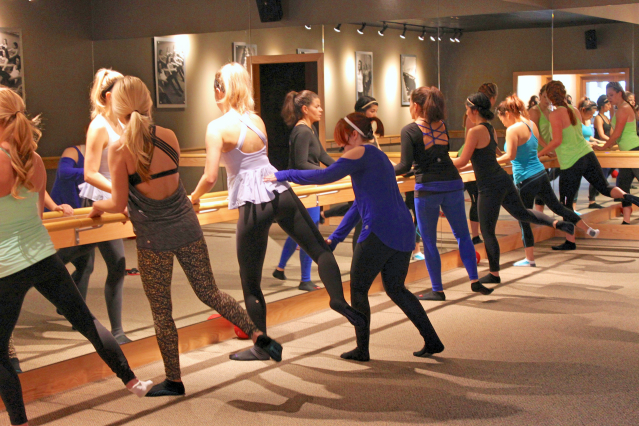
Each class is 55 minutes of booty burning, lifting, toning goodness.  There are no breaks, so you are getting more than your moneys worth for the short time you are there.  It takes a class or two to get used to the lingo and the movements, but once you do, you will be tucking, shaking and squeezing to perfection. There is a ‘Breaking Down the Barre’ class once a month that I would suggest to all newbies, (next one is January 17th @11 a.m.).

tuck pure barre

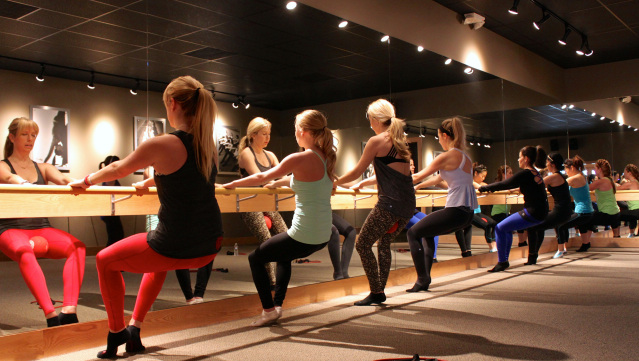
Don’t be scared to try this out, yes the pictures above show every girl in Lululemon attire, but that is only because the entire Lululemon staff came in to take a class together the day I was taking pictures.  I have been to four classes so far, and there are all shapes and sizes in each class.

Don’t be scared to get the technique right away.  The amazing instructors are very hands on and will correct you in a loving way.  No one will even notice.  All the other members are too busy embracing their shake (it means change is happening), and maintaining their own technique.  There are modifications for newbies.

pure barre squeeze

Do make sure you go in early on your first class to talk with the instructor about the lingo.  Knowing how to tuck properly makes a huge difference.

Do ask questions if you have them.  Like “when you say to move an inch is it really an inch?”. Small isometric moves people.

Do keep going even though the first class might be overwhelming.  You will get stronger and more knowledgeable with each class. Set a goal for yourself, to hold a move longer, or lose the modifications eventually.

Do go at your own pace, everyone has different skill levels and strength.  You are only in competition with yourself.  Repeat that to yourself.

pure barre jamie

What it is:  Pure Barre is a mesh of pilates, and yoga, utilizing isometric movements to “lift, tone, and burn” (#LTB) every inch of your body without any high impact moves.

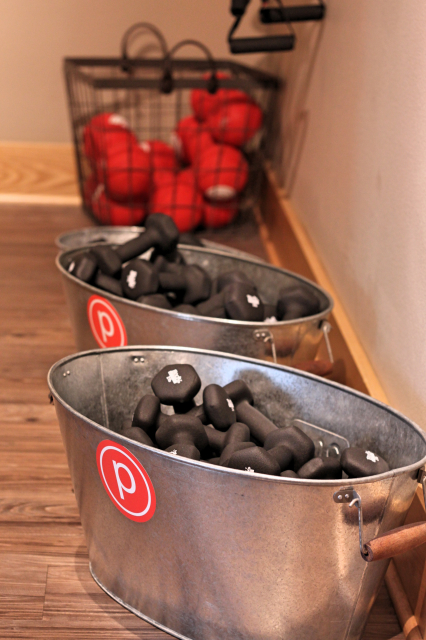
What to bring:  Just yourself in pants (no shorts allowed) and a tank, socks and some water.  They sell grippy socks for $12, which I would recommend, so you don’t slide all over the place.  All the equipment is provided.

What to expect:  Each class starts out with a warm up, then stretching.  From there you will head to the barre where you will earn your shake.  Figuratively and literally.  Expect to stretch right when you need it most.  After the barre you will head to the floor for targeted excercises. that will lift your ledge and tone your abs.  All followed by a much needed final stretch.

Where:  8792 19th Street, Rancho Cucamonga, CA 91701.  Click here for a location nearest you (there are 200 locations).  To call the Rancho location, dial (909) 944-4978.

When:  There are classes seven days a week.  Click here to find a time that works for you.

Cost:  $25 a class, if you buy them as a single class.  Each studio has a special price your first month $99 unlimited classes, this is what I reccomend..  It’s a an awesome deal!   BONUS:  If you mention Decadently Fit you will get a bonus week free**!  Click here to sign up!

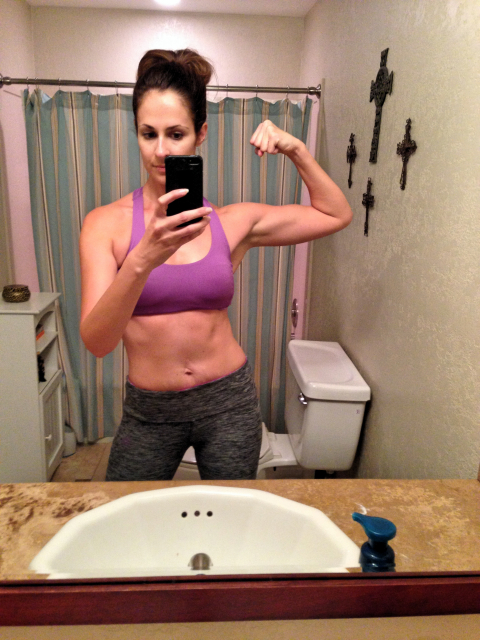
Why I really love it:  Pure Barre targets muscles that I never work out on my own.  I was extremely sore the first time, and I work out quite a lot.  In just four classes I am are already seeing signs of the infamous *ledge.  I love the fact that all of the exercises are low impact.  I can’t wait to see what a month of classes will do!

Ready to join me at the barre?

pure barre socks

*ledgeadjective –  the lack of space between your booty and the top of your thigh.  a.k.a. an extremely lifted and toned booty.  LOVE.

**Must purchase one month before adding the free week on.

Disclosure:  I was not compensated to review the classes at Pure Barre.  The fee for four classes was waived so that I could experience and review them for purposes pertaining to my blog series.  My absolute love for this type of exercise and the opinions expressed in this post are entirely my own.

Garlic Chili Black-Eyed Peas & Eggs

black eyed peas breakfast_Fotor

Happy New Year!  This is my first official recipe post of the year and the first one to show off my new philosophy. I am going for a more simple approach regarding recipes this year.  Quicker, simpler, cleaner.

We all have busy lives.  As mine has gotten perpetually busier I realized I haven’t had the time to make the recipes I was posting.  That’s a problem.

It’s not just the holidays, it’s the everyday busyness that starts the bad habits forming.  The “I don’t have time to make something right now so I am going to pick an unhealthy option” cycle.  So instead of complaining about the problem, I came up with a solution.  Stop complicating things.  Go the easy route and simplify the food I am making.  I am still getting the same result without the stress.

It’s a well know superstition that eating black-eyed peas in the New Year will bring you good luck.  My amazing friends at Melissa’s Produce recently sent me a lovely gift of black-eyed peas and their Clean Snax.  They know the way to my heart for sure.  Delicious, convenient, clean food.

cleansnacks_Fotor

The black-eyed peas come cooked.  There is nothing to do, but open the package, rinse them and break them apart.  In this dish I patted them dry with paper towels to prevent them from steaming in the pan. I didn’t want mushy peas.

This dish is perfect for a busy morning, especially after a great workout.  It comes together in a matter of minutes, about 10 to be exact.  It’s full of protein, fiber, and good fats.  Everything you need to rebuild muscle and level out your blood sugar.  In simple terms you will be fuller longer and give your body the nutrients it needs after working out.

I hope you are finding 2015 to be everything you hoped for.  Never forget you have the key to your destiny.  If you do the work you will see the results.  Don’t let excuses get in the way of your goal.  Find a solution to each excuse and nothing will stop you!  Happy New Year!

Click on the pictures below to buy these wonderful products.


Disclosure:  I was not compensated for writing this post. Melissa’s Produce supplied the black-eyed peas and clean snacks for my own use.  All opinions are my own.

Garlic Chili Black Eyed Peas & Eggs
 
Author: 
Nutrition Information
  • Serves: 2
  • Serving size: 2
  • Calories: 485
  • Fat: 26.6
  • Saturated fat: 13.8
  • Unsaturated fat: 1
  • Trans fat: 0
  • Carbohydrates: 33.6
  • Sugar: 15.9
  • Sodium: 618
  • Fiber: 10.7
  • Protein: 27.8
  • Cholesterol: 375
Recipe type: Breakfast
Prep time: 
Cook time: 
Total time: 
A hearty, protein filled breakfast that comes together in less than 10 minutes.
Ingredients
Instructions
  1. Mix together the ghee, garlic & herb salt, and chili powder
  2. Add the beans into the ghee mixture and combine thoroughly
  3. Heat a large skillet over medium-high heat. Add the beans when hot. Let the beans sit for two minutes, then stir, let sit another two minutes. Repeat for 8 minutes until the beans are heated through and are starting to brown slightly. Do not overcook. If the beans start popping pull off heat.
  4. In another pan, heat the final tablespoon of ghee over medium heat till melted. Spread over pan and fry eggs in ghee till desired temperature is reached. You can add a lid to steam the top of the eggs to cook faster.
  5. Serve two eggs on top of ½ of the beans.


The 10 Best Recipes of 2014

2015_FotorAnother year in the books.  Another year that went by at warp speed.  Is it just me, or does every year seem to go by faster and faster?  It feels like I live in a constant whirlwind.

2014 was a great year for Decadently Fit!  I learned a lot about how to be a healthier me, in turn sharing it with all of you.  I reviewed two handfuls of wonderful healthy cookbooks and was able to give them away to my wonderful readers.

I spent a ton of time with the amazing people at Melissa’s Produce sampling their stunning produce and eating the best food prepared by their chefs.

I started working with some wonderful brands that support healthy goals, such as Kitchen Aid, Latortilla Factory, Luna Olivo, Kerrygold Cheese and Butter, Klondike, Oroweat Organic, & Bob’s Red Mill.

I am so excited to start a new year blogging in 2015!  I have many changes coming to streamline my approach.  New philosophies that I want to try out, and new goals.

Speaking of goals here are a few of mine related to health and fitness:

1.  Conquer my sweet tooth once and for all

2.  Lose fat and gain muscle

3.  Do a Spartan Race or Tough Mudder

4.  Run a half marathon

5.  Start teaching healthy cooking classes

6.  Inspire as many people as I can to become the best versions of themselves, whatever that is to them.

What are your goals?  Use the comment section below to make it official by telling us what you want to achieve in 2015.  You are 45% more likely to complete a goal if you write it down.  Come on, tell me, I would love to encourage you!

Without further ado, here is the 10 best recipes of 2014:


 Number One:  Cauliflower Crust Pizza

cauliflower pizza 5

Number Two:  Peach Pie Protein Smoothie

peach-pie-protein-shake-2_Fotor

Number Three:  Paleo Carrot Cake

carrot-cake-slice-feature1_Fotor

Number Four:  Red Chili Chicken

hatch chili chicken tostada border

Number Five:  Broccoli Slaw Salad

broccoli slaw gawk border

Number Six:  Zucchini Lasagna

zucchini lasagna  border

Number Seven:  Strawberry Hot Wings

strawberry hot wings

Number Eight:  Chia Banana Pudding

chia banana maple pudding border

Number Nine:  Fudgy Flourless Chocolate Torte

flourless choc cake 3

Number Ten:  Mediterranean Dip

jajic holiday no words border


My Ultimate Sandwich Creation- Organic Oroweat Bread Giveaway

sandwich orowheat 1_Fotor

If you follow my blog posts on a regular basis you know that I am super picky about what I put in my body.  I like to eat organic whenever possible, especially when it comes to products/ingredients that are notoriously GMO (genetically modified) or filled with preservatives.

Oroweat recently asked me to review their line of organic breads and come up with an ultimate sandwich.  Even though they sent me coupons to try the bread and a gift card to buy ingredients for an ultimate sandwich, it was a no brainer to review the bread.  Not only is this bread already a staple in our household, it has been approved by my pickiest eaters, and more importantly by me.

oroweat_organic_breads_bkg_Fotor

The bread comes in two varieties, Grains & Seeds and Whole Wheat.  Both are fantastic, and made with all USDA certified organic ingredients.  *There are only 17g of carbs in each slice (, making it friendly to my carb counters.  *No high fructose corn syrup, and 3g of fiber.  The slices have a wonderful texture and hearty in size.  Best of all I buy it at my nearby Target.  No need to go to a specialty store to buy a healthy, delicious bread option.  Click here to find a store near you!

I was challenged to create an ultimate sandwich using the organic line of breads.  I love my sandwiches.  Since lunch is when I eat the highest amount of carbs, sandwiches are usually what I gravitate to.  They fill me up and keep me happy till snack time around 3 p.m.

sandwich open face_Fotor

I personally am super sick of turkey sandwiches at this point.  I know the barrage of turkey is happening again in a couple of weeks, so I decided to take another route.  After much thought, I decided to go with a Greek Chicken Salad Sandwich.

I’m so glad I went with a Mediterranean inspired sandwich.  It was easy to make and woke up my taste buds. This sandwich is a protein powerhouse with chicken, hummus and greek yogurt based tzatziki sauce.  The addition of cucumbers, roasted red bell peppers and spinach make the sandwich crunchy and nutrient dense.

sandwich with spinach_Fotor

In case you are wondering, this sandwich is an awesome addition to any lunch box.  I made one, stuck it in my sandwich container and left it in the fridge.  Four hours later when I went to eat it, it was exactly the same as the one I made fresh.  That is huge to me, I strongly dislike soggy sandwiches.

sandwich orowheat 3_Fotor

Want to recreate my mediterranean masterpiece?  Follow the recipe below.  Want to win your own coupons and gift card from Oroweat?  Of course you do!  To follow Oroweat on Facebook click here.

a Rafflecopter giveaway

______________________________

Recipe

6 slices of Oroweat Organic Whole Wheat Bread

Greek Chicken Salad on Organic Oroweat Bread

2 roasted chicken breasts, cubed (great use for leftovers!)

1/3 cup roasted red bell pepper, diced

1/2 cup cucumber, diced

1/2 cup tzatziki sauce, (see recipe below or used organic store-bought)

6 tablespoon hummus

baby spinach

Tzatziki Sauce

1 cup 0% organic greek yogurt

1 tablespoon dried dill weed

1 tablespoon organic lemon juice

1 tablespoon organic olive oil

3 garlic organic garlic cloves, minced

sea salt and pepper to taste

Method

1.  Make the tzatziki sauce by mixing all the ingredients together and chilling for at least 4     hours.

2.  Mix together 1/2 cup of the tzatziki sauce with the chicken, bell peppers, and cucumber.

3.  To assemble sandwich place 1 tablespoon of hummus on one side of bread.  Place about 1/4 cup of the chicken salad on one slice of bread, top with a handful of spinach, and top with the another slice of bread.  Serve immediately or save for lunch time.

Disclosure:  I was given 3 coupons for 1 loaf of Oroweat Organic bread and a $25 gift card to purchase ingredients related to my sandwich creation.  All opinions are my own.  All facts regarding the bread are directly from Oroweat.

*Nutrition information given was taken directly from the Whole Wheat bread package.


Potato Leek Soup with Bacon – DYP Book Review – PLUS Giveaway!

potato leek 2_FotorPotatoes notoriously get a bad rap.  Dieters exclude them from their menu plans, grouping them with the bad carbs such as the ones in bread.  Casting them aside afraid they will add more unwanted pounds.

The round, eye filled root vegetable has been type cast as the evil villain due to its role as the greasy french fry and calorie dense chip.  I’m here to tell you that the poor potato has been misunderstood.  His good qualities need to be highlighted and celebrated by the health seeker. Potatoes are high in fiber, vitamin c,  B-complex, and magnesium.  They can lower blood pressure, cholesterol, improve brain function, prevent kidney stone formation, protect against cancer, and boost antioxidants.

With that being said, there are so many different types, how is one to know which to use in a potato salad versus a stew.  Well, let me make it really easy for you.  Bake a russet and use Dutch Yellow Potatoes (DYPs) in everything else.  It’s really that simple. 1Baby Dutch Yellow 24 oz_Fotor Dutch Yellow Potatoes are so versatile they work for just about everything, even dessert.  On November 18th, I was at the book launch at Melissa’s Produce for their latest cookbook DYPs The Perfect Everyday Cookbook.  Since the DYP is exclusive to Melissa’s Produce it was only natural for them to compile a book full of the best recipes for the golden tuber.

I learned some interesting facts about potatoes at the event.  For instance, did you know that if a potato has a green hue to it you should not eat it.  The green hue is a warning sign that the potatoes have gone bad.  Amazingly, the DYP will not ever get the green hue, due to their extraordinarily long shelf life.  That fact is important considering the normal harvest time is August to October.  The potatoes are stored in giant temperature climate-controlled storage rooms for the rest of the year where they are harvested in Idaho.

DYPs are the most versatile potato because of their waxy texture and edible skin.  They cook quickly, about 6 – 10 minutes and won’t fall apart and get mushy.  It’s hard to over cook these adorable little guys.  I added them to my Pork Chili verde, simmered them for an hour, and they were perfectly cooked.  I used the Pee Wee size DYP for the chili, so there was zero prep before adding them into the green saucy goodness.  Look for the recipe in an upcoming post!

pb cookies_Fotor

I have to encourage you to try a potato based dessert.  Especially the Gluten-Free Peanut Butter Cookie Sandwiches (pg. 261).  It’s no secret that I love peanut butter. These cookies were to die for!  I would have never thought to use potatoes as a gluten-free option in a dessert.  Well played Melissa’s!  I may have snuck a lot of them out the door that day.  I only shared one.

Whether you mash, roast, use them in a salad or dessert, you should keep always keep DYPs around.  I see them in my local Von’s year round.  Chances are they are in your local grocery store as well.

Yes, potatoes have carbs, but they are good carbs.  Carbs that if you are working out, you need as fuel.  They are a clean fuel that your body knows how to process.  Yes, you should eat them in moderation.  But, they are what I call happy carbs.  They are satiating so you actually have to eat fewer of them to feel full.

To give you a taste, pun intended, here is one of my favorite recipes from the DYP cookbook, DYP and Leek Soup.  Not only is it the simplest soup recipe I have ever come across, it’s so luscious and comforting.  Not to mention it’s also topped with crispy bacon.  To die for.

If you are interested in learning more about the perfect potato and how to use them in every season, click here to purchase this incredible DYP cookbook.  OR enter my giveaway to receive the book and a bag of potatoes!  You can enter in the box below (or if the box does not come up click on the rafflecopter link)!

a Rafflecopter giveaway

5.0 from 1 reviews
Potato Leek Soup with Bacon - DYP Book Review - PLUS Giveaway!
 
Author: 
Recipe type: Soup
Prep time: 
Cook time: 
Total time: 
Ingredients
  • 1½ cups DYPs, diced small
  • 1 package Melissa's Belgian Style Leeks, sliced lengthwise, then cut crosswise into 1 inch pieces (about 2 leeks)
  • 2 tablespoons butter
  • 2 cups water
  • 2 cups vegetable or chicken broth, plus more for thinning
  • ¾ teaspoon sea salt
  • white pepper to taste
  • 3 slices thick cut bacon, cooked and crumbled
Instructions
  1. Place the DYPs in a bowl and cover with water to prevent discoloration.
  2. Set a large stock pot over low heat and add butter. Add the leeks and cook, stirring occasionally, until softened. Drain the DYPs and add them to the leeks, along with water and the broth, sea salt, and white pepper.
  3. Increase heat to high and bring to a boil. Cover and reduce the heat to a simmer. Cook for 30 minutes, or until the DYPs are very soft.
  4. Pour the soup mixture into a blender, in batches if needed, and puree until smooth. (Be careful with hot liquids in blenders). Return the pureed soup to the pan and add broth to reach the desired consistency. Continue to cook over low heat till heated throughly.
  5. Serve in bowls topped with bacon.

Disclaimer:  I was not paid to promote or sponsor this post.  I was given a bag of DYPs and the DYP Cookbook from Melissa’s Produce.  All opinions are my own.   Please see disclaimer in the giveaway for details regarding to the prize and details of the contest.

The Big Book Of Sides – Cookbook Review – Whole Roasted Cauliflower

cauliflower_Fotor

This is the time of year I spend hours scouring the internet looking for the most impressive side to impress our relatives with at holiday gatherings.  Half the time I get distracted on Pinterest looking at other things besides a mouth-watering side.  Hours later I have nothing to show for it.

A couple of weeks ago I attended a cookbook release event at the Melissa’s Produce test kitchen in Vernon, CA.  The Big Book of Sides by Rick Rodgers was presented to an entire room of hungry bloggers.  We were treated to several recipes from the book, prepared by Melissa’s amazing chefs.  Life as a food blogger does not suck.

bekah rick_Fotor

Rick is an Award winning cookbook author of more than 40 cookbooks.  This isn’t his first rodeo. His past experience has helped create an impressive collection. This compilation of inventive and traditional sides is the only place I will need to look when trying to impress the relatives.

There is something for everyone from stuffing and gravy to homemade green bean casserole and macaroni and cheese.  There are healthy sides and decadent comfort foods.   Even homemade dressings and step by step instructions to the perfect risotto.  If you have any occasion you need to bring a side dish for this book covers it all.

Among the dishes we were served was:

Roasted Beet and Orange Salad

beets_Fotor

Homemade Green Bean and Mushroom Casserole with Crispy Shallots

green beans_Fotor

Mexican Christmas Eve Salad

christmas salad

Also on the menu was Roasted Brussel Sprouts with Bacon and Maple Syrup, Butternut Squash and Potato Gratin, and Ricks perfect Gravy.  When I say perfect, I mean perfect.

One of the recipes that jumped off the page and into my kitchen this week was the Whole Roasted Cauliflower with Za’tar Crust (page 67).  Not only would this make a great holiday side, but it is a fast, easy, tasty middle of the week side.  Middle eastern spices mixed with greek yogurt create an almost parmesan like crust over the entire cauliflower head.  If you haven’t decided what to bring to Thanksgiving dinner bring this.  As the description in the book says, “It’s a show stopper!”.  Below you will find the recipe card for this show stopping side dish.

To add this wonderful book to your collection you can click here or on the image below.  The book would make a great Christmas present for anyone who loves to cook or is learning to cook.


Disclosure:  I was not compensated for any portion of this post.  The book was given to my courtesy of Rick Rodgers cookbook launch event.  All opinions are my own.  My opinion is that you should click the link above and get this book into your hot little hands now.  :)

Whole Roasted Cauliflower with Za'tar Crust
 
Author: 
Nutrition Information
  • Serving size: ⅛ of the head
Recipe type: Vegetable, Side dish
Cuisine: Middle Eastern
This is a show stopper- an entire head of cauliflower roasted with a yogurt topping to a golden brown turn. For such a simple dish, it gets points for its dramatic appearance and complex flavors.
Ingredients
  • ¾ cup low-fat plain yogurt (I used greek)
  • 1 teaspoon dried oregano
  • 1 teaspoon dried thyme
  • 1 teaspoon sesame seeds
  • 1 teaspoon ground sumac
  • 2 garlic cloves, crushed through a press
  • 1 teaspoon kosher salt
  • ½ teaspoon freshly ground pepper
  • 1 head (about 2 lbs) cauliflower, green leaves trimmed
Instructions
  1. Position a rack in the center of the oven and preheat the oven to 400 degrees. Line a rimmed baking sheet with parchment paper or foil.
  2. In a medium bowl, whisk the yogurt, oregano, thyme, sesame seeds, sumac, garlic, salt and the pepper until smooth. Stand the cauliflower on the baking sheet and spread the yogurt mixture all over the top and sides.
  3. Roast until the topping is deep and golden brown and the cauliflower is tender when pierced with a long, thin knife, 50 minutes to 1 hour. Cut the cauliflower into wedges and serve.

Simple Cranberry Sauce

cranberry sauce 2_FotorSigns are everywhere.  It’s all over our radios, every mall, every store and even our children’s art work. It’s coming like an earthquake in southern California.  The holidays are sneaking up on us and shaking our worlds with reckless abandon.

For some reason 2014 has gone by faster than any other in history.  Wasn’t Thanksgiving a month ago?!  If another person tells me how many days there are till Christmas I think I’ll scream.  I want to live in ignorant bliss.  Although, thanks to my obsessive compulsive tendencies I am fully aware that there are only 35 days till ‘C’ day.  Crap.

But first we have Thanksgiving to deal with.  The first of the over load our belly holidays.  The beginning of the winter weight season.

I know a lot of people go with the theory that everything is ok in moderation.  I personally do not believe in that theory.  Holiday food is a gateway ‘drug’ to, “Oh one of these buckeyes won’t hurt. I never eat like this so it’s o.k”.  At least in my experience it is.  Once I open that can of worms it’s so hard for me to close it.

So I prefer to make versions of holiday food that are healthier and cleaner than their original versions.  Over the next week I am going to try to post as many of them as possible.  We shall see how that goes.  No promises people.

First, I would like to introduce you to the simplest recipe on the face of the earth.  Simple ingredients, simple instructions, simple beauty.  One container of ruby-red cranberries is simmered together with fresh orange juice, ginger and honey.  No high fructose corn syrup here.  The mixture is reduced, and that is it.  Simple cranberry sauce, no fluff.

cranberry sauce simmer_Fotor 2

This sauce should be shown in all its simplistic glory on your Thanksgiving table.  But, should also be slathered on your post Black Friday shopping turkey and stuffing sandwich.  The tart, slightly sweet and tangy condiment will become a new holiday tradition.

I’ll be honest though, there is one thing I will miss about not using canned cranberry sauce.  You guessed it, the darn can lines.  Why are those so appealing?  I guess I should start working on a healthy version of jellied cranberry next.  Then nothing will be missing!

I hope you and your family have a wonderful Thanksgiving.  There are so many things to be thankful for, especially the little things.  Even can lines on the cranberry.  Those lines mean I can afford to eat.

Happy Thanksgiving!

Simple Cranberry Sauce
 
Author: 
Nutrition Information
  • Serves: 1 cup
  • Serving size: 1 tablespoon
  • Calories: 27
  • Carbohydrates: 5.7
  • Sugar: 3.4
  • Sodium: .7
  • Fiber: 1
  • Protein: .3
Recipe type: Condiment
Prep time: 
Cook time: 
Total time: 
A simple, clean cranberry sauce sweetened with agave and orange juice.
Ingredients
  • 7.5 ounces fresh or frozen cranberries
  • 1 cup orange juice
  • 2 inch piece of fresh ginger, skin removed
  • 2 tablespoons honey
  • ½ teaspoon of cayenne (optional for the adventurous foodie)
Instructions
  1. Combine all the ingredients in a small heavy sauce pan
  2. Bring to a gentle boil over medium low heat. Cranberries will begin to pop.
  3. Reduce heat and simmer till reduced for about 10 minutes, stirring occasionally.
  4. Sauce is done when all cranberries are cooked and resembles a jam like consistency.
Notes
Can be stored in refrigerator for up to 2 weeks.


Creamy Tomato Basil Soup

vampire blood

There are so many reasons I love fall.  The cooler weather.  The sporadic but present Southern California rain.  The Halloween candy bags filled with Reese’s Peanut Butter cups left for me to steal from my own children.  Yes, I steal candy from my children, don’t judge, you know you do it too.

My absolute favorite part of fall is the ability to make soup and grilled cheese for dinner without breaking out in an unattractive sweat.  Yes, that is important.  No one wants to start eating a hot bowl of creamy tomato soup and start sweating into it.  Yuck!

I am sure you are wondering how in the world do I eat tomato soup and grilled cheese while still making it healthy.  I do and don’t at the same time.  Yes, very contradictory.

As I mentioned in my last post, all of October, and now into November, I am eating all unprocessed foods.  I was eating mostly ‘clean’ foods before, but I still consume a lot of processed healthy and unhealthy foods.  I didn’t realize the amount of processed foods I was putting into my body until I completely took them out.

In the October Unprocessed challenge I didn’t eat anything I couldn’t make in my kitchen.  I made tortillas for the first time and loved them!  They were thicker than store-bought, but incredible.  I made wheat bread (from veganbaking.net) for my kid’s school lunches.  They went crazy for it because it was pretty much the tastiest, healthy wheat bread we have ever had.

wheat bread_Fotor

It was hard at times to keep on the unprocessed route.  I ate more peanut butter than I ever have in my entire life to fuel myself.  I love me some PB so it was fine by me.   I have never felt better in my life.  I have never had more definition and fewer headaches.  I never post ‘progress’ pictures, but I felt this time it was appropriate.  This is what eating unprocessed for 30 days can do:

bekah unprocessed

I’m pretty proud of myself!  I’m actually starting to see ab muscles!

Because I was making everything unprocessed, some nights I was tired of cooking by the end of the day.  Plus I had a lot of events that I was attending that needed new recipes or required me to cook.  One night I was over it.  I wanted something simple.  So I grabbed one of the home-made loaves of whole wheat bread, some Kerrygold Dubliner cheese, roasted jalapeños and Kerrygold butter.  The marriage of these ingredients created a melty, crunchy grilled cheese baby that I dipped into a pool of creamy tomato soup.

I loved the combo so much that I brought it to share at my monthly IEFB (Inland Empire Food Bloggers) meeting at fellow member Natalie Orozco’s (The Devil Wears Parlsey) house.  Of course I had to dress it up for the event, since our meeting was a Halloween theme.  Vampire blood test tube shots with Frankenstein and Bat grilled cheese fit in nicely among my fellow member’s awesome contributions.

choco bones myimp_Collage

Top:  Silly Cupcakes from My Imperfect Kitchen, middle left:  Autumn Harvest Croissants from It’s Okay to Eat the Cupcake, middle middle:  Meatloaf Skulls from The Devil Wears Parsley, middle right: Vegan Pumpkin Chocolate Chip Cookies, bottom:  Halloween Cookies with assorted frosting from The Devil Wears Parsley.

I hope you all had a healthy and fun Halloween.  Do those two words even go in the same sentence with Halloween?  Sure, why not?  Even if they don’t I hope I have inspired you to take an unprocessed challenge of your own.  It doesn’t have to mean only fruits and vegetables.  Just make your own clean foods and see what changes take place.  I dare you.


Disclosure:  I was not compensated for any portion of this post.  The Kerrygold cheese and butter was supplied to me by Kerrygold.  All opinions and ideas are my own unless otherwise stated.

Dairy Free Creamy Tomato Basil Soup
 
Author: 
Nutrition Information
  • Serves: 4-6 servings
  • Serving size: 1 cup
  • Calories: 129
  • Fat: 6.8
  • Saturated fat: .9
  • Carbohydrates: 13.2
  • Sugar: 7.9
  • Sodium: 977
  • Fiber: 3.8
  • Protein: 4.8
Recipe type: Soup
Prep time: 
Cook time: 
Total time: 
Adapted from Nordstrom Cafe's Tomato Basil Soup A hearty tomato soup that will stand up to your pickiest grilled cheese accompaniment.
Ingredients
  • 3 tablespoons olive oil
  • 4 large carrots, peeled and diced
  • 1 large onion, diced
  • 1 tablespoon dried basil
  • 3, 28 ounce cans organic diced tomatoes
  • 1 quart chicken stock (preferably homemade)
  • salt and pepper to taste
Instructions
  1. In a large, heavy saucepan, heat the olive oil over medium-high heat. Add carrot and onion and cook until beginning to soften, 10 minutes, then add basil and cook until vegetables are completely soft, about 5 minutes more.
  2. Add tomatoes and broth, bring to a boil, then reduce heat and simmer 30 to 45 minutes.
  3. Allow the soup to cool somewhat, then purée until smooth in a blender or food processor or using an immersion blender.
  4. Season to taste with salt and pepper, and serve warm.


Pumpkin Chocolate Chip Soft Batch Cookies

pumpkin cookies 2_Fotor resized


My favorite cookies growing up were the Keebler Soft Batch Chocolate Chip cookies.  My mom didn’t buy them often but when she did, lunch took on a whole new meaning.  Well let’s be honest, I totally ate them before any of my other lunch box items.  But, lunch was just happier when they were amongst my bologna sandwich and fruit punch.

About a year ago I bought some for old times sake.  I’m not sure what happened but they were not the same.  They were smaller and had an unpleasant after taste.  AKA, they ruined them.  Or I just grew up and my tastes changed.  Not sure which of the two it is, but I do not love them like I did.

Recently I have had a ton of requests for something pumpkin. Mostly for a clean version of any pumpkin comfort food/dessert.  It’s fall so it’s only fair to start receiving these requests, but there is one problem.  I am not a lover of all things pumpkin.  I do not get a PSL (pumpkin spice latte) the day they come out.  I can’t stand pumpkin pie.  The only form of pumpkin I love is my pumpkin cupcakes with cream cheese frosting and crumb topping.  They are to die for.  But, I am sure if I calculate the calories one would be in the 750 range.

I have a favorite clean cookie that a fellow blogger, Texan Erin conjured up.  They are amazing.  There is no butter, eggs, or grain.  They knocked my socks off the first time I had one.  Not because they were just a good chocolate chip cookie, but because the main ingredient was chick peas.  Yes, beans.  They make having dessert a less guilty experience when there is that much fiber present.

I had a crazy idea of playing with her recipe, making it into a pumpkin cookie.  Instead of the peanut butter I used organic pumpkin puree.  Since pure maple syrup and pumpkin go together like peanut butter and jelly I used it to sweeten the batter.  Plus, the cookies could be labeled purely vegan without the honey.

I used traditional pumpkin spices; cinnamon, ginger and nutmeg, to give the cookie a fall type feel.  My favorite part of Erin’s cookie is the melted chocolate strewn throughout.  So instead of a chemical laden chocolate chips I gave Enjoy Life vegan chocolate chips a try.  I was extremely hesitant.  I figured it would be obvious they were vegan.  Maybe a weird after taste?  Nothing.  The chips tasted exactly like their GMO filled rivals.

pumpkin cookies 4_Fotor resized

Fingers crossed I scooped mounds of chocolate chip pumpkin batter on a silpat and popped them into a 350 degree oven.  They had to stay in much longer than the original version, but what emerged from the oven at 25 minutes was firm outside and pillowy soft inside.  It was reminiscent of the soft batch cookies from my childhood, but with a blast of fall goodness.

I had all of the usual picky taste testers try them.  I am happy to announce that even though none of us are pumpkin fans, the cookies were given 4 thumbs up.  2 kids, 2 adults liked them.  The boys had no idea what the ingredients were, but they liked them, and that is all that mattered to me.  Who doesn’t like a good chocolate chip cookie?

The only fair warning I will give you is that 2 out of the 4 of us wanted them crisper on the outside.  That part is up to you.  Flatten them a little after scooping them out and leave them in longer if you want a crispy outside.

Nutritionally these babies are a great choice for an afternoon snack or dessert.  There is only 136 calories, and a high fiber content for two cookies, coming in at 4.2 grams.

For all of you pumpkin lovers I hope this recipe helps kick off the beginning of pumpkin season, I mean fall.  Don’t forget to share this post with your friends.  Hey, they might even make them for you!


Disclosure:  I was not compensated for any portion of this post.  All opinion are my own.

5.0 from 1 reviews
Pumpkin Chocolate Chip Soft Batch Cookies
 
Author: 
Nutrition Information
  • Serves: 20 cookies
  • Serving size: 2 cookies
  • Calories: 136
  • Fat: 5.1
  • Saturated fat: 2.4
  • Carbohydrates: 17.8
  • Sugar: 10
  • Sodium: 60.1
  • Fiber: 4.2
  • Protein: 4
Recipe type: Dessert
Prep time: 
Cook time: 
Total time: 
Crisp on the outside, pillowy soft on the inside. A clean, fall version of soft batch cookies.
Ingredients
  • 1½ cups chick peas, rinsed and patted dry
  • ½ cup pumpkin puree
  • 2 tablespoon pure maple syrup
  • ⅛ teaspoon sea salt
  • 1 teaspoon ground cinnamon
  • ½ teaspoon ground nutmeg
  • ¼ teaspoon ground ginger
  • 1 teaspoon baking powder
  • ½ cup, Enjoy Life mini chocolate chips
Instructions
  1. Pre-heat oven to 350 degrees.
  2. Put all the ingredients except chocolate chips in a food processor and puree till smooth.
  3. Remove blade from the food processor and stir in chocolate chips. Batter will be moist but should be able to be formed.
  4. Using a melon baller scoop out batter onto a silpat baking sheet, pressing down each mound of dough slightly to form a circle.
  5. Bake for 20 -30 minutes depending on how crisp you prefer the outside.
  6. Let cool on the silpat.
  7. Can be store up to a week in the refrigerator. Or 1 day in a tupperware in a cool dry place.


Good Cheap Eats & October Unprocessed

good-cheap-eats-coverThe most frequent complaint I hear about eating healthy or even just eating clean is how expensive it can be.  I do a lot of work to make our grocery bill fit within the budget.  I wrote Top 12 Tips for Eating Healthy on a Budget in March to give my readers an insight into how I do it.  But honestly, it takes a lot of planning.  For those of my readers who need, “healthy, yet frugal” meals in one book, Good Cheap Eats is for you.

This book could not have come at a better time for me.  October 1st marked the first day of the “October Unprocessed” Challenge.  If you are unfamiliar with it, click here to read the official guide.  In summary, each person who pledges to go through all of October eating only food with whole ingredients.  If you can’t pronounce it, you don’t eat it.

October Unprocessed 2014

Each individual can make their own exceptions and rules so they don’t set themselves up for failure.  For instance, last weekend I did a mud run and camped all weekend with 30 other people.  I am made exceptions because of this.  They are my own personal exceptions.  But I am writing them down and making clear rules for myself to abide by.  For you that might look like giving up soda.  Or not eating blue box mac n’ cheese.  For everyone it will be different.

Although Good Cheap Eats does not solely focus on unprocessed foods, Jessica Fisher is a huge proponent of making meals from scratch, using whole ingredients.  Jessica defines this book best in her about section.  She says, “This book is a road map toward shopping wisely, choosing ingredients carefully, and planning meals that your family will enjoy; and of course, it’s full of recipes to help you do it with taste and style, all while staying under budget”.  Each dinner for four people is $10 or less.  Music to a healthy frugalista’s ears.
Tortilla Stack_IMG_4160_Fotor
There are a few recipes that stand out to me the most for my unprocessed challenge.  The first one is the Homemade Corn Tortillas.  Tortillas have been on my ‘make my own’ list for quite some time.  For some reason they seem so daunting.  Thanks to the 30 day challenge I can add these to the list of must have home-made pantry items.
Another recipe that immediately caught my eye and was super easy to make was her Skillet Poached Eggs with Spinach.  The picture alone should sell you on its pure awesomeness.  Protein paired with detoxifying greens, makes for a perfect breakfast, lunch or dinner for the super busy individual.  I’ve posted the recipe below to give you a taste of Good Cheap Eats.
Skillet Eggs (2)_Fotor
Not only do you get 200 money-saving, clean recipes, but also advice on how to eat out on the cheap, and how to make your menu even more budget friendly.  She also offers tips to save you time and a list of kitchen equipment that will ‘set you up for success’.
Like I said, this book could not come at a better time.  I have used it multiple times this week alone for unprocessed meal ideas.  Not only do I love these meals, but my family does too.  They are simple yet awesome eats.
Click here to purchase your copy.  Not only will you be purchasing valuable recipes, and ideas, but supporting an awesome mom.  Win, win!
Click here to purchase!

Disclosure:  I was not compensated in any way to review Good Cheap Eats.  I was given the book, that I will happily keep in my cookbook collection.  All opinions and comments are my own.

5.0 from 2 reviews
Skillet Poached Eggs with Spinach
 
Author: 
Nutrition Information
  • Serving size: 4
  • Calories: 234
  • Fat: 17.1
  • Saturated fat: 4
  • Unsaturated fat: .7
  • Carbohydrates: 7.6
  • Sugar: 1.8
  • Sodium: 164
  • Fiber: 2
  • Protein: 13.9
  • Cholesterol: 390
Recipe type: Breakfast, Lunch, Dinner
You can adjust the greens to ones that you prefer, and add ingredients like mushrooms and peppers or bacon. Use whatever you have on hand.
Ingredients
  • 2 tablespoons olive oil
  • 2 leeks, halved lengthwise and thinly sliced crosswise into half-moons
  • 5 ounces baby spinach
  • 8 large eggs
  • Kosher salt and freshly ground pepper
Instructions
  1. In a large skillet with a lid, heat the oil over medium heat until shimmering. Add the leeks and sauté until tender, 3 to 5 minutes. Add the spinach. Stir gently and cook until slightly wilted.
  2. Spread out the spinach mixture to create 8 small wells. Crack an egg into each well. Season to taste with salt and pepper.
  3. Cover and cook until the desired doneness is reached for the eggs, 5 to 8 minutes.