Category: Vegan

Pumpkin Chocolate Chip Soft Batch Cookies

pumpkin cookies 2_Fotor resized


My favorite cookies growing up were the Keebler Soft Batch Chocolate Chip cookies.  My mom didn’t buy them often but when she did, lunch took on a whole new meaning.  Well let’s be honest, I totally ate them before any of my other lunch box items.  But, lunch was just happier when they were amongst my bologna sandwich and fruit punch.

About a year ago I bought some for old times sake.  I’m not sure what happened but they were not the same.  They were smaller and had an unpleasant after taste.  AKA, they ruined them.  Or I just grew up and my tastes changed.  Not sure which of the two it is, but I do not love them like I did.

Recently I have had a ton of requests for something pumpkin. Mostly for a clean version of any pumpkin comfort food/dessert.  It’s fall so it’s only fair to start receiving these requests, but there is one problem.  I am not a lover of all things pumpkin.  I do not get a PSL (pumpkin spice latte) the day they come out.  I can’t stand pumpkin pie.  The only form of pumpkin I love is my pumpkin cupcakes with cream cheese frosting and crumb topping.  They are to die for.  But, I am sure if I calculate the calories one would be in the 750 range.

I have a favorite clean cookie that a fellow blogger, Texan Erin conjured up.  They are amazing.  There is no butter, eggs, or grain.  They knocked my socks off the first time I had one.  Not because they were just a good chocolate chip cookie, but because the main ingredient was chick peas.  Yes, beans.  They make having dessert a less guilty experience when there is that much fiber present.

I had a crazy idea of playing with her recipe, making it into a pumpkin cookie.  Instead of the peanut butter I used organic pumpkin puree.  Since pure maple syrup and pumpkin go together like peanut butter and jelly I used it to sweeten the batter.  Plus, the cookies could be labeled purely vegan without the honey.

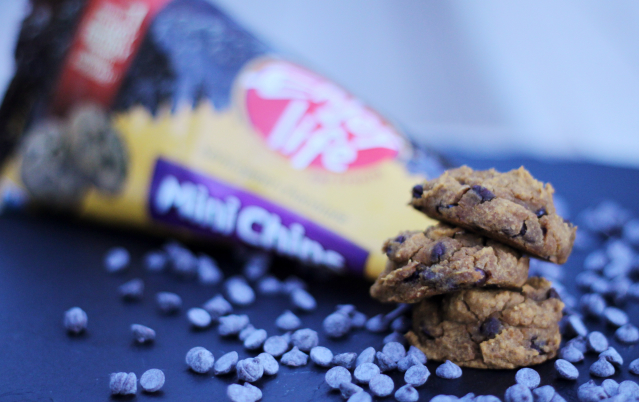
I used traditional pumpkin spices; cinnamon, ginger and nutmeg, to give the cookie a fall type feel.  My favorite part of Erin’s cookie is the melted chocolate strewn throughout.  So instead of a chemical laden chocolate chips I gave Enjoy Life vegan chocolate chips a try.  I was extremely hesitant.  I figured it would be obvious they were vegan.  Maybe a weird after taste?  Nothing.  The chips tasted exactly like their GMO filled rivals.

pumpkin cookies 4_Fotor resized

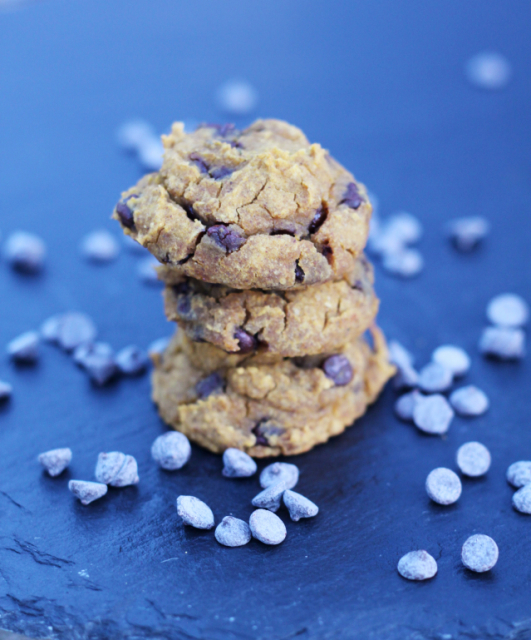
Fingers crossed I scooped mounds of chocolate chip pumpkin batter on a silpat and popped them into a 350 degree oven.  They had to stay in much longer than the original version, but what emerged from the oven at 25 minutes was firm outside and pillowy soft inside.  It was reminiscent of the soft batch cookies from my childhood, but with a blast of fall goodness.

I had all of the usual picky taste testers try them.  I am happy to announce that even though none of us are pumpkin fans, the cookies were given 4 thumbs up.  2 kids, 2 adults liked them.  The boys had no idea what the ingredients were, but they liked them, and that is all that mattered to me.  Who doesn’t like a good chocolate chip cookie?

The only fair warning I will give you is that 2 out of the 4 of us wanted them crisper on the outside.  That part is up to you.  Flatten them a little after scooping them out and leave them in longer if you want a crispy outside.

Nutritionally these babies are a great choice for an afternoon snack or dessert.  There is only 136 calories, and a high fiber content for two cookies, coming in at 4.2 grams.

For all of you pumpkin lovers I hope this recipe helps kick off the beginning of pumpkin season, I mean fall.  Don’t forget to share this post with your friends.  Hey, they might even make them for you!


Disclosure:  I was not compensated for any portion of this post.  All opinion are my own.

5.0 from 1 reviews
Pumpkin Chocolate Chip Soft Batch Cookies
 
Author: 
Nutrition Information
  • Serves: 20 cookies
  • Serving size: 2 cookies
  • Calories: 136
  • Fat: 5.1
  • Saturated fat: 2.4
  • Carbohydrates: 17.8
  • Sugar: 10
  • Sodium: 60.1
  • Fiber: 4.2
  • Protein: 4
Recipe type: Dessert
Prep time: 
Cook time: 
Total time: 
Crisp on the outside, pillowy soft on the inside. A clean, fall version of soft batch cookies.
Ingredients
  • 1½ cups chick peas, rinsed and patted dry
  • ½ cup pumpkin puree
  • 2 tablespoon pure maple syrup
  • ⅛ teaspoon sea salt
  • 1 teaspoon ground cinnamon
  • ½ teaspoon ground nutmeg
  • ¼ teaspoon ground ginger
  • 1 teaspoon baking powder
  • ½ cup, Enjoy Life mini chocolate chips
Instructions
  1. Pre-heat oven to 350 degrees.
  2. Put all the ingredients except chocolate chips in a food processor and puree till smooth.
  3. Remove blade from the food processor and stir in chocolate chips. Batter will be moist but should be able to be formed.
  4. Using a melon baller scoop out batter onto a silpat baking sheet, pressing down each mound of dough slightly to form a circle.
  5. Bake for 20 -30 minutes depending on how crisp you prefer the outside.
  6. Let cool on the silpat.
  7. Can be store up to a week in the refrigerator. Or 1 day in a tupperware in a cool dry place.


Lemon Panna Cotta with Dragon Fruit Gelee

panna cotta11

My new kick of trying and making new things continues. I can officially say that panna cotta and dragon fruit can be checked off the list.  I have always wanted to try them.  They both sound so mysterious and foreign to me.  So why not get crazy and try them at the same time!

I’ll be honest, I was not sure what to expect with the dragon fruit. She looked (yes she) so exotic and travelled.  I was scared and excited.  The outside surface looks scaly and feathery.  I needed to open her up and check her out.

The flesh of the fruit is stunning!  Nature’s pallete is simply amazing.  It was the brightest pink I could ever imagine seeing, speckled with seeds reminiscent of a kiwi.  Some varieties has white flesh too.

dragon fruit

What I thought it was going to taste like and what I got were completely different.  I expected a sour, yet sweet, but strong flavor.  In reality it was mild, slightly sweet, with a gentle texture less firm than a kiwi.

I can’t even remember why I thought to pair the dragon fruit with a panna cotta, let alone a lemon panna cotta, but it just sounded refreshing.  It was five thousand degrees outside and I wanted some relief.

What exactly is panna cotta?  Translated from it’s Northern Italian roots it means ‘cooked cream’.  Hmmm.  Well cream doesn’t get along with my stomach very often so I knew I would have to be creative to make it “me” friendly.  In it’s orginal form cream is combined together with sugar, vanilla and gelatin over heat and then sets in the fridge.  It can be served with fruit or plain.  I am so not a plain Jane, I knew the bright dragon fruit would be the perfect accessory for the panna cotta to shine.

Not ever having a panna cotta I had to do some serious research on what I was getting into.  So to the internet I went.  Apparently I am the only one that has never had panna cotta or made it.  There is a plethora of recipes out there.  Not one really screamed to me, so of course I made up my own hodge podge of a billion recipes.

panna cotta9 640

So lets recap.  I have never made a panna cotta in my life and made up my own recipe for it.  Then I decided to serve it to 3 other very experienced food bloggers at our second Inland Empire Food Bloggers meeting.  Not my brightest moment.  THANK GOD it worked.  Phew.  Although I have nothing to compare it to I thought it was darn good and my fellow bloggers liked it as well.

You will be excited to know that in addition to dragon fruit’s beauty she also has many health benefits; high in vitamin C, full of antioxidants, good fats and protein from the seeds, and 1 gram of fiber per 100g of fruit.

Typically pitaya is grown in South and Central America, Asia and Mexico.  When shopping for this beauty of a fruit look for skin that isn’t blemished and not molded.

Since I chose to make my panna cotta without any dairy this baby is pure vegan, gluten-free and scrumptious.

Now that you are armed with the knowledge to pick the best dragon fruit and make panna cotta, you should go for it.  Speaking of, there is a panna cotta in the fridge with my name on it.  Toodles!

*Disclaimer* I was not compensated for this post.  All opinions are my own.  The dragon fruit was supplied by Melissa’s Produce.  To purchase this product and many other incredible products click here.

Lemon Panna Cotta with Dragon Fruit Gelee
 
Author: 
Nutrition Information
  • Serves: 6
  • Serving size: 1
  • Calories: 203
  • Fat: 7.6
  • Saturated fat: 5
  • Unsaturated fat: .3
  • Trans fat: 0
  • Carbohydrates: 32
  • Sugar: 30
  • Sodium: 44.2
  • Fiber: .4
  • Protein: 3.5
  • Cholesterol: 0
Recipe type: Dessert
Cuisine: Italian
Prep time: 
Cook time: 
Total time: 
A bright and tangy dragon fruit gelee tops a light and tart lemon panna cotta.
Ingredients
  • Lemon Panna Cotta
  • 6 tablespoons lemon juice
  • 3 teaspoons, unflavored powdered gelatin
  • 1 cup full fat coconut milk
  • 1 cup almond milk
  • ½ cup honey (maple syrup for vegans)
  • 2 tablespoons lemon peel, grated or minced
  • 1 teaspoon vanilla extract
  • Dragon Fruit Gelee
  • 2 ounces of boiling water (can be done in microwave safe mug)
  • 2 teaspoons, unflavored powdered gelatin
  • ½ dragon fruit, pureed
  • 3 tablespoons honey (maple syrup for vegans)
  • 1 tablespoon lemon juice
Instructions
  1. Lemon Panna Cotta
  2. Sprinkle gelatin over the lemon juice, let sit for 10 minutes.
  3. Combine the remaining ingredients in a heavy saucepan until steam forms. Stir the gelatin into the warm mixture till dissolved over low heat.
  4. Pour mixture evenly into ramekins, mason jars or small glasses.
  5. Cover with plastic wrap and refrigerate till set.
  6. Dragon Fruit Gelee
  7. Stir the gelatin and water together till dissolved.
  8. In a medium bowl combine the dragon fruit juice, honey, and lemon juice.
  9. Combine the gelatin and dragon fruit mixtures.
  10. Distribute the dragon fruit mixture evenly over each set panna cotta.
  11. Refrigerate till gelee is set, about 4 hours.


Chocolate Strawberry Protein Smoothie

choc straw smoothie2 resized

It’s that time of year again moms and dads.  School is back in session.  No more night swimming or sleeping in.  The mom only overnight wine tasting tours are on hold.  The leisurely weekday breakfasts have come to a sudden halt.  There is a gloom in the hot molten air that can only be described as buzz kill.

I’m sure some of you are scratching your heads as to why we are already back in school.  Ask California’s Governor Jerry Brown to answer that one for you.  Apparently it had something to do with California Standard testing which has been dissolved.  Hey Jerry!  Can we have a September start date again?

Back to reality.  Literally.  6:10 a.m. wake up times are again my new reality for the next 10 months.  Back to being super organized in the morning, even more so since I have two in school.  Two completely different lunches to pack, two kids that lose shoes on a daily basis, two kids to keep from killing each other while they brush their teeth.  The most handsome third grader and first grader are now in my midst.

boys 1st day resize


With the organized chaos that ensues every morning sometimes I forget to make food for myself.  For instance, this morning I made 3 breakfast sandwiches with a side of strawberries.  As my husband and two boys were eating their sandwiches I looked down at the plate I set out for myself.  Empty.  With only 10 minutes before departure time my stomach growled loudly, reminiscent of the mountain lions that keep coming out of our foothills.  My only option was to make a smoothie, another sandwich wasn’t in my time constraint.

I’ve made this smoothie once before and inhaled it, creating massive brain freeze.  This time I used self control as to not repeat such idiocy.  In a moment of clarity I remembered that I had promised to post the recipe about a month ago on my Instagram.

So as promised here is the healthiest well balanced version of a chocolate covered strawberry you will ever ingest.  This smoothie has a whopping 26.5 grams of green organic whey free protein.  I started using the Orgain protein powder because it took care of my aversion to whey in my protein shakes.   This powder is a legit source of clean protein made from Organic Brown Rice Protein, Organic Sprouted Chia Seed, Organic Hemp Protein, and Organic Pea Protein.  The sugar comes from monk fruit and organic stevia.

We need to talk about the raw green chocolate powder in this smoothie.  If you haven’t started using raw green powder start today.  These powders are nutrient dense and cost less than buying the 1 pound of greens it takes to make 1 ounce.  Because the powder is raw the enzymes are still in tact when they are turned into powder form.  Raw greens will give you increased energy and repair cellular damage.  I know the next question, “what does it taste like?”.  My honest answer is I have no clue.  I always put it in a smoothie and I can’t taste it.

This surprisingly vegan, gluten-free smoothie will easily make it’s way into your rotation. It’s incredibly filling, nutrient dense, and above all it tastes like dessert.  I hope you enjoy it amongst the controlled chaos in your life.  Cheers!

choco straw smoothie5 resized


Now for some exciting news!   As of August 4, 2014 I became a full time food blogger!  Woohoo!  So what exactly does that mean?  More posts with more healthy, decadent recipes.  More giveaways, more awesomeness that you will notice in each post.  So stay tuned!  If you haven’t already, now would be the perfect time to subscribe to the blog so you don’t miss anything.  A lovely email with the newest post comes straight to your inbox.  No checking social media to make sure you didn’t miss anything.

You can subscribe by typing in your email on the right hand side of the homepage.

Questions?  Comments?  Feel free to leave a love note at the bottom of this post.

Feeling social?  We are on Pinterest, Instagram, Facebook and Twitter.


New York Style Vegan Cheesecake

vegan cheesecake1-2

There came a time in my journey towards a healthier me that I really started missing my former fatty friends.  No, I am not making a rude comment about anyone in my life.  I am referring to the unhealthy food choices that I constantly made.

I used to love McDonald’s french fries.  Actually, let me rephrase that, love, love, LOVED McDonald’s french fries.  There was something about those salty, hot sticks of pleasure that just made me happy.  Now they make me sick.  I am happy to say that fatty friend has not passed my lips in….well I can not remember when.  Good riddance.

Then there were the ridiculously large portions at any restaurant, which we would go to a couple of times a week.  More former fatty, GMO, preservative filled, friends like Chili’s, T.G.I. Friday’s, & Applebees.  Nothing they serve is fresh, and the amount of bad for you food that is put on your plate is mind-blowing.  I miss none of these restaurants.

Alas, there is one fatty friend my heart will always long for.  Who am I kidding?  My heart?  We all know it’s my stomach.  Let me explain it this way.  You know that one friend you had growing up that your mom told you was bad for you?  You know the one that never did anything good but made you feel great when you were around them?  Well that is how cheesecake is for me.  I know it’s bad for me, but I just can’t quit.

vegan cheesecake6

I know I am not alone in my love affair with cheesecake.  It’s the one dessert that most people can agree on.  It’s smooth, creamy, sweet and savory.  What’s not to love?  Well there is that one thing, the damn calories!  One slice of New York style cheesecake holds a whopping 710 calories.  In the midst of devouring a heavenly piece of cheesecake that is the last thing I think about.  But then it comes, the guilt.  The ‘Why do I love that stuff so much that I would do this to myself?!”, self loathing.

One of my infamous cravings came on the other night.  I knew I couldn’t go down the fatty friend road.  I ‘ve been working way too hard lately to undo all of my work.  I went on a hunt for  a healthy version that was great, not just good.  It had big shoes to fill if it was going to take the place as my new cheesecake BFF.

I stumbled upon a version on the Minimalist Baker(If you have never heard of them, click on over and check them out.  So awesome!).  They had a recipe for Simple Vegan Cheesecakes that sounded like what I was looking for.  I thought I would give it a shot, but hope for the best.

I changed the recipe to fit my needs and what I came up with was astounding.  I honestly could not tell that it was vegan, and gluten-free.  I hate labeling this dessert as vegan or gluten-free because of the stigma that comes with it.  Most people make faces when they hear those words.  But, in my very picky, meat and potato eating, brutally honest husband’s own words, “It is really, really good!”.

I can truly say I have found a new skinny friend to add to my growing repertoire.  Eating healthy isn’t always easy, but recipes like this make it much easier.

vegan cheesecake5___________________________________________________________

Vegan New York Style Cheesecake

Adapted from Minimalist Baker

12 Servings

Crust:

1 cup fresh dates, pits removed

1 cup salted almonds

1 tablespoon ghee (or vegan butter like Melt)

Filling:

1 1/2 cups cashews, soaked for 6 hours

1/4 cup fresh lemon juice

2 tablespoons vanilla

1/3 cup melted coconut oil

1/2 cup agave (honey for non-vegans)

1/2 cup + 2 tablespoons full fat coconut milk (refrigerated upside down 12 hours)

Topping:

1 8 oz. container vegan cream cheese

1/4 cup agave (honey for non-vegans)

2 tablespoons fresh lemon juice

1 tablespoon vanilla

Directions:

Line the bottom of a 9 inch spring form pan with parchment paper.

Soak the dates in hot water for 10 minutes.

In a food processor pulse the dates, almonds, and ghee till finely chopped and well combined.  Mixture should stick together when pressed into the bottom the spring form pan.  Evenly press the mixture into the bottom of the pan.  Put in the freezer to set while making the filling.

Using a food processor or blender combine all filling ingredients till completely combined and smooth.  Remove the crust from the freezer and pour the filling on top of the crust.  Using a spatula (or back of a spoon)  spread the mixture evenly in the pan.  Return back to freezer for 4 – 6 hours.

Using a food processor or blender puree the topping ingredients till smooth.  Pour over the filling, spread evenly.  Return to freezer for 2 hours.

To serve, cut into 12 equal slices, serve immediately or let thaw for 10 minutes before eating.  Store in freezer.

Nutrition

Servings: 12• Size 1/12th of the Cheesecake Calories 399: • Fat 27.4g • Carb: 36.8g • Fiber: 2.5g • Protein: 5.9g • Sugar:  28.6g Sodium: 215.5mg • Cholesterol: 2.8mg

Chocolate Paleo Energy Bites

energy balls 5I get hungry, a lot.  I eat 3 meals a day but I need daily snacks to hold me over to each meal.  I don’t purchase bad snack options because I know I will eat them if available.  BUT, my lovely husband used to bring tempting devilish snacks into our home.  Chips, donuts, oreos, you name it.  So every now and then I would get a craving for an item on the “Do not eat” list, and go nuts.

Thank goodness in the last month he has decided to come over to the fit side.  Hallelujah!  Every morning he wakes up at 5:45 a.m. to work out, and has cleaned up his diet tremendously.  Needless to say I am incredibly proud of him.

Due to his change in eating, the bad stuff is no longer crossing the threshold into our pantry.  Instead I need to make sure I have snacks for both of us now.  Two hangry people in the afternoon can be dangerous.  I keep the obvious staples, like hard-boiled eggs and hummus on hand, but sometimes that doesn’t quite hit my sweet spot.  My sweet tooth needs to be fed every now and then.

Chocolate Almond Energy Bites hit my sweet spot every time.  Two small bites pack almost 4g of protein, enough carbs (7g) to level your blood sugar.  The good fats and fiber give you a satiated feeling, making the bridge to your next meal a happy one.

The bites last in the fridge for two weeks, but can be frozen for up to 3 months.

Do yourself a favor and make a large batch so you always have a healthy, yet decadent option ready.

energy balls

_________________________________________________________________________

Recipe

Serves 12

1 1/2 cups whole almonds

1/2 cup dark chocolate chips (can use vegan chips, I love Enjoy Life!)

1/2 cup unsweetened dried flake coconut

2 teaspoons water

Directions:

In a food processor pulse the first 3 ingredients till smooth, but still has some texture.  Add in the water one teaspoon at a time, pulse till combined.

Using a melon baller scoop up the mixture, press mixture firmly, and then roll into a ball.

Refrigerate till firm or freeze till ready to use.  If frozen, thaw at room temperature for 30 minutes before eating.


Nutrition

Servings: 12• Size: 2 bites Calories 124: • Fat 9.5g • Carb: 7.7g • Fiber: 1.6g • Protein: 3.3g • Sugar:  2.6g Sodium: 92.9mg • Cholesterol: 2.2mg

Peach Crisp with Coconut Whipped Cream

peach crisp color fixedLast week, while trying out this whole gluten-free lifestyle, I learned a lot. What stuck out most to me was some times those with a gluten allergy also have a dairy allergy.  To be specific, a casein allergy.  Casein is a protein found in dairy. A very hard protein to digest.

Dairy and I have never gotten along, but at least I can somewhat tolerate casein once it has been cooked. I won’t go into anaphylactic shock,  instead I will feel like a tiny demon is using my stomach as a trampoline park.

Let’s face it, like gluten, dairy is in everything, especially desserts.   Having that removed from your food list permanently along with gluten would narrow your food choices significantly.

So, for my gluten, dairy, and egg free followers, here is a sweet treat.  This peach crisp is made with a combination of gluten-free flour (garbanzo bean flour, potato starch, tapioca flour, white sorghum flour, and fava bean flour), almond meal, and coconut sugar.  Tossed together with beautiful, juicy peaches.  The perfectly portioned peach treats are topped with a cinnamon infused crumble that is to die for.  A small mountain of dairy-free coconut whipped cream adorns the crisp.

Even though this dish was made with my gluten and dairy free followers in mind, this version of peachy goodness is great for everyone.  Do keep in mind, although the calories are lower than a regular peach crisp, this is not a low-carb dessert.  It is a clean dessert.  For a lower calorie, lower fat version of this dessert, omit the crumble.

Recipe

Serves 4

Toss together

2 peaches, cut into 1 inch pieces (you can choose to take the skin off, or leave it on)

1 tablespoon gluten-free flour (I used Bob’s Red Mill)

1 tablespoon almond meal

1 teaspoon ground cinnamon

1 tablespoon coconut sugar

Crumble

1 tablespoon coconut oil

1/2 cup gluten-free flour

2 tablespoons almond meal

1 1/2 tablespoons coconut sugar

1/2 teaspoon cinnamon

1 teaspoon pure vanilla

1/2 teaspoon sea salt

Whipped Cream

1 can of full fat coconut cream, chilled for 24 hours (do not freeze)

Directions:

Pre-heat the oven to 350 degrees.

Toss together the first 5 ingredients in a medium bowl.  Divide into 4 small ramekins.

In another medium bowl combine all ingredients using a fork.  The mixture should be crumbly.  Divide the crumb topping into 4, and top the peaches with the mixture.  Bake for 20 minutes.

While the crisp is baking, open the can of the coconut cream.  Scoop out the cream, reserving the water for your morning smoothie.  Using the whisk attachment on your mixer, whip the coconut cream, on medium high-speed, till it resembles whipped cream.  Refrigerate immediately.

When the crisps are done, let cool slightly.  Top with coconut cream.  Prepare to be blown away.

Don’t forget to pin this recipe so your friends can be blown away too.

Servings: 4• Size: 1 ramekin Calories: 219• Fat: 9g • Carb: 34g • Fiber: 4g • Protein: 4g • Sugar:  14g Sodium: 23mg • Cholesterol: 0mg