Category: Desserts

Desserts on Decadently Fit

Low Carb Whipped Cream

whipped cream

I’m a sweet junkie.  I’ll never be able to give up sweets no matter what.  I’ve tried and it’s never worked.  So, in order for me to maintain a carb/sugar level that doesn’t make my Fitness Pal scream I have to come up with alternatives.

When I was pregnant with my second son I had gestational diabetes.  It was awful considering I was also on bed rest due to pre-term labor and blood clots.  Every night before bed I had to eat a snack to maintain my blood sugar levels through the night.  Every night my husband/nurse would bring me strawberries and sugar-free Cool Whip.  We figured out it was the perfect carb/sweet amount I needed to maintain my blood sugar and give me the sugar fix my pregnant body was craving.

If you have ever read the ingredient list on a tub of Cool Whip you know that most of the words are extremely hard to pronounce, a.k.a a chemical storm of ‘ingredients’.  Although I was able to keep my sugar levels down with the sugar substitutes I was trading one evil for another.

Fast forward to now.  I have zero time to put together low-fat/low sugar desserts that will quench my insatiable sweet tooth.  Then it dawned on me, if I cut up a ton of strawberries on Sunday and come up with a low sugar, whole ingredient alternative for the whip cream I used to enjoy I would be set.  Then another light bulb precariously teetered above my chemistry and anatomy swollen brain, I have an Isi whip cream dispenser.  That would aid in the instant gratification need.  So, long story short this super simple quick recipe was born.  Yes, you do need a whip cream dispenser, but trust me it’s worth every penny.

Click the whip cream canister image to be directly taken to amazon to purchase!

5.0 from 1 reviews
Low Carb Whipped Cream
 
Author: 
Nutrition Information
  • Serves: 10 servings
  • Serving size: ¼ cup
  • Calories: 76
  • Fat: 7.2
  • Saturated fat: 4.8
  • Carbohydrates: 2.5
  • Sugar: 2.5
  • Sodium: 8
  • Protein: 0
  • Cholesterol: 32
Recipe type: Dessert
Prep time: 
Total time: 
Low Carb Whipped Cream
Ingredients
  • 1 tablespoon honey
  • 14 oz. whipping cream
  • 2 teaspoons vanilla
Instructions
  1. Melt the honey in a microwave safe dish on your melt function or on 10% power for 1 minute or until melted.
  2. Stir in the cream until combined with the honey, add in the vanilla.
  3. Transfer mixture to an Isi whip cream dispense, only filling till max fill line. Screw the lid on tightly then add nitrous canister, screw in tightly.
  4. Refrigerate for 4 hours or until cold.
  5. Shake before dispensing whip cream.


Click the whip cream canister image to be directly taken to amazon to purchase!

Pumpkin Chocolate Chip Soft Batch Cookies

pumpkin cookies 2_Fotor resized


My favorite cookies growing up were the Keebler Soft Batch Chocolate Chip cookies.  My mom didn’t buy them often but when she did, lunch took on a whole new meaning.  Well let’s be honest, I totally ate them before any of my other lunch box items.  But, lunch was just happier when they were amongst my bologna sandwich and fruit punch.

About a year ago I bought some for old times sake.  I’m not sure what happened but they were not the same.  They were smaller and had an unpleasant after taste.  AKA, they ruined them.  Or I just grew up and my tastes changed.  Not sure which of the two it is, but I do not love them like I did.

Recently I have had a ton of requests for something pumpkin. Mostly for a clean version of any pumpkin comfort food/dessert.  It’s fall so it’s only fair to start receiving these requests, but there is one problem.  I am not a lover of all things pumpkin.  I do not get a PSL (pumpkin spice latte) the day they come out.  I can’t stand pumpkin pie.  The only form of pumpkin I love is my pumpkin cupcakes with cream cheese frosting and crumb topping.  They are to die for.  But, I am sure if I calculate the calories one would be in the 750 range.

I have a favorite clean cookie that a fellow blogger, Texan Erin conjured up.  They are amazing.  There is no butter, eggs, or grain.  They knocked my socks off the first time I had one.  Not because they were just a good chocolate chip cookie, but because the main ingredient was chick peas.  Yes, beans.  They make having dessert a less guilty experience when there is that much fiber present.

I had a crazy idea of playing with her recipe, making it into a pumpkin cookie.  Instead of the peanut butter I used organic pumpkin puree.  Since pure maple syrup and pumpkin go together like peanut butter and jelly I used it to sweeten the batter.  Plus, the cookies could be labeled purely vegan without the honey.

I used traditional pumpkin spices; cinnamon, ginger and nutmeg, to give the cookie a fall type feel.  My favorite part of Erin’s cookie is the melted chocolate strewn throughout.  So instead of a chemical laden chocolate chips I gave Enjoy Life vegan chocolate chips a try.  I was extremely hesitant.  I figured it would be obvious they were vegan.  Maybe a weird after taste?  Nothing.  The chips tasted exactly like their GMO filled rivals.

pumpkin cookies 4_Fotor resized

Fingers crossed I scooped mounds of chocolate chip pumpkin batter on a silpat and popped them into a 350 degree oven.  They had to stay in much longer than the original version, but what emerged from the oven at 25 minutes was firm outside and pillowy soft inside.  It was reminiscent of the soft batch cookies from my childhood, but with a blast of fall goodness.

I had all of the usual picky taste testers try them.  I am happy to announce that even though none of us are pumpkin fans, the cookies were given 4 thumbs up.  2 kids, 2 adults liked them.  The boys had no idea what the ingredients were, but they liked them, and that is all that mattered to me.  Who doesn’t like a good chocolate chip cookie?

The only fair warning I will give you is that 2 out of the 4 of us wanted them crisper on the outside.  That part is up to you.  Flatten them a little after scooping them out and leave them in longer if you want a crispy outside.

Nutritionally these babies are a great choice for an afternoon snack or dessert.  There is only 136 calories, and a high fiber content for two cookies, coming in at 4.2 grams.

For all of you pumpkin lovers I hope this recipe helps kick off the beginning of pumpkin season, I mean fall.  Don’t forget to share this post with your friends.  Hey, they might even make them for you!


Disclosure:  I was not compensated for any portion of this post.  All opinion are my own.

5.0 from 1 reviews
Pumpkin Chocolate Chip Soft Batch Cookies
 
Author: 
Nutrition Information
  • Serves: 20 cookies
  • Serving size: 2 cookies
  • Calories: 136
  • Fat: 5.1
  • Saturated fat: 2.4
  • Carbohydrates: 17.8
  • Sugar: 10
  • Sodium: 60.1
  • Fiber: 4.2
  • Protein: 4
Recipe type: Dessert
Prep time: 
Cook time: 
Total time: 
Crisp on the outside, pillowy soft on the inside. A clean, fall version of soft batch cookies.
Ingredients
  • 1½ cups chick peas, rinsed and patted dry
  • ½ cup pumpkin puree
  • 2 tablespoon pure maple syrup
  • ⅛ teaspoon sea salt
  • 1 teaspoon ground cinnamon
  • ½ teaspoon ground nutmeg
  • ¼ teaspoon ground ginger
  • 1 teaspoon baking powder
  • ½ cup, Enjoy Life mini chocolate chips
Instructions
  1. Pre-heat oven to 350 degrees.
  2. Put all the ingredients except chocolate chips in a food processor and puree till smooth.
  3. Remove blade from the food processor and stir in chocolate chips. Batter will be moist but should be able to be formed.
  4. Using a melon baller scoop out batter onto a silpat baking sheet, pressing down each mound of dough slightly to form a circle.
  5. Bake for 20 -30 minutes depending on how crisp you prefer the outside.
  6. Let cool on the silpat.
  7. Can be store up to a week in the refrigerator. Or 1 day in a tupperware in a cool dry place.


The Great Pepper & Hatch Chilie Cookbook Review {giveaway}

Great Pepper Book-close up14-1 640I talked about my life long passion for cookbooks in one of my last posts.  I can honestly sit for hours and read them.  I get excited about learning new things and love seeing a traditional recipe tweaked into a modern version.

Yes, I am a culinary geek to the core.  My library of cookbooks is pretty vast.  Although I love finding new recipes on the internet, nothing is better than sitting with a book, feeling the page between your fingers, finding new inspiration at the turn of each page.

The Great Pepper Cookbook is no exception.  Melissa’s Produce doesn’t hold anything back when they create a new cookbook.  I have personally been to their test kitchen and tasted the recipes made by their chefs.  They are talented and inventive.  The recipes in this book speak to that.

Of course when I received the books I immediately started going through them.  In each book, the first section talks all about the scoville scale (how hot a pepper is), describes each pepper type in detail and how to prepare fresh and dried.

I love spicy food!  I actually carry around packets of tabasco in my purse, just in case there is an emergency.  True story.  I like some spice to my food, not overpowering, but a wake me up, warm me up spice.

In the Great Pepper Cookbook I found a multitude of recipes I wanted to make.  But there was one that HAD to be made first.  It combines my two food lusts together, spicy and chocolate.  Chile Chocolate Truffles, oh em gee, come to me.  I’ve had a love for spicy chocolate since I had it the first time at the San Diego Food & Wine Festival.  I couldn’t wait to taste that duo together again.

spicy truffle5

Making the truffles was actually very easy. I changed the heavy cream to coconut milk in my version due to my intolerance.  You simply heat the cream/coconut milk together with spicy peppers, combine with the chocolate, sesame seeds and raisins.  Then cool the concoction in the fridge for two hours.  Scoop the chocolate with a melon baller, roll into balls and toss in walnuts.  Yup, pretty much the best truffle I have ever had.  No joke.  I will have these babies in the fridge from her on.  Each truffle is only 80 calories. Serious bonus!

Now onto the Hatch Chile Cookbook.  I actually have had this book for over a year.  I went to the recipe tasting event at Melissa’s test kitchen when they launched the book.  I was able to taste the Honey Mustard Pretzel Crunch, Hatch Chile Corn Bread, Hatch Chile Deviled Eggs, Hatch Chile cookies, and even a lemonade infused with hatch chili ice cubes.  Every single item was incredible.

hatch cookies 640

I’ve made a lot of the recipes from the Hatch Chile book and even developed this Hatch Chile Corn dog because I love the flavor so much.  I wanted to showcase something new and different for you.  I love stuffing portabellos, I’ve made them into BBQ Chicken Pizzas, and every now and then I crave one stuffed with creamed spinach.  I never thought to make them into a frittata. Kudos on that idea Melissa’s!

hatch cookbook 640 2 3porto fritatta2 640


You have to make the Frittata-Stuffed Portobello Stuffed Mushroom Caps.  Such a fun, spicy way to serve eggs.  It would be amazing as a brunch item during the holidays.  The colors are even perfect with the addition of tomato, hatch chilies and basil.

Lucky for you it’s Hatch Chilie season and during this time of year you can attend a live roasting!  Click here to find a location roasting chilies near you.  Then go buy the book, it is a chile lovers must have.

Melissa’s produce has always been extremely generous with me.  Not only did they supply all the produce for this post, they have allowed me to share both recipes I mentioned.  AND, they offered up FOUR of The Great Pepper Cookbooks to giveaway!  Entering is super easy!  Just follow the instruction in the Rafflecopter link here ——->  a Rafflecopter giveaway

For more awesome sneak peeks at these cookbooks check out what my fellow IEFB bloggers did:  My Imperfect Kitchen, The Devil Wears Parsely & It’s Okay to Eat the Cupcake.


5.0 from 1 reviews
Chile-Chocolate Mole Truffles
 
Author: 
Nutrition Information
  • Serves: 36 (1 truffle)
  • Serving size: 1 truffle
  • Calories: 80
  • Fat: 6g
  • Saturated fat: 2.5g
  • Carbohydrates: 7g
  • Sugar: 5g
  • Sodium: 0mg
  • Fiber: 1g
  • Protein: 1g
  • Cholesterol: 5g
Recipe type: Dessert
Prep time: 
Cook time: 
Total time: 
These truffles are an exotic, subtly spicy, decadent treat
Ingredients
  • 10 ounces semi sweet chocolate chips (can use vegan)
  • 1 tablespoon white sesame seeds, toasted
  • 2 tablespoons seedless raisins, minced
  • 5 ounces heavy whipping cream
  • ¼ ounce (about a 1 x 2-inch piece) dried ancho chile pepper
  • ½ teaspoon ground dried chipotle pepper
  • ½ teaspoon ground cinnamon
  • ¼ teaspoon fresh lime zest
  • 1 cup walnuts, toasted and finely crushed
Instructions
  1. In a metal bowl, combine chocolate chips, sesame seeds, and raisins. In a small saucepan, heat cream over medium heat; stir in ancho chile, chipotle chile powder, cinnamon, and zest. Bring just to a simmer; immediately remove from heat. Remove and discard ancho, pour cream mixture over chocolate chip mixture, stirring constantly until chocolate is melted and mixture is completely blended. Let cool to room temperature; cover and refrigerate until firm, about 1 to 2 hours.
  2. Line a baking sheet with parchment paper. On a plate, spread the walnuts in an even layer. Using a ½ teaspoon measuring spoon (or melon baller) scoop out cooled chocolate mixture, form into a 1-inch ball, roll in crushed walnuts, and place on prepared baking sheet. Repeat with remaining chocolate mixture to form 36 truffles. Cover and refrigerate for at least 2 hours or up to 5 days. Serve.
Notes
Nutrition facts are for original recipe, not with coconut milk.

5.0 from 1 reviews
Frittata-Stuffed Portobello Mushroom Caps
 
Author: 
Recipe type: Breakfast
Ingredients
  • Oil for cooking spray
  • 12 large eggs
  • Melissa's My Grinder Organic Italian Seasoning
  • Melissa's My Grinder Rainbow Peppercorns
  • 1 tablespoon unsalted butter
  • 1 large heirloom tomato, top and bottom removed, thickly sliced into 4 rounds
  • Salt and freshly ground black pepper
  • 10 fresh basil leaves, cut into ribbons
  • 2 Hatch Chilies, roasted peeled, stemmed, seeded, and chopped
  • 4 large Portobello mushrooms stems and gills removed (see note below)
  • 4 ounces cream cheese, cubed
Instructions
  1. Preheat the oven to 350 degrees. Lightly oil a baking dish.
  2. In a large bowl, whisk together the eggs and a few grindings of the Italian seasoning and rainbow peppercorns. Set aside.
  3. In a large skillet, melt the butter over medium heat and cook the tomatoes, turning once, just until the tomatoes release their moisture, about 1 to 2 minutes. Season to taste with salt and pepper, then add the basil and chilies and continue cooking just until the basil begins to wilt, about 1 minute.
  4. To stuff the Portobellos, fit 1 tomato slice into each mushroom cap and one-fourth of the basil and chilies. Pour in egg mixture to nearly fill the mushroom. Top each Portobello with a few cubes of cream cheese.
  5. Bake the stuffed mushrooms in the prepared baking dish for 35 to 45 minutes, or until the filling is set.
Notes
Gently scooping out some of the meat of the mushroom cap often helps the stuffing fit nicely.


Lemon Panna Cotta with Dragon Fruit Gelee

panna cotta11

My new kick of trying and making new things continues. I can officially say that panna cotta and dragon fruit can be checked off the list.  I have always wanted to try them.  They both sound so mysterious and foreign to me.  So why not get crazy and try them at the same time!

I’ll be honest, I was not sure what to expect with the dragon fruit. She looked (yes she) so exotic and travelled.  I was scared and excited.  The outside surface looks scaly and feathery.  I needed to open her up and check her out.

The flesh of the fruit is stunning!  Nature’s pallete is simply amazing.  It was the brightest pink I could ever imagine seeing, speckled with seeds reminiscent of a kiwi.  Some varieties has white flesh too.

dragon fruit

What I thought it was going to taste like and what I got were completely different.  I expected a sour, yet sweet, but strong flavor.  In reality it was mild, slightly sweet, with a gentle texture less firm than a kiwi.

I can’t even remember why I thought to pair the dragon fruit with a panna cotta, let alone a lemon panna cotta, but it just sounded refreshing.  It was five thousand degrees outside and I wanted some relief.

What exactly is panna cotta?  Translated from it’s Northern Italian roots it means ‘cooked cream’.  Hmmm.  Well cream doesn’t get along with my stomach very often so I knew I would have to be creative to make it “me” friendly.  In it’s orginal form cream is combined together with sugar, vanilla and gelatin over heat and then sets in the fridge.  It can be served with fruit or plain.  I am so not a plain Jane, I knew the bright dragon fruit would be the perfect accessory for the panna cotta to shine.

Not ever having a panna cotta I had to do some serious research on what I was getting into.  So to the internet I went.  Apparently I am the only one that has never had panna cotta or made it.  There is a plethora of recipes out there.  Not one really screamed to me, so of course I made up my own hodge podge of a billion recipes.

panna cotta9 640

So lets recap.  I have never made a panna cotta in my life and made up my own recipe for it.  Then I decided to serve it to 3 other very experienced food bloggers at our second Inland Empire Food Bloggers meeting.  Not my brightest moment.  THANK GOD it worked.  Phew.  Although I have nothing to compare it to I thought it was darn good and my fellow bloggers liked it as well.

You will be excited to know that in addition to dragon fruit’s beauty she also has many health benefits; high in vitamin C, full of antioxidants, good fats and protein from the seeds, and 1 gram of fiber per 100g of fruit.

Typically pitaya is grown in South and Central America, Asia and Mexico.  When shopping for this beauty of a fruit look for skin that isn’t blemished and not molded.

Since I chose to make my panna cotta without any dairy this baby is pure vegan, gluten-free and scrumptious.

Now that you are armed with the knowledge to pick the best dragon fruit and make panna cotta, you should go for it.  Speaking of, there is a panna cotta in the fridge with my name on it.  Toodles!

*Disclaimer* I was not compensated for this post.  All opinions are my own.  The dragon fruit was supplied by Melissa’s Produce.  To purchase this product and many other incredible products click here.

Lemon Panna Cotta with Dragon Fruit Gelee
 
Author: 
Nutrition Information
  • Serves: 6
  • Serving size: 1
  • Calories: 203
  • Fat: 7.6
  • Saturated fat: 5
  • Unsaturated fat: .3
  • Trans fat: 0
  • Carbohydrates: 32
  • Sugar: 30
  • Sodium: 44.2
  • Fiber: .4
  • Protein: 3.5
  • Cholesterol: 0
Recipe type: Dessert
Cuisine: Italian
Prep time: 
Cook time: 
Total time: 
A bright and tangy dragon fruit gelee tops a light and tart lemon panna cotta.
Ingredients
  • Lemon Panna Cotta
  • 6 tablespoons lemon juice
  • 3 teaspoons, unflavored powdered gelatin
  • 1 cup full fat coconut milk
  • 1 cup almond milk
  • ½ cup honey (maple syrup for vegans)
  • 2 tablespoons lemon peel, grated or minced
  • 1 teaspoon vanilla extract
  • Dragon Fruit Gelee
  • 2 ounces of boiling water (can be done in microwave safe mug)
  • 2 teaspoons, unflavored powdered gelatin
  • ½ dragon fruit, pureed
  • 3 tablespoons honey (maple syrup for vegans)
  • 1 tablespoon lemon juice
Instructions
  1. Lemon Panna Cotta
  2. Sprinkle gelatin over the lemon juice, let sit for 10 minutes.
  3. Combine the remaining ingredients in a heavy saucepan until steam forms. Stir the gelatin into the warm mixture till dissolved over low heat.
  4. Pour mixture evenly into ramekins, mason jars or small glasses.
  5. Cover with plastic wrap and refrigerate till set.
  6. Dragon Fruit Gelee
  7. Stir the gelatin and water together till dissolved.
  8. In a medium bowl combine the dragon fruit juice, honey, and lemon juice.
  9. Combine the gelatin and dragon fruit mixtures.
  10. Distribute the dragon fruit mixture evenly over each set panna cotta.
  11. Refrigerate till gelee is set, about 4 hours.


New York Style Vegan Cheesecake

vegan cheesecake1-2

There came a time in my journey towards a healthier me that I really started missing my former fatty friends.  No, I am not making a rude comment about anyone in my life.  I am referring to the unhealthy food choices that I constantly made.

I used to love McDonald’s french fries.  Actually, let me rephrase that, love, love, LOVED McDonald’s french fries.  There was something about those salty, hot sticks of pleasure that just made me happy.  Now they make me sick.  I am happy to say that fatty friend has not passed my lips in….well I can not remember when.  Good riddance.

Then there were the ridiculously large portions at any restaurant, which we would go to a couple of times a week.  More former fatty, GMO, preservative filled, friends like Chili’s, T.G.I. Friday’s, & Applebees.  Nothing they serve is fresh, and the amount of bad for you food that is put on your plate is mind-blowing.  I miss none of these restaurants.

Alas, there is one fatty friend my heart will always long for.  Who am I kidding?  My heart?  We all know it’s my stomach.  Let me explain it this way.  You know that one friend you had growing up that your mom told you was bad for you?  You know the one that never did anything good but made you feel great when you were around them?  Well that is how cheesecake is for me.  I know it’s bad for me, but I just can’t quit.

vegan cheesecake6

I know I am not alone in my love affair with cheesecake.  It’s the one dessert that most people can agree on.  It’s smooth, creamy, sweet and savory.  What’s not to love?  Well there is that one thing, the damn calories!  One slice of New York style cheesecake holds a whopping 710 calories.  In the midst of devouring a heavenly piece of cheesecake that is the last thing I think about.  But then it comes, the guilt.  The ‘Why do I love that stuff so much that I would do this to myself?!”, self loathing.

One of my infamous cravings came on the other night.  I knew I couldn’t go down the fatty friend road.  I ‘ve been working way too hard lately to undo all of my work.  I went on a hunt for  a healthy version that was great, not just good.  It had big shoes to fill if it was going to take the place as my new cheesecake BFF.

I stumbled upon a version on the Minimalist Baker(If you have never heard of them, click on over and check them out.  So awesome!).  They had a recipe for Simple Vegan Cheesecakes that sounded like what I was looking for.  I thought I would give it a shot, but hope for the best.

I changed the recipe to fit my needs and what I came up with was astounding.  I honestly could not tell that it was vegan, and gluten-free.  I hate labeling this dessert as vegan or gluten-free because of the stigma that comes with it.  Most people make faces when they hear those words.  But, in my very picky, meat and potato eating, brutally honest husband’s own words, “It is really, really good!”.

I can truly say I have found a new skinny friend to add to my growing repertoire.  Eating healthy isn’t always easy, but recipes like this make it much easier.

vegan cheesecake5___________________________________________________________

Vegan New York Style Cheesecake

Adapted from Minimalist Baker

12 Servings

Crust:

1 cup fresh dates, pits removed

1 cup salted almonds

1 tablespoon ghee (or vegan butter like Melt)

Filling:

1 1/2 cups cashews, soaked for 6 hours

1/4 cup fresh lemon juice

2 tablespoons vanilla

1/3 cup melted coconut oil

1/2 cup agave (honey for non-vegans)

1/2 cup + 2 tablespoons full fat coconut milk (refrigerated upside down 12 hours)

Topping:

1 8 oz. container vegan cream cheese

1/4 cup agave (honey for non-vegans)

2 tablespoons fresh lemon juice

1 tablespoon vanilla

Directions:

Line the bottom of a 9 inch spring form pan with parchment paper.

Soak the dates in hot water for 10 minutes.

In a food processor pulse the dates, almonds, and ghee till finely chopped and well combined.  Mixture should stick together when pressed into the bottom the spring form pan.  Evenly press the mixture into the bottom of the pan.  Put in the freezer to set while making the filling.

Using a food processor or blender combine all filling ingredients till completely combined and smooth.  Remove the crust from the freezer and pour the filling on top of the crust.  Using a spatula (or back of a spoon)  spread the mixture evenly in the pan.  Return back to freezer for 4 – 6 hours.

Using a food processor or blender puree the topping ingredients till smooth.  Pour over the filling, spread evenly.  Return to freezer for 2 hours.

To serve, cut into 12 equal slices, serve immediately or let thaw for 10 minutes before eating.  Store in freezer.

Nutrition

Servings: 12• Size 1/12th of the Cheesecake Calories 399: • Fat 27.4g • Carb: 36.8g • Fiber: 2.5g • Protein: 5.9g • Sugar:  28.6g Sodium: 215.5mg • Cholesterol: 2.8mg

Chocolate Paleo Energy Bites

energy balls 5I get hungry, a lot.  I eat 3 meals a day but I need daily snacks to hold me over to each meal.  I don’t purchase bad snack options because I know I will eat them if available.  BUT, my lovely husband used to bring tempting devilish snacks into our home.  Chips, donuts, oreos, you name it.  So every now and then I would get a craving for an item on the “Do not eat” list, and go nuts.

Thank goodness in the last month he has decided to come over to the fit side.  Hallelujah!  Every morning he wakes up at 5:45 a.m. to work out, and has cleaned up his diet tremendously.  Needless to say I am incredibly proud of him.

Due to his change in eating, the bad stuff is no longer crossing the threshold into our pantry.  Instead I need to make sure I have snacks for both of us now.  Two hangry people in the afternoon can be dangerous.  I keep the obvious staples, like hard-boiled eggs and hummus on hand, but sometimes that doesn’t quite hit my sweet spot.  My sweet tooth needs to be fed every now and then.

Chocolate Almond Energy Bites hit my sweet spot every time.  Two small bites pack almost 4g of protein, enough carbs (7g) to level your blood sugar.  The good fats and fiber give you a satiated feeling, making the bridge to your next meal a happy one.

The bites last in the fridge for two weeks, but can be frozen for up to 3 months.

Do yourself a favor and make a large batch so you always have a healthy, yet decadent option ready.

energy balls

_________________________________________________________________________

Recipe

Serves 12

1 1/2 cups whole almonds

1/2 cup dark chocolate chips (can use vegan chips, I love Enjoy Life!)

1/2 cup unsweetened dried flake coconut

2 teaspoons water

Directions:

In a food processor pulse the first 3 ingredients till smooth, but still has some texture.  Add in the water one teaspoon at a time, pulse till combined.

Using a melon baller scoop up the mixture, press mixture firmly, and then roll into a ball.

Refrigerate till firm or freeze till ready to use.  If frozen, thaw at room temperature for 30 minutes before eating.


Nutrition

Servings: 12• Size: 2 bites Calories 124: • Fat 9.5g • Carb: 7.7g • Fiber: 1.6g • Protein: 3.3g • Sugar:  2.6g Sodium: 92.9mg • Cholesterol: 2.2mg

Best 100 Juices for Kids Review + Giveaway

(giveaway has ended)
My children love their morning glass of juice.  It has become a morning ritual that they look forward to.  I am not a huge fan of unnecessary sugar deposited into my kids.  Especially right before they are going to sit in a classroom all day.  But, their pediatrician actually recommended they enjoy one glass in the morning to alleviate morning time hypoglycemia.  So it was easy for this health loving mama to give them their one glass without guilt.  To keep the juice healthy I buy organic apple juice for them, and sometimes I get wild and crazy and pull out orange juice.

A few weeks ago I received a fabulous fellow blogger’s new cook book in the mail, Best 100 Juices  for Kids (The Harvard Common Press).  The fabulous author, Jessica Fisher, writes the popular blogs, Life as Mom, and Good Cheap Eats. Both blogs have been an inspiration for my own blog.  She is witty, brilliant, and gracious.

I was lucky enough to sit next to her at Camp Blogaway last year.  Immediately I liked her.  Shortly after we met, she took me under her wing.  As a new blogger I needed help to make my blog into what it is today.  She gave me the tools to improve my blog without batting an eye.   So when she asked who would like to review her new book, I eagerly shot up my hand.  It was the least I could do after all the help she has given me.

From the moment I cracked open 100 Juices, I was in love.  FishMama openly shares her journey through their family’s eating habit reform.   She talks about her days as a former soda junkie, something I can most definitely relate to.  About how that addiction led to unwanted dental visits for the family.

Best100JuicesForKids-1024x1024

There was one line that really grabbed me hook line and sinker in her intro.  She mentions that even though feeding her six children (FishKids) can be expensive, she wanted to make “every bite count”.  I internalized that statement.  Pondered what it meant for the G family, and my two kids.  I got the concept of the book in its entirety, as applied to our life.

After some quick research I found the organic apple juice I was buying from the store contained 15g more sugar than a freshly juiced apples.  Even though I thought I was making a healthy choice for my kids, I was not making every bite count.  Switching to freshly juiced apples would meet that goal.  The 15 g of hidden sugars wouldn’t exist and I would spend less money by making my own.

Even though this was the best choice, would my kids follow suit and drink the fresh concoctions?

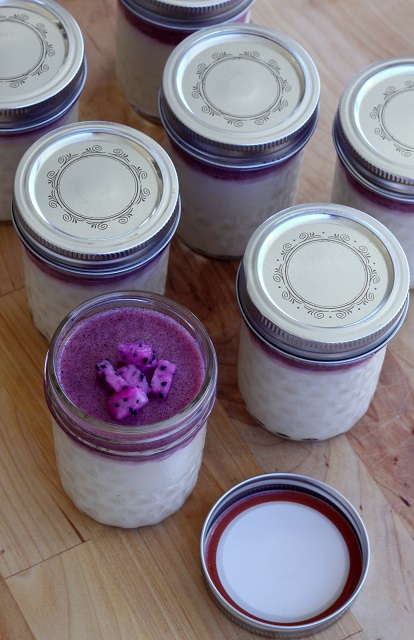
I had the boys become official Best 100 Juice taste testers.  To my surprise and joy, they loved it.  Not only did they approve of the recipes, they loved the process of making them.  They are still enjoying the same morning ritual, but it has been improved.  Less sugar, more nutrition.  Just the way I like it.

I like that beyond writing 100 recipes Jessica also added in advice on how to juice on a budget, types of juicers, how to get the most juice out of them, and how to clean them.  Oh, and wonderful tips on making the experience fun for kids.

Among the juices are smoothies, popsicle, sports drinks, fizzy drinks or sparklies, fruit/veg drinks, and slushies too!   Such a fun array of recipes for parents that want their kids to learn healthy eating habits.

I am looking forward to making a new recipe every day of summer break with the boys.  Only 15 more days till that glorious day!  But, who’s counting?

__________________________________________________________________________________________

Recipes from 100 Best Juices for Kids

This is a great recipe for my two boys that are always on the go.  I personally despise the store-bought sports drinks.  Typical ‘ade’ drinks contain two kinds of artificial sugar, artificial flavoring and preservatives. These are not items I want my child rehydrating with. For FishMama’s clean version, I had all the easy pronounce ingredients on-hand.  This is a sports drink I will say YES! to.

Lemon-Lime Sports Ade

Lemon-Lime Sports Drink fishmama

3 1/2 cups water

6 tablespoons Honey Syrup (1 cup honey to 1 cup water, boiled)

2 tablespoons freshly squeezed lemon juice

2 tablespoons freshly squeezed lime juice

1/4 teaspoon fine sea salt

1.  In a pitcher, whisk together the water, honey syrup, lemon and lime juices, and salt.

2.  Store in a covered jar or container in the refrigerator.  Serve chilled.

___________________________________________________________________________________________________

I want to share one more of her brilliant recipes.  Not only could this be a fun breakfast for the kids, but also for mom and dad.  This fiber and protein filled smoothie will please everyone.  It has three of my favorite ingredients, banana, chocolate and peanut butter.  Yum!

Chocolate & Banana Nut Butter Blast

Chocolate Banana Nut Butter Blast fishmama

Serves 1

1 cup crushed ice

1 small banana, broken into chunks

1/2 cup milk

1 tablespoon natural unsweetened cocoa powder

1 tablespoon peanut butter or other nut or seed butter of your choice

1.  Place the ice, banana, milk, cocoa powder, and nut or seed butter in the blender cup or pitcher.

2.  Blend until very smooth.

 ____________________________________________

GIVEAWAY!

best juices book

Do you love these kid approved healthy recipes as much as I do?  I thought you would!  Well you are in luck my friend.  Harvard Common Press is giving away a copy of this incredible book.  To enter follow the rafflecopter link below.

Click here to enter Best 100 Juices for Kids Giveaway!


Disclosure:  I did not receive any compensation to write this post.  All opinions are my own. 

Photo Credit:  Harvard Common Press

Paleo Carrot Cake & Throwdown {$50 gift card giveaway}

carrot cake slice feature1

{giveaway has ended}

Spring has officially sprung, the signs are everywhere.  Birds are busy building their nests.  The intoxicating smell of blooming flowers is in the air.  All of this means that Easter is on it’s way!  Not only do I love this holiday for spiritual reasons, but for the candy, cakes, and sugar.

My name is Rebekah and I am/was a sugar-a-holic.  Even though I have cleaned up my diet tremendously, this is the area I still struggle.  If there is a Reese’s Peanut Butter Egg within 5 feet of me, I will seek and destroy.  It’s embarrassing to be caught shoving said egg in your mouth by your 5 year old.  The yellow wrapper and chocolate lining my lips didn’t help.  Sorry C-Bear, I owe you.

My addiction to sugar is so bad that I gave it up for Lent this year.  What is Lent?  Christians & Catholics use this time of year to give up anything that may take their focus away from God.  It symbolizes the sacrifice that Jesus made for us.  So for 40 days we try to simulate a sacrifice.  For me that means 40 days without processed sugar.

The Lent period starts Ash Wednesday and ends on Easter Sunday.  There have been serious temptations sent my way, but I have stood firm against the sugar demons.  Don’t worry, those peanut butter eggs don’t stand a chance on Easter.  Hide your eggs, hide your chocolate, I’ll be on a mission to give my self a horrible stomach ache.  Then I won’t want to touch it for at least a day, maybe day and a half.

carrot cake whole 1

Another favorite spring time treat of mine is carrot cake.  I can’t resist the buttery, sweet, carrot filled, cream cheese topped cake.  In moderation it wouldn’t be so bad, but I don’t know anyone who is satisfied with a small sliver of the carrot-filled goodness.  I want a satiating piece.

Wanting a satiating piece of carrot cake was one of the reasons I started conjuring  up a healthy version. Giving up processed sugar was the biggest reason.  This was truly a passion project.  It took many tries to get it right, but I am truly proud of the finished project.  You will not find any ounce of processed sugar or grains in this paleoan beauty.  All you gluten-free lovers can eat this proudly.  Vegetarians, you can enjoy this freely.   Clean eats all the way.

The sweetness in the cake comes from a mixture of dates, pineapple, and carrots.  I used Bob’s Red Mill Hazelnut Flour and Coconut Flour for the base.  Then added in Bob’s Arrowroot starch to stabilize the cake. To frost this luscious grain-free goodie, I blended together coconut oil and pure maple syrup.  I know it sounds strange, but it is out of this world good.

It’s hard to tell that this is a healthy version of the naughty nosh.  This cake would be the perfect end to your Easter dinner.  Or any dinner you choose to serve this season.

If you are looking for the best decadent, playful versions of carrot cake, check out my friends Jillian, Barbara, and Angela’s recipes.

After you check them out, enter to win a $50 gift card to the store of your choice!  You can enter multiple times by following each of our social media outlets.  Click the link below to enter!

carrot_cake_cheesecake_cake
Jillian’s Bakery Style Carrot Cake Cheesecake Cake from Food Folks & Fun
carrot-cake-brownie-bars-feature
Barbara’s Carrot Cake Brownie Bars from Barbara Cooks
ang carrot cake
Angela’s Rainbow Carrot Cupcakes from Aloha: Yinz Mangia
carrot cake slice feature1
Paleo Carrot Cake from Decadently Fit

Enter giveaway by clicking rafflecopter link below!

a Rafflecopter giveaway

_______________________________________________________________________

Paleo Carrot Cake

Serves 16

Cake

12 dates, chopped

1 1/2 cups boiling water

1 teaspoon baking soda

1/2 cup chopped pineapple, packed

3 cups carrot, finely shredded

6 tablespoons Melt Buttery Spread (or other vegan butter), melted

4 eggs, room temperature

3/4 cup Bob’s Red Mill Hazelnut flour

1/2 cup Bob’s Red Mill Coconut flour

1/4 cup Bob’s Red Mill Arrowroot starch

4 teaspoons cinnamon

1 teaspoon nutmeg

1/2 teaspoon fine sea salt

1 teaspoon baking powder

1 t. baking soda

2 teaspoons vanilla

Frosting

6 tablespoons pure maple syrup

1/2 cup room temperature coconut oil (do not melt)

Cake

Pre-heat oven to 350 degrees.

Prepare a 9 inch spring form pan by greasing the sides and bottom with Melt, and cutting a parchment paper circle to fit the bottom of the pan.

Combine the dates, boiling water and teaspoon of baking soda.  Set timer for 10 minutes.

After time is up, use a fine strainer to remove dates from mixture.  Pulse dates 1 minute in food processor.  If the mixture is too thick to pulse, use 1 tablespoon of orange juice at at time to make it easier.  Do not liquify the mixture, it should still be somewhat chunky.

In another bowl, combine the flours, cinnamon, nutmeg, salt, baking powder and baking soda together.

In a large mixing bowling, whisk eggs till frothy.  Whisk in the Melt slowly.   With a wooden spoon mix in the dates, then the pineapple, carrots and vanilla.

Combine the wet mixture with the flour mixture till everything is incorporated well.

Pour batter into spring form pan and cover with foil.

Bake for 30 minutes, then remove foil cover and bake for another 30 – 40 minutes, or until cake is done.  It will be done when middle of cake springs back to gentle touch.

Frosting

With an immersion blender or high power blender combine the two ingredients till smooth.  Frost the cooled cake and enjoy.

Cake can be store at room temperature up to 3 days.


Servings: 16• Size: 1/16 Calories: 248• Fat: 15.5g • Carb: 25g • Fiber: 3.4g • Protein: 3.4g • Sugar:  18g Sodium: 222mg • Cholesterol: 53mg


Fudgy Flourless Dark Chocolate Torte

flourless choc cake 3If you were on a desert Island what one food would you bring?  A sane person would most likely bring something that they can grow.  They might even bring something that can continually reproduce like chickens.

Not me.  If I was stuck on a desert Island, I would bring chocolate.  More specifically dark chocolate.

Since I was little I have craved the midnight colored confection. As I have grown into adulthood my love for the treat has increased. It’s not my fault though.  The addiction runs in my family. Here are 3 cases that prove my theory.

Case #1:  After my grandmother passed away, the tough job of cleaning out the house had to be done.   Hidden all over the house we found loads of chocolate.  I’m pretty sure it was even in the bathroom and laundry room.  Buried treasure everywhere.

Case #2:  Starting at a young age my aunt would find chocolate and ice cream containers under my cousin’s bed.  She has since learned to hide her addiction better.  She now has learned to lock herself in the bathroom, consume said treat and dispose of the wrappers in the outside trash.  Her 3-year-old daughter caught her once, but she bribed her with chocolate not to tell.

Case #3:  I have passed on this gene to both of my boys.  The biggest addict is my oldest mini me.  He won’t even glance at a dessert unless it is entirely composed of chocolate. He’s seven people.  I’m sure the amount of chocolate I consumed while pregnant has nothing to do with this.  It’s the genes.

Now that I have proved my point I’ll move on.

Valentines Day is just around the corner.  Over the past couple years we have celebrated as a family rather than just the husband and I.  We love celebrating our love for our family.

I cover the dining room table with a shiny red table-cloth, and set it with my fine china and crystal glasses.  We dim the lights, light a few candles and indulge in a meal saved for this day.  The last two years the menu consisted of lobster tails (bought on sale of course), wedge salads and a nice steak.

Since V-day is synonymous with chocolate, we always finish off our evening devouring it any way we can.  Last year we scoured the pantry and fridge for items to dip in chocolate.  The short list of items include:  bacon, strawberries, raspberries, pretzels, and pistachios.

flourless choc cake 4

This year I opted for a gluten-free, healthier, decadent chocolate dessert.  After many attempts at a perfect flour-less chocolate cake, this dark temptress was born.

The cake contains zero butter and zero flour (gluten).  Coconut oil and coconut milk have taken the place of the butter fat.  Bob’s Red Mill ARROWROOT STARCH has taken the place of flour, making sure that it doesn’t fall apart.  These three super foods create a smooth fudge like texture.

What exactly is arrowroot?  The easily digested root based powder is used in place of cornstarch.  The flavorless thickening agent is low in calories and doesn’t cloud your finished product.  Instead it adds a beautiful sheen.  Arrow Root is being used more and more in Gluten-free and Paleo cooking.

If you are gluten-free, follow a Paleo Diet, low-carb diet, have celiac, or just like to eat clean lower calorie versions of your favorites, this luscious chocolate dessert is for you.

_____________________________________________________

Fudgy Flourless Chocolate Torte

Serves 12

flourless choc cake 3

8 oz. 72% dark chocolate (if GF make sure you choose a GF one)

1/2 cup coconut oil, melted

1/4 c. hot coffee

1/2 c. full fat coconut milk (canned)

4 large eggs, room temperature

1 cup coconut sugar

4 tablespoons Bob’s Red Mill (coupon) arrowroot powder

1/8 teaspoon fine sea salt

1 teaspoon pure vanilla extract

Pre-heat the oven to 350.

Line the bottom of a 9 inch spring form pan with parchment paper, cut to fit.  Cut another piece of parchment the exact same size and set aside.  Lightly grease the sides of the pan with coconut oil.  Cover the bottom outside of the pan with enough foil to prevent water from seeping into the pan.

Break apart the chocolate and place in food processor.  Process until crumbly.  Add in the sugar, salt and the arrowroot.  Process for 30 more seconds.

In a small saucepan melt the oil and coconut milk with the coffee and vanilla.  Heat till it just starts to simmer.  Remove from heat.  With the food processor on, pour carefully into the chocolate mixture.  Be careful not to burn yourself! Process till a pudding like consistency is reached, about 1 minute.

Pour into prepared pan.  Tap pan on the counter to level, or use off set spatula.

Cover the mixture with the second piece of parchment paper.  Place the spring form pan inside of another larger pan.  Pour enough boiling water into the second pan, so that it reaches halfway up the side of the spring form pan to create a water bath. Place the pans in the oven.  Bake for 45 minutes.

Remove from oven.  Allow to cool completely, and remove parchment paper before serving.

Refrigerate any leftovers up to a week.  Can be frozen up to 3 months.  Defrost in fridge over night before eating.

Questions about this recipe?  Please post a comment below, or email me at decadentlyfit@yahoo.com

Servings: 12• Size: 1/12th of the torte Calories: 238• Fat: 19g • Carb: 17g • Fiber: 1.4g • Protein: 3.5g •    Sugar:  12g Sodium: 44mg • Cholesterol: 61mg

This post was not sponsored, all opinions are my own.  I just really love Bob’s Red Mill products that much.  


Peach Crisp with Coconut Whipped Cream

peach crisp color fixedLast week, while trying out this whole gluten-free lifestyle, I learned a lot. What stuck out most to me was some times those with a gluten allergy also have a dairy allergy.  To be specific, a casein allergy.  Casein is a protein found in dairy. A very hard protein to digest.

Dairy and I have never gotten along, but at least I can somewhat tolerate casein once it has been cooked. I won’t go into anaphylactic shock,  instead I will feel like a tiny demon is using my stomach as a trampoline park.

Let’s face it, like gluten, dairy is in everything, especially desserts.   Having that removed from your food list permanently along with gluten would narrow your food choices significantly.

So, for my gluten, dairy, and egg free followers, here is a sweet treat.  This peach crisp is made with a combination of gluten-free flour (garbanzo bean flour, potato starch, tapioca flour, white sorghum flour, and fava bean flour), almond meal, and coconut sugar.  Tossed together with beautiful, juicy peaches.  The perfectly portioned peach treats are topped with a cinnamon infused crumble that is to die for.  A small mountain of dairy-free coconut whipped cream adorns the crisp.

Even though this dish was made with my gluten and dairy free followers in mind, this version of peachy goodness is great for everyone.  Do keep in mind, although the calories are lower than a regular peach crisp, this is not a low-carb dessert.  It is a clean dessert.  For a lower calorie, lower fat version of this dessert, omit the crumble.

Recipe

Serves 4

Toss together

2 peaches, cut into 1 inch pieces (you can choose to take the skin off, or leave it on)

1 tablespoon gluten-free flour (I used Bob’s Red Mill)

1 tablespoon almond meal

1 teaspoon ground cinnamon

1 tablespoon coconut sugar

Crumble

1 tablespoon coconut oil

1/2 cup gluten-free flour

2 tablespoons almond meal

1 1/2 tablespoons coconut sugar

1/2 teaspoon cinnamon

1 teaspoon pure vanilla

1/2 teaspoon sea salt

Whipped Cream

1 can of full fat coconut cream, chilled for 24 hours (do not freeze)

Directions:

Pre-heat the oven to 350 degrees.

Toss together the first 5 ingredients in a medium bowl.  Divide into 4 small ramekins.

In another medium bowl combine all ingredients using a fork.  The mixture should be crumbly.  Divide the crumb topping into 4, and top the peaches with the mixture.  Bake for 20 minutes.

While the crisp is baking, open the can of the coconut cream.  Scoop out the cream, reserving the water for your morning smoothie.  Using the whisk attachment on your mixer, whip the coconut cream, on medium high-speed, till it resembles whipped cream.  Refrigerate immediately.

When the crisps are done, let cool slightly.  Top with coconut cream.  Prepare to be blown away.

Don’t forget to pin this recipe so your friends can be blown away too.

Servings: 4• Size: 1 ramekin Calories: 219• Fat: 9g • Carb: 34g • Fiber: 4g • Protein: 4g • Sugar:  14g Sodium: 23mg • Cholesterol: 0mg