Category: Giveaways

Hatch Chili Quinoa Stuffed Zucchini – Plus a Giveaway!

Fresh Hatch Chiles_Fotor If you have been a reader of my blog for at least a year you know about the Hatch Chili.  If not, here is a quick history/biography of the only chili that can be purchased in three different heat scales, mild, medium and hot. a Rafflecopter giveaway

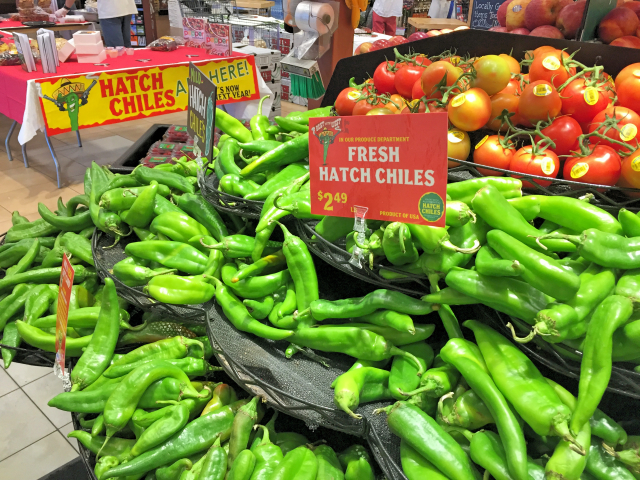
The Hatch Chili has a very short season, which starts in August and ends in September.  They are only grown in Hatch, New Mexico, where the climate is perfect for this species of chili.  The chilies resemble a poblano, but have a deeper flavor.  Whether used roasted, fresh or in powder form the chili goes well with so many flavor profiles. Hatch Chili Roasting IEFB_Fotor 
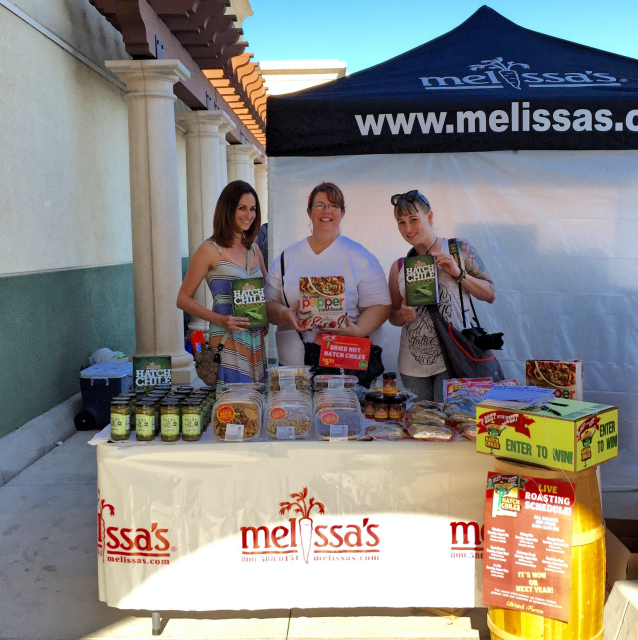
The smell of the roasted chills is pretty incredible though.  I should know that scent incredibly well after recently going to a Hatch Chili Roasting event at the Bristol Farms located in Palm Desert.  I was lucky enough to attend with my fellow IEFB friends, Sara from My Imperfect Kitchen and Natalie from The Devil Wears Parsley.  Sue from It’s Okay to Eat the Cupcake was there in spirit with us! Hatch Chili Salsas 
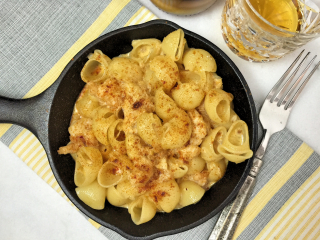
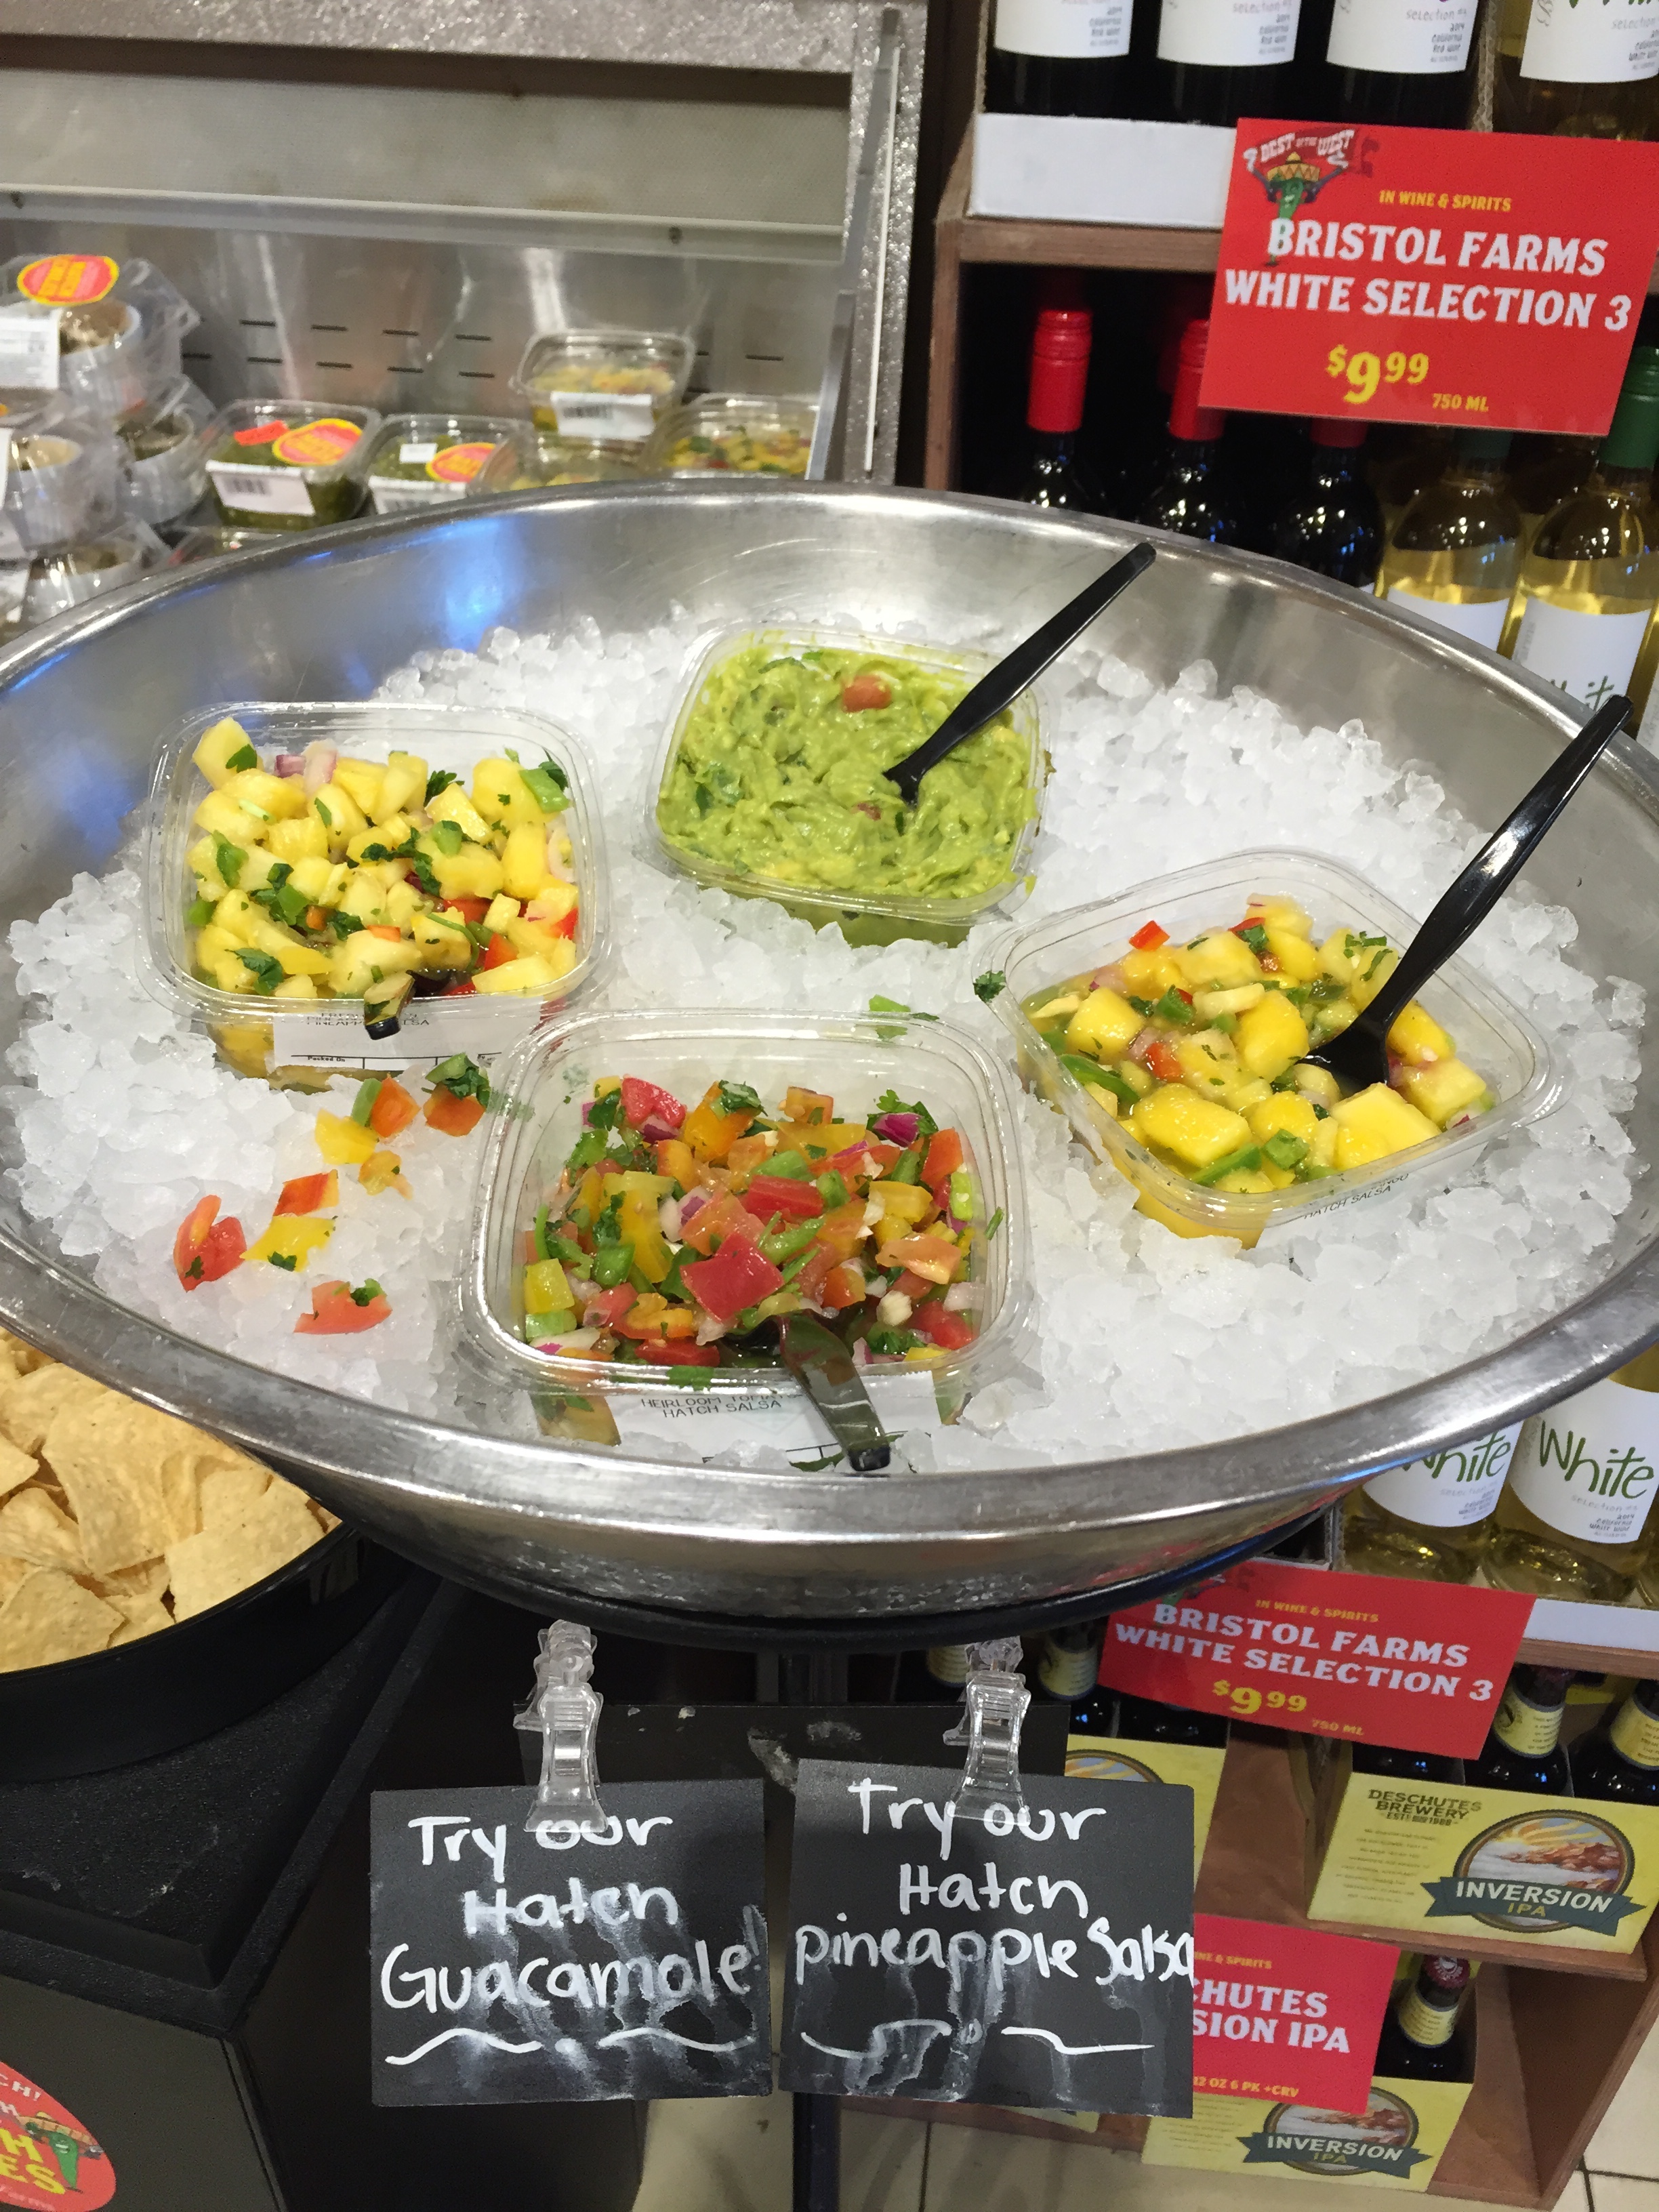
I tried Hatch Chili everything that day!  From savory dishes like, pizza, sushi, grilled cheese, salsa, macaroni and cheese, guacamole, and chorizo.  My sweet tooth was invited to the party with the juices, smoothies and cupcakes spiked withe versatile chili. Hatch Chilis Roasted_Fotor   
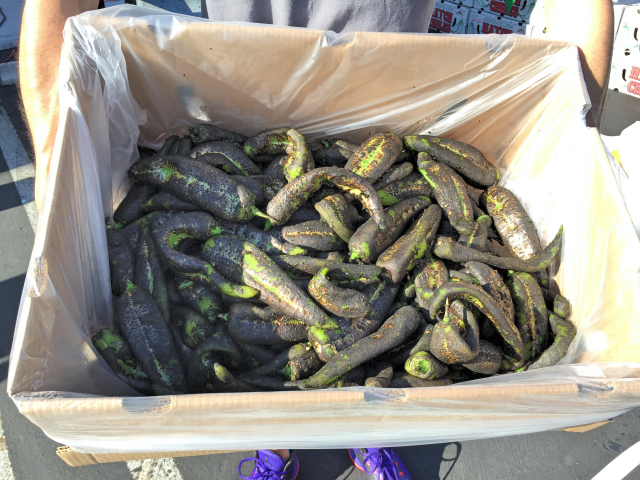
I had never been to a Hatch Chili Roasting or a Bristol Farms before.  Both were worth the drive to the desert!  The smell of the hatch chilis wafted through the parking lot when we pulled up and filled the car on our drive home.  We bought a case and split it amongst the four of us.  I would highly recommend doing this.  Since the season is so short it’s one of the only ways to have access to them in the off season.  If you would like to find a roasting near you click here. IMG_3727_Fotor 
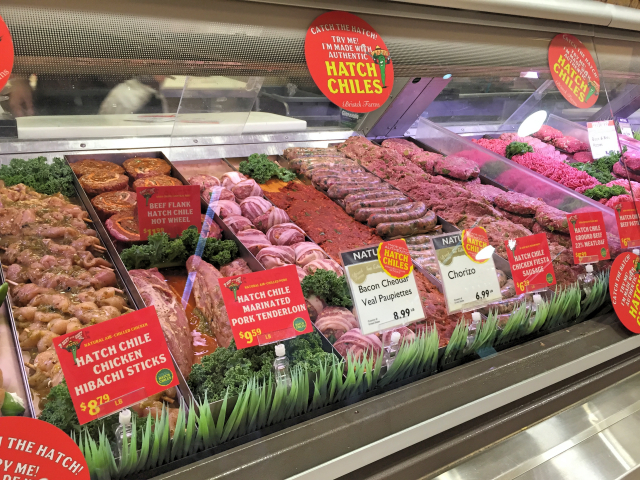
After you have purchased your chills make sure you peel and freeze them within 24 hours of the roasting.  I separated my 1/4 case into smaller freezer bags, flattened them, and stacked them in the freezer.  I left a portion fresh and have been eating them in eggs, soups, meat loaf and then came up with the recipe below with items I already had on hand. Hatch Zucchi_Fotor 
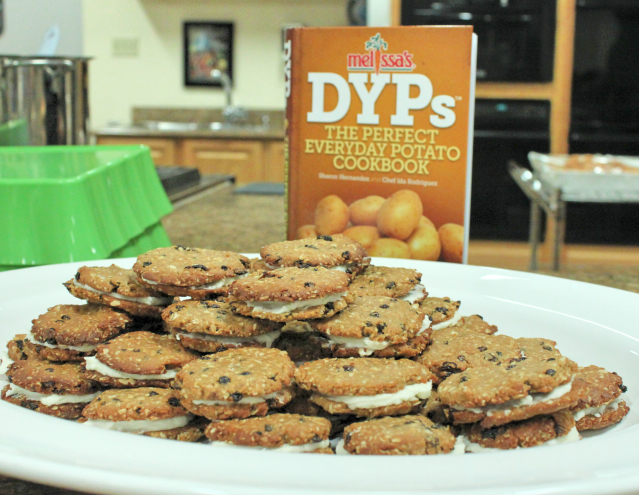
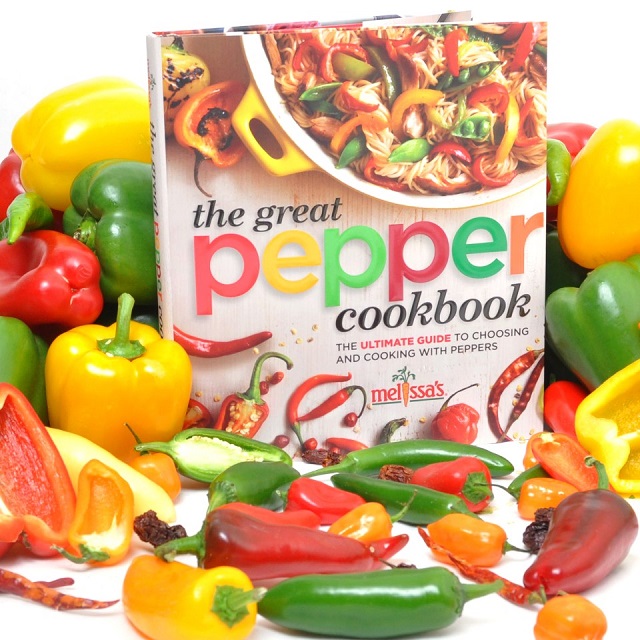
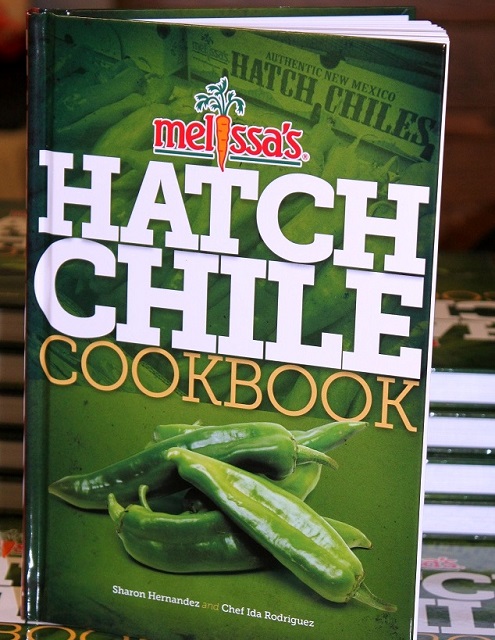
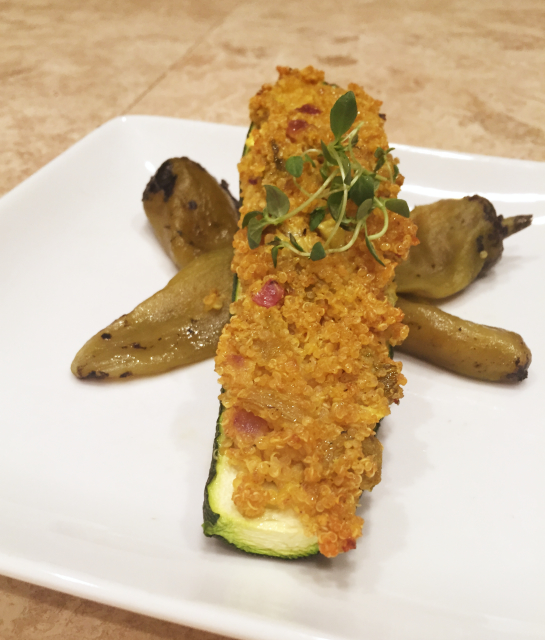
Hatch Chili Quinoa Stuffed Zucchini is a quick protein filled meal that satisfies.  The mild bite from the mixture of hatch chills and curry powder gives the zucchini a flavorful punch.  Low carb, vegetarian, gluten free, diabetic friendly and tastes amazing.  (recipe below) Want your own Hatch Chili Cook Book from the produce experts at Melissa’s Produce?  Enter to win your own copy here!  You may even win one of the signed copies from the author!

a Rafflecopter giveaway

Here are even more great hatch chili recipes from my friends:

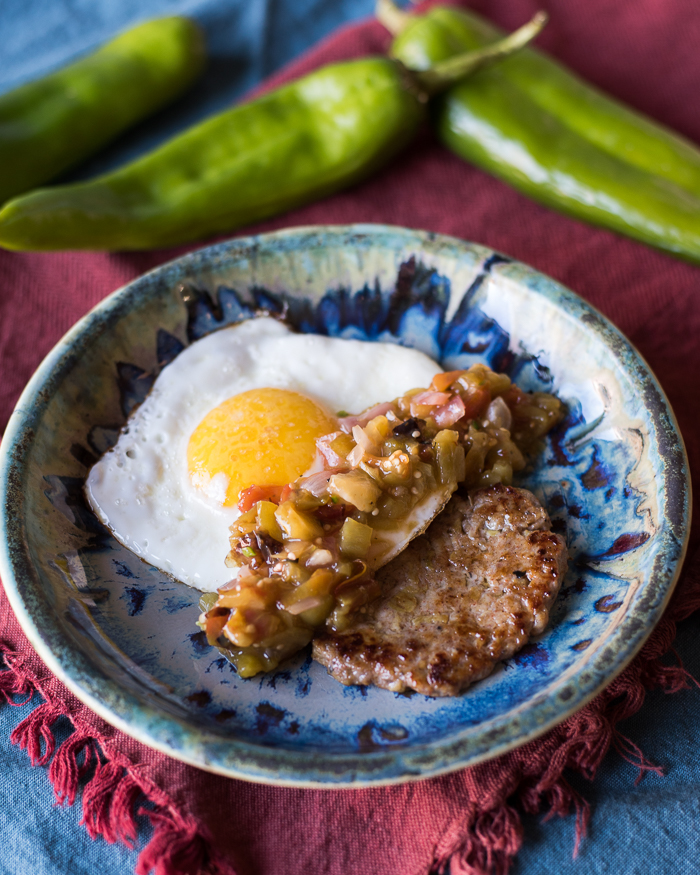
Hatch Chili Breakfast Sausage from Natalie at The Devil Wears Parsley

HatchChileChickenSausage-Natalie

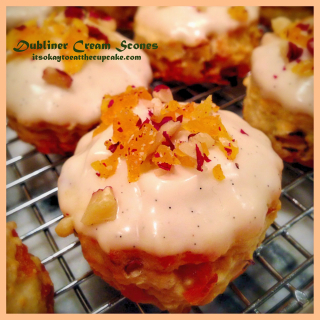
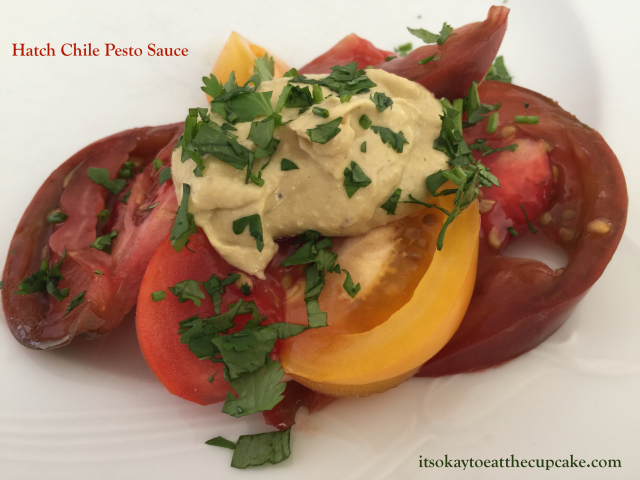
Hatch Chili Pesto from Sue at It’s Okay to Eat the Cupcake

Hatch Chile Pesto Sauce_Fotor

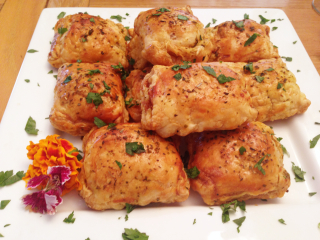
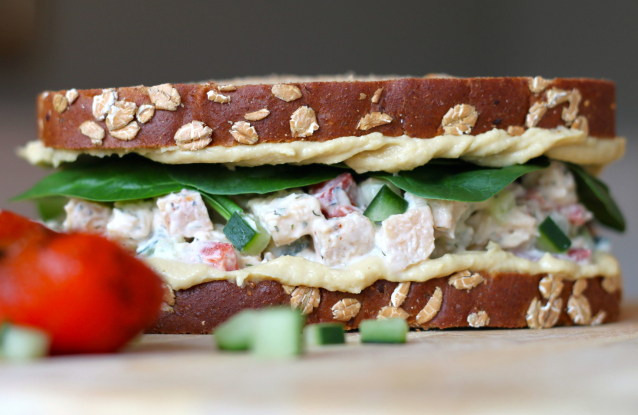
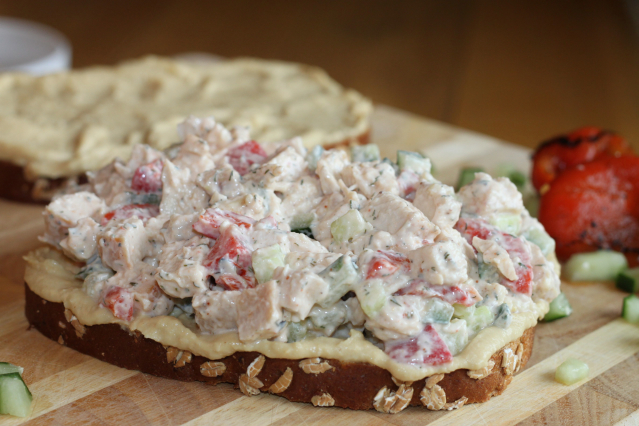
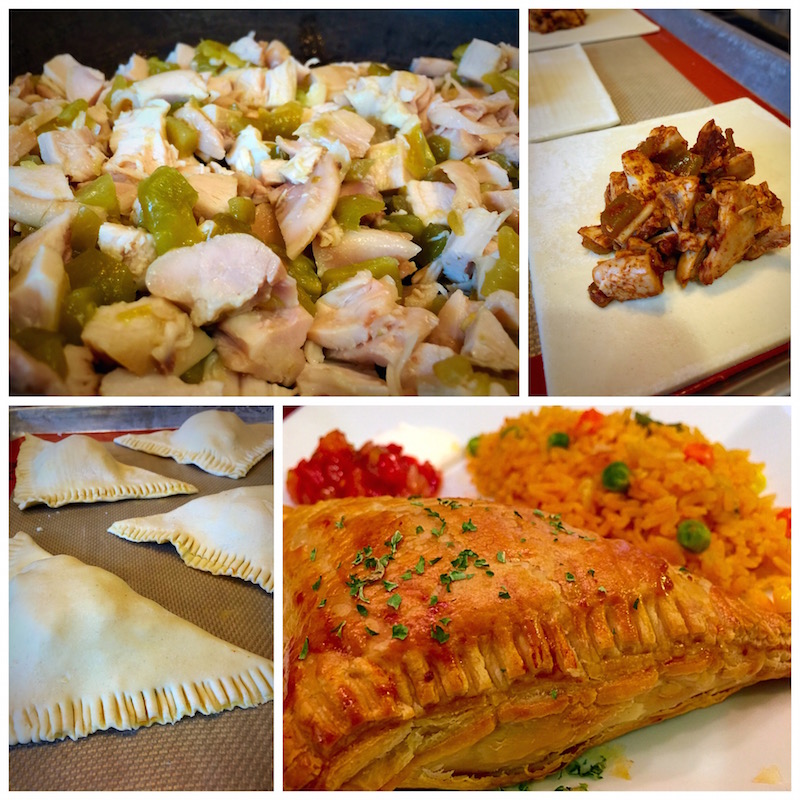
Hatch Chili & Chicken Pockets from Sara at My Imperfect Kitchen

HatchChile&ChickenPuffPastryPockets

4.8 from 4 reviews
Hatch Chili Quinoa Stuffed Zucchini - Plus a Giveaway!
 
Author: 
Recipe type: Main Dish
Ingredients
  • 4 zucchini, split in half
  • 2 cups cooked quinoa
  • 1 teaspoon curry powder
  • ½ cup greek yogurt
  • ½ teaspoon sea salt
  • ½ cup red onion, diced
  • 3 roasted hatch chilis, peeled, and diced
  • 8 tablespoons cheddar cheese (optional)
Instructions
  1. Preheat oven to 350 degrees.
  2. Remove the insides of the zucchini, leaving an edge all the way around the zucchini to hold in the filling. Roughly chop the insides and set aside in a medium size mixing bowl
  3. Saute the red onion in 1 tablespoon olive oil over medium heat for 5 minutes or until translucent.
  4. Add the red onion to the mixing bowl, along with the quinoa, curry, yogurt, salt, and chills. Mix to combine.
  5. Place the zucchini on a cookie sheet, then scoop the quinoa filling into each zucchini boat.
  6. Bake for 30 minutes, then top with cheese if desired. Bake another 5 minutes to melt cheese.
  7. Serve immediately.

 Disclosures:  All opinions in this post are my own.  Bristol Farms did not sponsor this post.  Melissa’s Produce has generously supplied the cookbooks in the giveaway, and hatch chili ingredients.  

Shepherd’s Pie – Kerrygold Cheese & Butter Giveaway

SP Shephards Pie 2_Fotor Top of the morning’ to ya!  Or afternoon, not sure what time of day you are reading this, but this is one recipe you will want to make.  I started making this a few years ago as a solution to a dinner time problem.  One of us wanted healthy, the other wanted hearty.

My gluten-free Shepherd’s Pie became the solution to that problem. Although it’s undergone many makeovers since first conception of the dish, I have settled on this version as my favorite.  The best part is the loaded cauliflower mash that adorns the gluten-free chicken and veggie filling.  The mash is filled with Kerrygold unsalted butter and their Dubliner with Irish Stout.  This Shepherd’s Pie is the perfect healthy St. Patty’s day dinner.

If you read my last post you know that today is the LAST day to enter the Kerrygold Cheese & Butter gift basket worth an estimated value of $175!  Enter below!

a Rafflecopter giveaway

Disclosure:  I was not paid to develop this recipe or to express my opinion.  All opinions are my own.

Shepherd's Pie (gluten free)
 
Author: 
Nutrition Information
  • Serves: 6
  • Serving size: ⅙th
  • Calories: 219
  • Fat: 11
  • Saturated fat: 6.3
  • Carbohydrates: 12.5
  • Sugar: 3.4
  • Sodium: 523
  • Fiber: 2.4
  • Protein: 15.8
  • Cholesterol: 50
Recipe type: Healthy Comfort Food
Cuisine: Irish
Prep time: 
Cook time: 
Total time: 
Slimmed down version of Shepherd's Pie, full of chicken & vegetables, topped with a Dubliner Stout Cauliflower Mash.
Ingredients
  • Cauliflower Mash
  • 1 head of cauliflower, core removed and steamed
  • ⅓ c. crumbled Kerrygold Dubliner with Irish Stout Cheese
  • 2 tablespoons unsalted Kerrygold Butter
  • 1 teaspoon salt
  • ¼ teaspoon white pepper
  • Filling
  • 2 chicken breasts cut into one inch cubes
  • 1 tablespoon Kerrygold unsalted butter
  • 1 shallot, diced
  • 2 garlic cloves, minced
  • 10 ounces baby portobello mushrooms, sliced
  • 1 carrot, diced
  • ½ cup frozen peas
  • 1½ cups chicken broth
  • 1 tablespoon worcestershire sauce
  • 2 tablespoons arrowroot powder
  • 2 tablespoons chicken stock
  • ½ teaspoon dried thyme
  • sea salt and pepper to taste
Instructions
  1. Cauliflower Mash
  2. In a food processor pulse the cheese until it crumbles into very small pieces
  3. add in the rest of the ingredients and puree till smooth. Set aside
  4. Filling
  5. Preheat the oven to 425 degrees.
  6. Melt the butter in a large pot.
  7. Add the mushrooms and a few pinches of salt to the pot and cook on medium high heat for 3-5 minutes, or until the liquid from the mushrooms disappears.
  8. Add the shallots and garlic an sauté for another 2 - 3 minutes, or until shallots are softened.
  9. Add the peas and carrots, stir to combine.
  10. Stir in the chicken broth and worcestershire sauce
  11. In a small bowl stir together the 2 tablespoons of chicken broth and arrowroot till smooth.
  12. Reduce the heat to medium low and combine the arrowroot mixture with the veggie and chicken mixture stirring constantly, cooking for about 5 minutes on low heat until the mixture thickens. Season with salt and pepper.
  13. Pour the veggie chicken mixture into a medium sized baking dish (9X9).
  14. Top the veggie chicken mixture with the cauliflower mash, cover the filling completely.
  15. Bake for 20 -30 minutes or until the mixture begins to bubble.
  16. Let cool for 5 minutes before serving.

Buffalo Blue Cheese Stuffed Eggs – PLUS a Kerrygold Giveaway!

devil eggs4_Fotor 640 Deviled eggs are a pretty popular contribution to Easter celebrations.  Mostly because of the crazy tradition of hiding and finding hard boiled eggs in grass and dirt.  Who started this crazy tradition?  The germaphobe in me cringes. If your household is like mine there is an abundance of hard boiled eggs looking for new uses after the binge eating is over.  There is the obvious egg salad, or as an ingredient in a cobb salad.  My favorite use is the deviled egg. Usually I am a very simplistic lover of the deviled egg.  The less fuss and simpler the ingredients the better, but I love a challenge. I was recently asked to take part of an amazing giveaway with  Kerrygold cheese and butter.  If you have never have a KG product you need to remedy that situation ASAP.  Their products  are made from cows that graze on grass in the hills of Ireland.  Happy cows.  Grateful cows, that make their product with love that you can taste.

products_butter_salted-butter
photo courtesy of kerrygoldusa.com

I’m sure you are wondering if cows eating grass makes a difference.  I can say empathically that it does.  The old saying “You are what you eat”, not only applies to the cows, but to us as we eat the byproduct of what they eat.  The taste is cleaner than butter and cheese made from a grain fed cow. Not only is the taste better, but there are health benefits to eating the products of grassfed cows.  The butter is yellow in color due to the high levels of beta carotene and is hormone-free.  Did you know that there is a significant amount of Vitamin K2 in the butter made from grassed cows?  K2 is responsible for decalcifying our arteries.  Consuming grassfed butter can lower heart disease, (authority nutrition.com).  

products_landing-intro
photo courtesy of kerrygoldusa.com

A better question begs to be asked.  Why in the world would you consume anything else?  Especially when you can buy Kerrygold products almost anywhere these days, even Costco. They have some amazing flavors in their cheese line.  From their infamous Dubliner to different types of cheddars, swiss, or the more complex Dubliner with Irish Stout, or Aged-Cheddar with Irish Whiskey and the Irish Cashel Blue Cheese.  Click here to learn more about each cheese.

products_cheese_cashel-blue
photo courtesy of kerrygoldusa.com

After receiving a rather large assortment of happy cow cheeses and butters I was challenged to make an appetizer for our monthly Inland Empire Food Bloggers Meeting.  As a group we are giving away a gift basket of KG cheese and butter valued at $175!  Each of us was asked to come up with a recipe show casing the cheeses. Since Easter is on it’s way, and like I discussed earlier I am always looking for a way to use hard boiled eggs, I came up with this version of deviled eggs.  I guess they should be called buffalowed eggs though.  The eggs are stuffed full of Kerrygold Irish Cashel Blue Cheese.  There is zero mayo in this recipe, using protein packed, tangy greek yogurt instead.  The addition of buffalo sauce in the eggs leaves a spicy finish on the back end.  Diced celery gives the eggs a lovely crunchy texture.  My favorite part of these spicy, cheese filled eggs?  There are only 84 calories for two of these babies. This is what the other members of our IEFB group made with their cheese and butter:

From Sue at It’s Okay to Eat the Cupcake A Dubliner Cream Scone

Single Scone _Fotor

Cottage Pies from Sara at My Imperfect Kitchen

cottage pies_Fotor

Kerrygold Beer & Cheese Pairing from Natalie at The Devil Wears Parsley

KerrygoldCheeseBeerPairing-19_Fotor

Dubliner Judge made by Christy at Confessions of a Culinary Diva

dubliner judge_Fotor

The recipe for the eggs is below, but before I get to that I want to share what is in the Kerrygold gift basket!

2 wedges Kerrygold Dubliner Cheese

2 wedges Kerrygold Swiss Cheese

2 wedges Kerrygold Blarney Castle Cheese

2 wedges Kerrygold Aged Cheddar

2 wedges Kerrygold Reserve Cheddar

2 wedges Kerrygold Red Leicester

2 wedges of Kerrygold Skellig

2 packs Kerrygold Pure Irish Butter

2 packs Kerrygold Unsalted Butter

2 packs of Kerrygold Garlic and Herb Butter

2 packs of Kerrygold Softer Butter

A $175 estimated retail value!

a Rafflecopter giveaway

5.0 from 2 reviews
Buffalo Blue Cheese Stuffed Eggs
 
Author: 
Nutrition Information
  • Serves: 8
  • Serving size: 8
  • Calories: 84
  • Fat: 4.2
  • Saturated fat: 1.4
  • Carbohydrates: .8
  • Sugar: .6
  • Sodium: 241
  • Fiber: .1
  • Protein: 6.5
  • Cholesterol: 164
Recipe type: Appetizer
Cuisine: American
Prep time: 
Cook time: 
Total time: 
A playful, twist on deviled eggs. Cashel Irish Blue Cheese is paired with spicy buffalo sauce and topped with crunchy celery.
Ingredients
  • 8 eggs, hard boiled, peeled
  • 5 tablespoons plain 0% greek yogurt
  • 3 tablespoons Franks Red Hot Sauce
  • ¼ cup Kerrygold Irish Cashel Blue Cheese
  • 5 tablespoons finely diced celery, reserve one for garnish
  • ⅛ teaspoon celery salt
  • cayenne or chili powder for garnish
Instructions
  1. Slice each egg in half lengthwise. Remove the yolks to a medium size bowl, mashing yolks with a fork.
  2. Add in the yogurt, hot sauce, blue cheese, salt, and 4 tablespoons of celery into the mashed yolks. Combine ingredients till smooth, adding more greek yogurt 1 tablespoon at a time until the mixture reaches desired consistency. It should not be too dry, but easy to pipe out of plastic bag.
  3. Scoop the blue cheese mixture into a piping bag or ziploc bag. Pipe about a half tablespoon of the mixture into each egg white half.
  4. Garnish the eggs with remaining celery, and sprinkle cayenne or chili powder on top of each.
  5. Refrigerate till ready to serve. Can be made up to a day before.

My Ultimate Sandwich Creation- Organic Oroweat Bread Giveaway

sandwich orowheat 1_Fotor

If you follow my blog posts on a regular basis you know that I am super picky about what I put in my body.  I like to eat organic whenever possible, especially when it comes to products/ingredients that are notoriously GMO (genetically modified) or filled with preservatives.

Oroweat recently asked me to review their line of organic breads and come up with an ultimate sandwich.  Even though they sent me coupons to try the bread and a gift card to buy ingredients for an ultimate sandwich, it was a no brainer to review the bread.  Not only is this bread already a staple in our household, it has been approved by my pickiest eaters, and more importantly by me.

oroweat_organic_breads_bkg_Fotor

The bread comes in two varieties, Grains & Seeds and Whole Wheat.  Both are fantastic, and made with all USDA certified organic ingredients.  *There are only 17g of carbs in each slice (, making it friendly to my carb counters.  *No high fructose corn syrup, and 3g of fiber.  The slices have a wonderful texture and hearty in size.  Best of all I buy it at my nearby Target.  No need to go to a specialty store to buy a healthy, delicious bread option.  Click here to find a store near you!

I was challenged to create an ultimate sandwich using the organic line of breads.  I love my sandwiches.  Since lunch is when I eat the highest amount of carbs, sandwiches are usually what I gravitate to.  They fill me up and keep me happy till snack time around 3 p.m.

sandwich open face_Fotor

I personally am super sick of turkey sandwiches at this point.  I know the barrage of turkey is happening again in a couple of weeks, so I decided to take another route.  After much thought, I decided to go with a Greek Chicken Salad Sandwich.

I’m so glad I went with a Mediterranean inspired sandwich.  It was easy to make and woke up my taste buds. This sandwich is a protein powerhouse with chicken, hummus and greek yogurt based tzatziki sauce.  The addition of cucumbers, roasted red bell peppers and spinach make the sandwich crunchy and nutrient dense.

sandwich with spinach_Fotor

In case you are wondering, this sandwich is an awesome addition to any lunch box.  I made one, stuck it in my sandwich container and left it in the fridge.  Four hours later when I went to eat it, it was exactly the same as the one I made fresh.  That is huge to me, I strongly dislike soggy sandwiches.

sandwich orowheat 3_Fotor

Want to recreate my mediterranean masterpiece?  Follow the recipe below.  Want to win your own coupons and gift card from Oroweat?  Of course you do!  To follow Oroweat on Facebook click here.

a Rafflecopter giveaway

______________________________

Recipe

6 slices of Oroweat Organic Whole Wheat Bread

Greek Chicken Salad on Organic Oroweat Bread

2 roasted chicken breasts, cubed (great use for leftovers!)

1/3 cup roasted red bell pepper, diced

1/2 cup cucumber, diced

1/2 cup tzatziki sauce, (see recipe below or used organic store-bought)

6 tablespoon hummus

baby spinach

Tzatziki Sauce

1 cup 0% organic greek yogurt

1 tablespoon dried dill weed

1 tablespoon organic lemon juice

1 tablespoon organic olive oil

3 garlic organic garlic cloves, minced

sea salt and pepper to taste

Method

1.  Make the tzatziki sauce by mixing all the ingredients together and chilling for at least 4     hours.

2.  Mix together 1/2 cup of the tzatziki sauce with the chicken, bell peppers, and cucumber.

3.  To assemble sandwich place 1 tablespoon of hummus on one side of bread.  Place about 1/4 cup of the chicken salad on one slice of bread, top with a handful of spinach, and top with the another slice of bread.  Serve immediately or save for lunch time.

Disclosure:  I was given 3 coupons for 1 loaf of Oroweat Organic bread and a $25 gift card to purchase ingredients related to my sandwich creation.  All opinions are my own.  All facts regarding the bread are directly from Oroweat.

*Nutrition information given was taken directly from the Whole Wheat bread package.


Potato Leek Soup with Bacon – DYP Book Review – PLUS Giveaway!

potato leek 2_FotorPotatoes notoriously get a bad rap.  Dieters exclude them from their menu plans, grouping them with the bad carbs such as the ones in bread.  Casting them aside afraid they will add more unwanted pounds.

The round, eye filled root vegetable has been type cast as the evil villain due to its role as the greasy french fry and calorie dense chip.  I’m here to tell you that the poor potato has been misunderstood.  His good qualities need to be highlighted and celebrated by the health seeker. Potatoes are high in fiber, vitamin c,  B-complex, and magnesium.  They can lower blood pressure, cholesterol, improve brain function, prevent kidney stone formation, protect against cancer, and boost antioxidants.

With that being said, there are so many different types, how is one to know which to use in a potato salad versus a stew.  Well, let me make it really easy for you.  Bake a russet and use Dutch Yellow Potatoes (DYPs) in everything else.  It’s really that simple. 1Baby Dutch Yellow 24 oz_Fotor Dutch Yellow Potatoes are so versatile they work for just about everything, even dessert.  On November 18th, I was at the book launch at Melissa’s Produce for their latest cookbook DYPs The Perfect Everyday Cookbook.  Since the DYP is exclusive to Melissa’s Produce it was only natural for them to compile a book full of the best recipes for the golden tuber.

I learned some interesting facts about potatoes at the event.  For instance, did you know that if a potato has a green hue to it you should not eat it.  The green hue is a warning sign that the potatoes have gone bad.  Amazingly, the DYP will not ever get the green hue, due to their extraordinarily long shelf life.  That fact is important considering the normal harvest time is August to October.  The potatoes are stored in giant temperature climate-controlled storage rooms for the rest of the year where they are harvested in Idaho.

DYPs are the most versatile potato because of their waxy texture and edible skin.  They cook quickly, about 6 – 10 minutes and won’t fall apart and get mushy.  It’s hard to over cook these adorable little guys.  I added them to my Pork Chili verde, simmered them for an hour, and they were perfectly cooked.  I used the Pee Wee size DYP for the chili, so there was zero prep before adding them into the green saucy goodness.  Look for the recipe in an upcoming post!

pb cookies_Fotor

I have to encourage you to try a potato based dessert.  Especially the Gluten-Free Peanut Butter Cookie Sandwiches (pg. 261).  It’s no secret that I love peanut butter. These cookies were to die for!  I would have never thought to use potatoes as a gluten-free option in a dessert.  Well played Melissa’s!  I may have snuck a lot of them out the door that day.  I only shared one.

Whether you mash, roast, use them in a salad or dessert, you should keep always keep DYPs around.  I see them in my local Von’s year round.  Chances are they are in your local grocery store as well.

Yes, potatoes have carbs, but they are good carbs.  Carbs that if you are working out, you need as fuel.  They are a clean fuel that your body knows how to process.  Yes, you should eat them in moderation.  But, they are what I call happy carbs.  They are satiating so you actually have to eat fewer of them to feel full.

To give you a taste, pun intended, here is one of my favorite recipes from the DYP cookbook, DYP and Leek Soup.  Not only is it the simplest soup recipe I have ever come across, it’s so luscious and comforting.  Not to mention it’s also topped with crispy bacon.  To die for.

If you are interested in learning more about the perfect potato and how to use them in every season, click here to purchase this incredible DYP cookbook.  OR enter my giveaway to receive the book and a bag of potatoes!  You can enter in the box below (or if the box does not come up click on the rafflecopter link)!

a Rafflecopter giveaway

5.0 from 1 reviews
Potato Leek Soup with Bacon - DYP Book Review - PLUS Giveaway!
 
Author: 
Recipe type: Soup
Prep time: 
Cook time: 
Total time: 
Ingredients
  • 1½ cups DYPs, diced small
  • 1 package Melissa's Belgian Style Leeks, sliced lengthwise, then cut crosswise into 1 inch pieces (about 2 leeks)
  • 2 tablespoons butter
  • 2 cups water
  • 2 cups vegetable or chicken broth, plus more for thinning
  • ¾ teaspoon sea salt
  • white pepper to taste
  • 3 slices thick cut bacon, cooked and crumbled
Instructions
  1. Place the DYPs in a bowl and cover with water to prevent discoloration.
  2. Set a large stock pot over low heat and add butter. Add the leeks and cook, stirring occasionally, until softened. Drain the DYPs and add them to the leeks, along with water and the broth, sea salt, and white pepper.
  3. Increase heat to high and bring to a boil. Cover and reduce the heat to a simmer. Cook for 30 minutes, or until the DYPs are very soft.
  4. Pour the soup mixture into a blender, in batches if needed, and puree until smooth. (Be careful with hot liquids in blenders). Return the pureed soup to the pan and add broth to reach the desired consistency. Continue to cook over low heat till heated throughly.
  5. Serve in bowls topped with bacon.

Disclaimer:  I was not paid to promote or sponsor this post.  I was given a bag of DYPs and the DYP Cookbook from Melissa’s Produce.  All opinions are my own.   Please see disclaimer in the giveaway for details regarding to the prize and details of the contest.

The Great Pepper & Hatch Chilie Cookbook Review {giveaway}

Great Pepper Book-close up14-1 640I talked about my life long passion for cookbooks in one of my last posts.  I can honestly sit for hours and read them.  I get excited about learning new things and love seeing a traditional recipe tweaked into a modern version.

Yes, I am a culinary geek to the core.  My library of cookbooks is pretty vast.  Although I love finding new recipes on the internet, nothing is better than sitting with a book, feeling the page between your fingers, finding new inspiration at the turn of each page.

The Great Pepper Cookbook is no exception.  Melissa’s Produce doesn’t hold anything back when they create a new cookbook.  I have personally been to their test kitchen and tasted the recipes made by their chefs.  They are talented and inventive.  The recipes in this book speak to that.

Of course when I received the books I immediately started going through them.  In each book, the first section talks all about the scoville scale (how hot a pepper is), describes each pepper type in detail and how to prepare fresh and dried.

I love spicy food!  I actually carry around packets of tabasco in my purse, just in case there is an emergency.  True story.  I like some spice to my food, not overpowering, but a wake me up, warm me up spice.

In the Great Pepper Cookbook I found a multitude of recipes I wanted to make.  But there was one that HAD to be made first.  It combines my two food lusts together, spicy and chocolate.  Chile Chocolate Truffles, oh em gee, come to me.  I’ve had a love for spicy chocolate since I had it the first time at the San Diego Food & Wine Festival.  I couldn’t wait to taste that duo together again.

spicy truffle5

Making the truffles was actually very easy. I changed the heavy cream to coconut milk in my version due to my intolerance.  You simply heat the cream/coconut milk together with spicy peppers, combine with the chocolate, sesame seeds and raisins.  Then cool the concoction in the fridge for two hours.  Scoop the chocolate with a melon baller, roll into balls and toss in walnuts.  Yup, pretty much the best truffle I have ever had.  No joke.  I will have these babies in the fridge from her on.  Each truffle is only 80 calories. Serious bonus!

Now onto the Hatch Chile Cookbook.  I actually have had this book for over a year.  I went to the recipe tasting event at Melissa’s test kitchen when they launched the book.  I was able to taste the Honey Mustard Pretzel Crunch, Hatch Chile Corn Bread, Hatch Chile Deviled Eggs, Hatch Chile cookies, and even a lemonade infused with hatch chili ice cubes.  Every single item was incredible.

hatch cookies 640

I’ve made a lot of the recipes from the Hatch Chile book and even developed this Hatch Chile Corn dog because I love the flavor so much.  I wanted to showcase something new and different for you.  I love stuffing portabellos, I’ve made them into BBQ Chicken Pizzas, and every now and then I crave one stuffed with creamed spinach.  I never thought to make them into a frittata. Kudos on that idea Melissa’s!

hatch cookbook 640 2 3porto fritatta2 640


You have to make the Frittata-Stuffed Portobello Stuffed Mushroom Caps.  Such a fun, spicy way to serve eggs.  It would be amazing as a brunch item during the holidays.  The colors are even perfect with the addition of tomato, hatch chilies and basil.

Lucky for you it’s Hatch Chilie season and during this time of year you can attend a live roasting!  Click here to find a location roasting chilies near you.  Then go buy the book, it is a chile lovers must have.

Melissa’s produce has always been extremely generous with me.  Not only did they supply all the produce for this post, they have allowed me to share both recipes I mentioned.  AND, they offered up FOUR of The Great Pepper Cookbooks to giveaway!  Entering is super easy!  Just follow the instruction in the Rafflecopter link here ——->  a Rafflecopter giveaway

For more awesome sneak peeks at these cookbooks check out what my fellow IEFB bloggers did:  My Imperfect Kitchen, The Devil Wears Parsely & It’s Okay to Eat the Cupcake.


5.0 from 1 reviews
Chile-Chocolate Mole Truffles
 
Author: 
Nutrition Information
  • Serves: 36 (1 truffle)
  • Serving size: 1 truffle
  • Calories: 80
  • Fat: 6g
  • Saturated fat: 2.5g
  • Carbohydrates: 7g
  • Sugar: 5g
  • Sodium: 0mg
  • Fiber: 1g
  • Protein: 1g
  • Cholesterol: 5g
Recipe type: Dessert
Prep time: 
Cook time: 
Total time: 
These truffles are an exotic, subtly spicy, decadent treat
Ingredients
  • 10 ounces semi sweet chocolate chips (can use vegan)
  • 1 tablespoon white sesame seeds, toasted
  • 2 tablespoons seedless raisins, minced
  • 5 ounces heavy whipping cream
  • ¼ ounce (about a 1 x 2-inch piece) dried ancho chile pepper
  • ½ teaspoon ground dried chipotle pepper
  • ½ teaspoon ground cinnamon
  • ¼ teaspoon fresh lime zest
  • 1 cup walnuts, toasted and finely crushed
Instructions
  1. In a metal bowl, combine chocolate chips, sesame seeds, and raisins. In a small saucepan, heat cream over medium heat; stir in ancho chile, chipotle chile powder, cinnamon, and zest. Bring just to a simmer; immediately remove from heat. Remove and discard ancho, pour cream mixture over chocolate chip mixture, stirring constantly until chocolate is melted and mixture is completely blended. Let cool to room temperature; cover and refrigerate until firm, about 1 to 2 hours.
  2. Line a baking sheet with parchment paper. On a plate, spread the walnuts in an even layer. Using a ½ teaspoon measuring spoon (or melon baller) scoop out cooled chocolate mixture, form into a 1-inch ball, roll in crushed walnuts, and place on prepared baking sheet. Repeat with remaining chocolate mixture to form 36 truffles. Cover and refrigerate for at least 2 hours or up to 5 days. Serve.
Notes
Nutrition facts are for original recipe, not with coconut milk.

5.0 from 1 reviews
Frittata-Stuffed Portobello Mushroom Caps
 
Author: 
Recipe type: Breakfast
Ingredients
  • Oil for cooking spray
  • 12 large eggs
  • Melissa's My Grinder Organic Italian Seasoning
  • Melissa's My Grinder Rainbow Peppercorns
  • 1 tablespoon unsalted butter
  • 1 large heirloom tomato, top and bottom removed, thickly sliced into 4 rounds
  • Salt and freshly ground black pepper
  • 10 fresh basil leaves, cut into ribbons
  • 2 Hatch Chilies, roasted peeled, stemmed, seeded, and chopped
  • 4 large Portobello mushrooms stems and gills removed (see note below)
  • 4 ounces cream cheese, cubed
Instructions
  1. Preheat the oven to 350 degrees. Lightly oil a baking dish.
  2. In a large bowl, whisk together the eggs and a few grindings of the Italian seasoning and rainbow peppercorns. Set aside.
  3. In a large skillet, melt the butter over medium heat and cook the tomatoes, turning once, just until the tomatoes release their moisture, about 1 to 2 minutes. Season to taste with salt and pepper, then add the basil and chilies and continue cooking just until the basil begins to wilt, about 1 minute.
  4. To stuff the Portobellos, fit 1 tomato slice into each mushroom cap and one-fourth of the basil and chilies. Pour in egg mixture to nearly fill the mushroom. Top each Portobello with a few cubes of cream cheese.
  5. Bake the stuffed mushrooms in the prepared baking dish for 35 to 45 minutes, or until the filling is set.
Notes
Gently scooping out some of the meat of the mushroom cap often helps the stuffing fit nicely.


Best 100 Juices for Kids Review + Giveaway

(giveaway has ended)
My children love their morning glass of juice.  It has become a morning ritual that they look forward to.  I am not a huge fan of unnecessary sugar deposited into my kids.  Especially right before they are going to sit in a classroom all day.  But, their pediatrician actually recommended they enjoy one glass in the morning to alleviate morning time hypoglycemia.  So it was easy for this health loving mama to give them their one glass without guilt.  To keep the juice healthy I buy organic apple juice for them, and sometimes I get wild and crazy and pull out orange juice.

A few weeks ago I received a fabulous fellow blogger’s new cook book in the mail, Best 100 Juices  for Kids (The Harvard Common Press).  The fabulous author, Jessica Fisher, writes the popular blogs, Life as Mom, and Good Cheap Eats. Both blogs have been an inspiration for my own blog.  She is witty, brilliant, and gracious.

I was lucky enough to sit next to her at Camp Blogaway last year.  Immediately I liked her.  Shortly after we met, she took me under her wing.  As a new blogger I needed help to make my blog into what it is today.  She gave me the tools to improve my blog without batting an eye.   So when she asked who would like to review her new book, I eagerly shot up my hand.  It was the least I could do after all the help she has given me.

From the moment I cracked open 100 Juices, I was in love.  FishMama openly shares her journey through their family’s eating habit reform.   She talks about her days as a former soda junkie, something I can most definitely relate to.  About how that addiction led to unwanted dental visits for the family.

Best100JuicesForKids-1024x1024

There was one line that really grabbed me hook line and sinker in her intro.  She mentions that even though feeding her six children (FishKids) can be expensive, she wanted to make “every bite count”.  I internalized that statement.  Pondered what it meant for the G family, and my two kids.  I got the concept of the book in its entirety, as applied to our life.

After some quick research I found the organic apple juice I was buying from the store contained 15g more sugar than a freshly juiced apples.  Even though I thought I was making a healthy choice for my kids, I was not making every bite count.  Switching to freshly juiced apples would meet that goal.  The 15 g of hidden sugars wouldn’t exist and I would spend less money by making my own.

Even though this was the best choice, would my kids follow suit and drink the fresh concoctions?

I had the boys become official Best 100 Juice taste testers.  To my surprise and joy, they loved it.  Not only did they approve of the recipes, they loved the process of making them.  They are still enjoying the same morning ritual, but it has been improved.  Less sugar, more nutrition.  Just the way I like it.

I like that beyond writing 100 recipes Jessica also added in advice on how to juice on a budget, types of juicers, how to get the most juice out of them, and how to clean them.  Oh, and wonderful tips on making the experience fun for kids.

Among the juices are smoothies, popsicle, sports drinks, fizzy drinks or sparklies, fruit/veg drinks, and slushies too!   Such a fun array of recipes for parents that want their kids to learn healthy eating habits.

I am looking forward to making a new recipe every day of summer break with the boys.  Only 15 more days till that glorious day!  But, who’s counting?

__________________________________________________________________________________________

Recipes from 100 Best Juices for Kids

This is a great recipe for my two boys that are always on the go.  I personally despise the store-bought sports drinks.  Typical ‘ade’ drinks contain two kinds of artificial sugar, artificial flavoring and preservatives. These are not items I want my child rehydrating with. For FishMama’s clean version, I had all the easy pronounce ingredients on-hand.  This is a sports drink I will say YES! to.

Lemon-Lime Sports Ade

Lemon-Lime Sports Drink fishmama

3 1/2 cups water

6 tablespoons Honey Syrup (1 cup honey to 1 cup water, boiled)

2 tablespoons freshly squeezed lemon juice

2 tablespoons freshly squeezed lime juice

1/4 teaspoon fine sea salt

1.  In a pitcher, whisk together the water, honey syrup, lemon and lime juices, and salt.

2.  Store in a covered jar or container in the refrigerator.  Serve chilled.

___________________________________________________________________________________________________

I want to share one more of her brilliant recipes.  Not only could this be a fun breakfast for the kids, but also for mom and dad.  This fiber and protein filled smoothie will please everyone.  It has three of my favorite ingredients, banana, chocolate and peanut butter.  Yum!

Chocolate & Banana Nut Butter Blast

Chocolate Banana Nut Butter Blast fishmama

Serves 1

1 cup crushed ice

1 small banana, broken into chunks

1/2 cup milk

1 tablespoon natural unsweetened cocoa powder

1 tablespoon peanut butter or other nut or seed butter of your choice

1.  Place the ice, banana, milk, cocoa powder, and nut or seed butter in the blender cup or pitcher.

2.  Blend until very smooth.

 ____________________________________________

GIVEAWAY!

best juices book

Do you love these kid approved healthy recipes as much as I do?  I thought you would!  Well you are in luck my friend.  Harvard Common Press is giving away a copy of this incredible book.  To enter follow the rafflecopter link below.

Click here to enter Best 100 Juices for Kids Giveaway!


Disclosure:  I did not receive any compensation to write this post.  All opinions are my own. 

Photo Credit:  Harvard Common Press

Paleo Carrot Cake & Throwdown {$50 gift card giveaway}

carrot cake slice feature1

{giveaway has ended}

Spring has officially sprung, the signs are everywhere.  Birds are busy building their nests.  The intoxicating smell of blooming flowers is in the air.  All of this means that Easter is on it’s way!  Not only do I love this holiday for spiritual reasons, but for the candy, cakes, and sugar.

My name is Rebekah and I am/was a sugar-a-holic.  Even though I have cleaned up my diet tremendously, this is the area I still struggle.  If there is a Reese’s Peanut Butter Egg within 5 feet of me, I will seek and destroy.  It’s embarrassing to be caught shoving said egg in your mouth by your 5 year old.  The yellow wrapper and chocolate lining my lips didn’t help.  Sorry C-Bear, I owe you.

My addiction to sugar is so bad that I gave it up for Lent this year.  What is Lent?  Christians & Catholics use this time of year to give up anything that may take their focus away from God.  It symbolizes the sacrifice that Jesus made for us.  So for 40 days we try to simulate a sacrifice.  For me that means 40 days without processed sugar.

The Lent period starts Ash Wednesday and ends on Easter Sunday.  There have been serious temptations sent my way, but I have stood firm against the sugar demons.  Don’t worry, those peanut butter eggs don’t stand a chance on Easter.  Hide your eggs, hide your chocolate, I’ll be on a mission to give my self a horrible stomach ache.  Then I won’t want to touch it for at least a day, maybe day and a half.

carrot cake whole 1

Another favorite spring time treat of mine is carrot cake.  I can’t resist the buttery, sweet, carrot filled, cream cheese topped cake.  In moderation it wouldn’t be so bad, but I don’t know anyone who is satisfied with a small sliver of the carrot-filled goodness.  I want a satiating piece.

Wanting a satiating piece of carrot cake was one of the reasons I started conjuring  up a healthy version. Giving up processed sugar was the biggest reason.  This was truly a passion project.  It took many tries to get it right, but I am truly proud of the finished project.  You will not find any ounce of processed sugar or grains in this paleoan beauty.  All you gluten-free lovers can eat this proudly.  Vegetarians, you can enjoy this freely.   Clean eats all the way.

The sweetness in the cake comes from a mixture of dates, pineapple, and carrots.  I used Bob’s Red Mill Hazelnut Flour and Coconut Flour for the base.  Then added in Bob’s Arrowroot starch to stabilize the cake. To frost this luscious grain-free goodie, I blended together coconut oil and pure maple syrup.  I know it sounds strange, but it is out of this world good.

It’s hard to tell that this is a healthy version of the naughty nosh.  This cake would be the perfect end to your Easter dinner.  Or any dinner you choose to serve this season.

If you are looking for the best decadent, playful versions of carrot cake, check out my friends Jillian, Barbara, and Angela’s recipes.

After you check them out, enter to win a $50 gift card to the store of your choice!  You can enter multiple times by following each of our social media outlets.  Click the link below to enter!

carrot_cake_cheesecake_cake
Jillian’s Bakery Style Carrot Cake Cheesecake Cake from Food Folks & Fun
carrot-cake-brownie-bars-feature
Barbara’s Carrot Cake Brownie Bars from Barbara Cooks
ang carrot cake
Angela’s Rainbow Carrot Cupcakes from Aloha: Yinz Mangia
carrot cake slice feature1
Paleo Carrot Cake from Decadently Fit

Enter giveaway by clicking rafflecopter link below!

a Rafflecopter giveaway

_______________________________________________________________________

Paleo Carrot Cake

Serves 16

Cake

12 dates, chopped

1 1/2 cups boiling water

1 teaspoon baking soda

1/2 cup chopped pineapple, packed

3 cups carrot, finely shredded

6 tablespoons Melt Buttery Spread (or other vegan butter), melted

4 eggs, room temperature

3/4 cup Bob’s Red Mill Hazelnut flour

1/2 cup Bob’s Red Mill Coconut flour

1/4 cup Bob’s Red Mill Arrowroot starch

4 teaspoons cinnamon

1 teaspoon nutmeg

1/2 teaspoon fine sea salt

1 teaspoon baking powder

1 t. baking soda

2 teaspoons vanilla

Frosting

6 tablespoons pure maple syrup

1/2 cup room temperature coconut oil (do not melt)

Cake

Pre-heat oven to 350 degrees.

Prepare a 9 inch spring form pan by greasing the sides and bottom with Melt, and cutting a parchment paper circle to fit the bottom of the pan.

Combine the dates, boiling water and teaspoon of baking soda.  Set timer for 10 minutes.

After time is up, use a fine strainer to remove dates from mixture.  Pulse dates 1 minute in food processor.  If the mixture is too thick to pulse, use 1 tablespoon of orange juice at at time to make it easier.  Do not liquify the mixture, it should still be somewhat chunky.

In another bowl, combine the flours, cinnamon, nutmeg, salt, baking powder and baking soda together.

In a large mixing bowling, whisk eggs till frothy.  Whisk in the Melt slowly.   With a wooden spoon mix in the dates, then the pineapple, carrots and vanilla.

Combine the wet mixture with the flour mixture till everything is incorporated well.

Pour batter into spring form pan and cover with foil.

Bake for 30 minutes, then remove foil cover and bake for another 30 – 40 minutes, or until cake is done.  It will be done when middle of cake springs back to gentle touch.

Frosting

With an immersion blender or high power blender combine the two ingredients till smooth.  Frost the cooled cake and enjoy.

Cake can be store at room temperature up to 3 days.


Servings: 16• Size: 1/16 Calories: 248• Fat: 15.5g • Carb: 25g • Fiber: 3.4g • Protein: 3.4g • Sugar:  18g Sodium: 222mg • Cholesterol: 53mg


Best Blogger Salad Ever WINNER! {Giveaway}

BRR_250x250_10372BloggerBadgeReaders_Salad

{giveaway has ended}

I guess the title completely gives away my amazing news.  Thanks to all of you, I won the Better Recipes Best Blogger Salad Ever!  Your support means the world to me.  I know some of you voted every day, and I am extremely grateful for your efforts.

To say thank you, I have partnered with Fit Body Boot Camp in Upland, CA to do a giveaway.  The lucky winner will receive a one month membership!  This isn’t just an ordinary gym.  Leandro Cabico runs a body tightening, health driven ship.  All of the workouts are based on high intensity interval training (HIIT).  In a 20 minute window you will have worked out every muscle group and will continue to burn calories for the rest of the day.

I have personally worked out at his gym.  Not only was I impressed with the workouts, but loved the camaraderie of the staff and clients.  If results are what you are looking for FBBC is the place for you.fbbc-logo-flat

If you are in the area on Saturday (2/22/14), I will be teaching a short seminar at FBBC, 10:30 a.m. Topic will be How to Eat Healthy on a Budget.  With the current drought in California, residents could see a 10 – 15% increase in their groceries bills for the next 1 – 1 1/2 years.  I will be sharing my tips and tricks on how to stay on budget.  The address is 1334 W. 9th Street, Upland, CA 91786.  Free to all.  Hope to see you there!

To enter this amazing giveaway valued at $257 all you need to do is like FBBC on facebook, and share this post directly from Decadently Fit’s FB page.  All entries will be drawn at random on February 26, 2014, @ 8:00 p.m. PST.

Good luck and thank you for voting in the Better Recipes contest.  Here is the link to my winning recipe.

broccoli slaw gawk border